Table of Contents
> Purlin Quick Facts
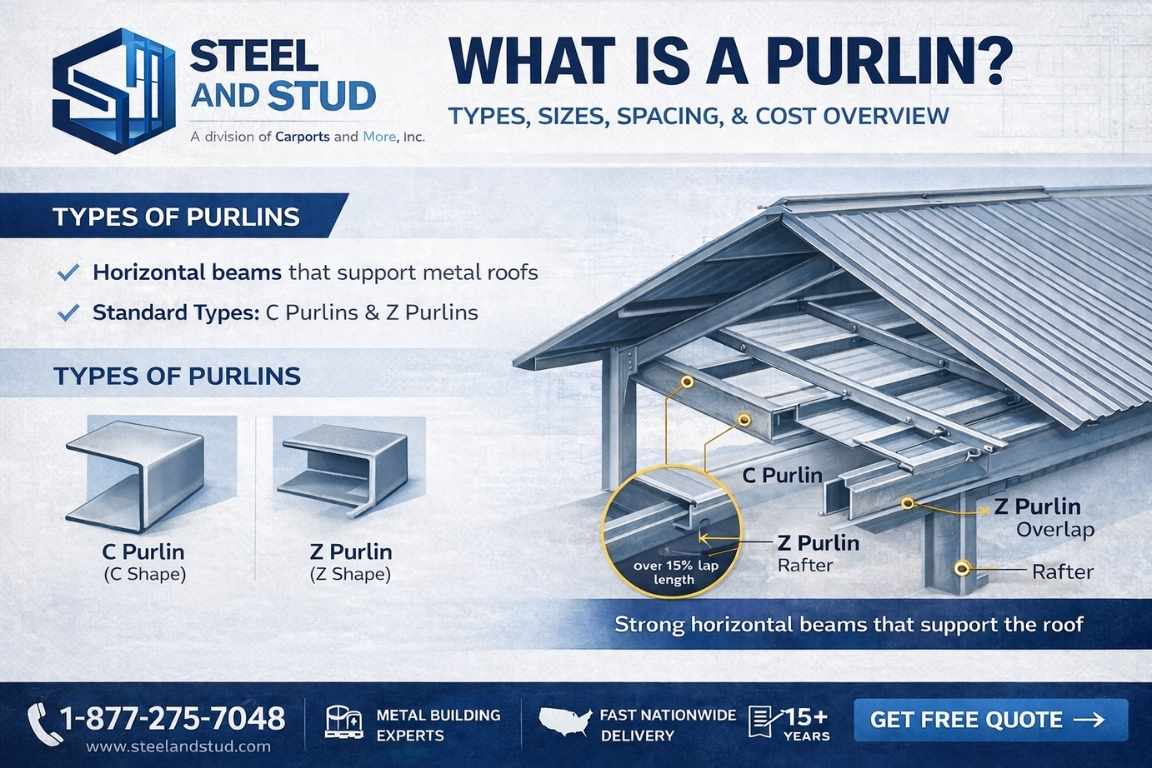
- Function: Horizontal beam that transfers roof loads to primary structural frames
- Common Materials: Cold-formed steel (galvanized or red oxide finish)
- Main Types: C purlins and Z purlins
- Standard Gauges: 12, 14, and 16 gauge
- Typical Spacing: 12″ to 24″ on center
- 2026 Cost Range: $1.50–$8.00+ per linear foot depending on size and gauge
What Is a Purlin?
In structural engineering, construction, and architecture, a purlin – also spelled historically as purline, perline, or purling – is a horizontal bar or beam whose purpose is the structural support of buildings. Purlins are commonly constructed in support of the roof system. They are supported either by rafters or the walls of the building.
Purlins are mostly used in metal buildings, although they sometimes replace closely spaced rafters in wood frame structures. They are a critical component in pre-engineered metal constructions, transferring loads from the roof system – including the roof sheeting – to the major structural elements of the steel building that support the roof.
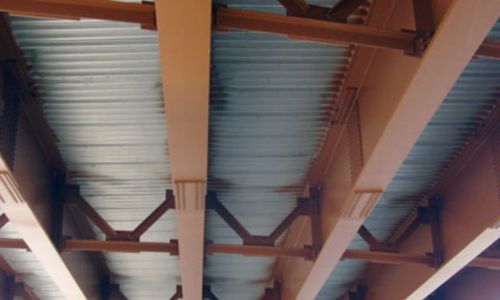
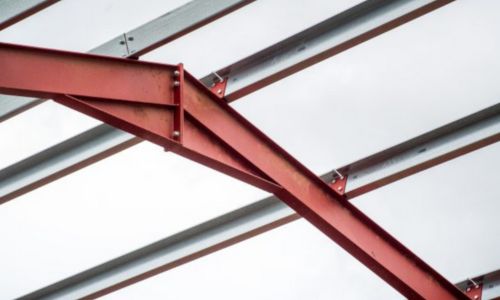
What do purlins look like? Purlins are long, horizontal steel members with a C-shaped or Z-shaped cross-section. They run perpendicular to the primary rafters or frames and sit on top of or are bolted to those frames. From a distance, they appear as evenly spaced parallel bars running across the length of the roof structure.
The arrangement and form of the purlins depend on the anticipated roof loads and the sheeting lengths used.
Are purlins load-bearing? Yes – purlins are load-bearing secondary structural members. They carry the dead load of the roof cladding, live loads such as snow and maintenance personnel, and wind uplift loads, then transfer all of these forces to the primary frames. However, they are not primary structural members like columns or rafters; they rely on the primary frame for ultimate support.
For the construction of building roofs, local building codes – including the International Building Code (IBC) and AISI S100 standards for cold-formed steel design– ought to be understood fully and implemented in the roof structure design.
How Purlins Work in Steel Buildings
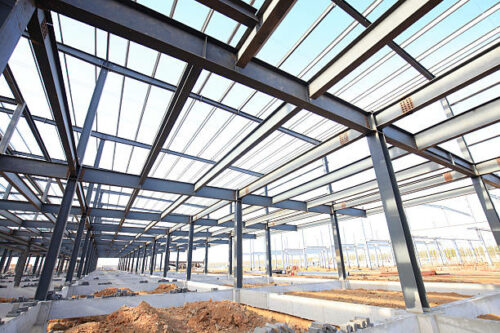
Purlins are commonly used in pre-engineered metal constructions. They pass loads of the roof system including the roof sheeting to the major elements of the steel building construction that support the roof. The arrangement and form of the purlins are in such a design that depends on the instance of roof loads besides limiting the sheeting lengths used.
Conclusively, for the construction of building roofs, local building codes ought to be understood fully and implemented in the concrete roof structure design.
Steel Building Vs. Wood Buildings Roofing
Wood Building Roofing
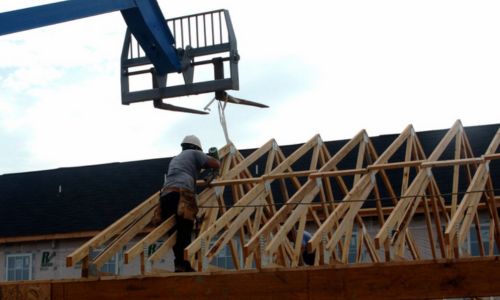
Wooden roofing commonly uses trusses as principal rafters. The closely spaced rafters are the skeletons of the roof deck, and they support the walls of the building by carrying the weight of the frame – a lightweight timber frame construction method.
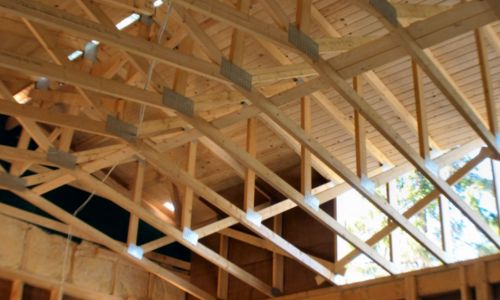
Trusses are paramount in the wood building roof since they prevent the building from flexing or bending, more so in buildings with more than two stories. Wood building roof trusses are installed manually by use of a crane or forklift, where the choice depends on the height of the building and the size of the truss. Truss connections are made with metal plates that fasten and ensure strong connections are achieved.
The roofing of a wooden building is faced with the dangers of decay, fire, and termite infestation. Wood can combust and burn in case of a fire outbreak. Termites and insects can bore through the wood and destroy the roofing.
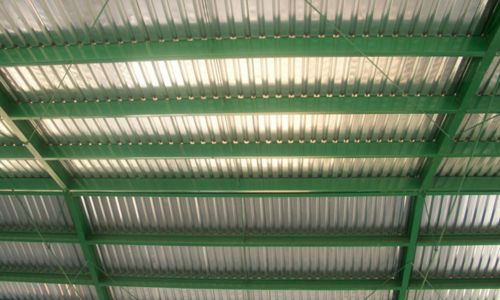
Metal Buildings Roofing
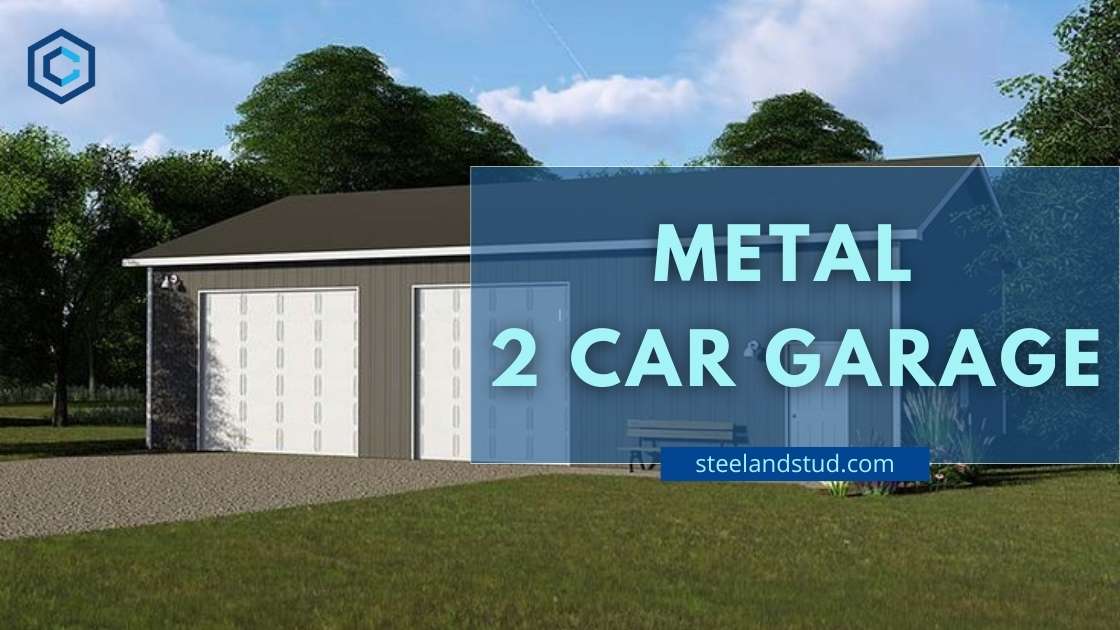
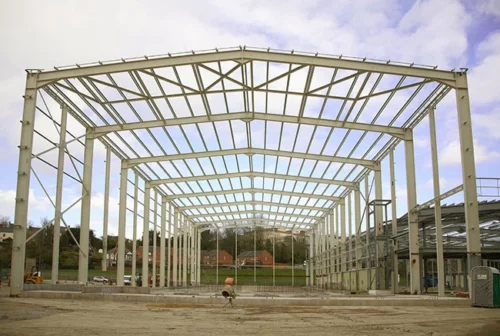
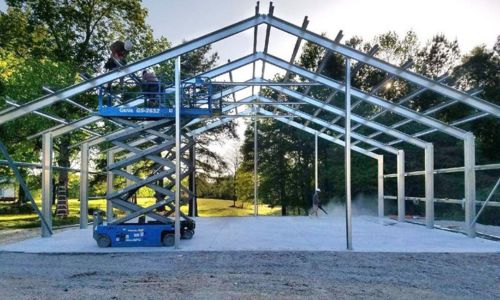
From garages to warehouses to workshops, steel structure roofing is preferred for steel buildings for several reasons. Steel is not only durable and affordable but also provides several functions that enhance comfort.
Whether you are planning a 30×40 metal building or a 100×200 metal building, purlins are the backbone of the roof framing system.
There are three general types of steel structure roofs: the truss structure, beam structure, and grid structure.
The Steel Beam Structure
This is suitable for buildings that have small spans. The I-beams, H-beams, and channel steel are all hot-rolled sections used in the steel structure roof.
The Truss Structures
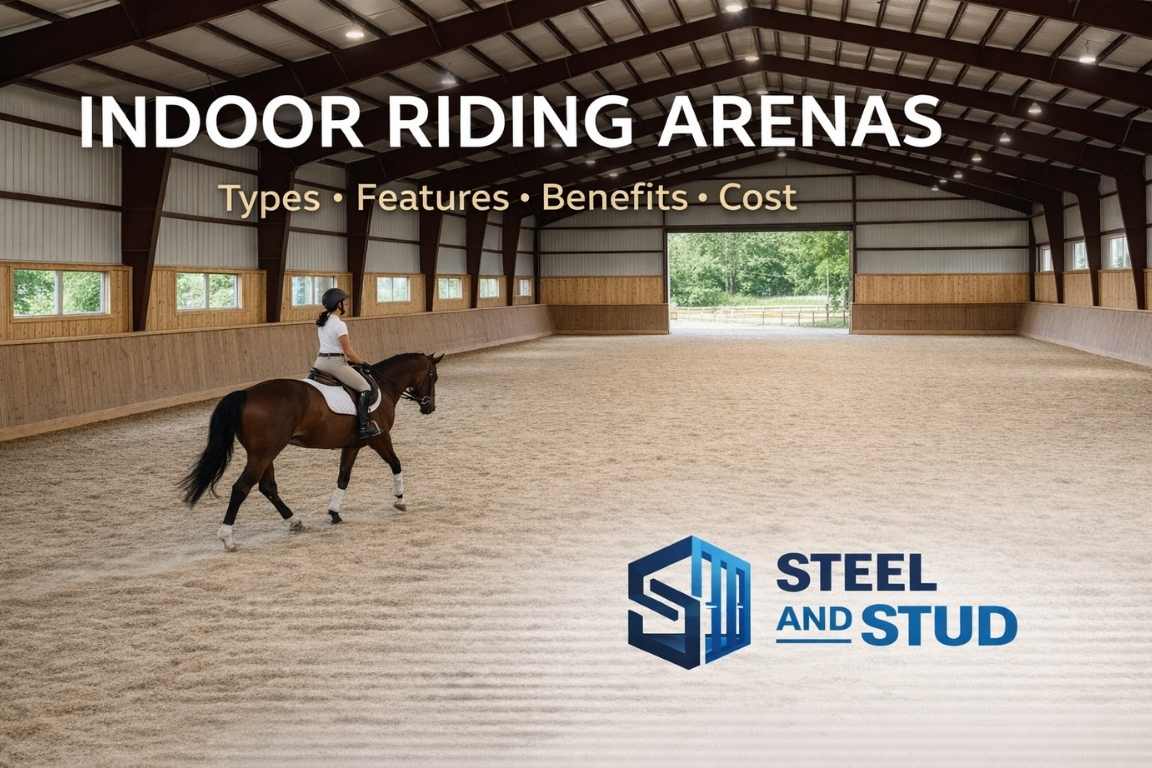
The truss structures refer to the truss beam. This latticed beam structure is often used in large-span buildings such as stadiums, factories, bridges, and exhibition halls, among other large public buildings. Its web comprises small cross-section rods and is referred to as an open web or lattice beam.
This is a spatial structure formed by connecting several rods through nodes in a particular grid form. The roofing style has the advantage of small space stress, high rigidity, good seismic performance, and lightweight construction. It is ideal for use in roofing buildings such as stadiums, exhibition halls, hangars, theatres, and two-way large column spacing workshops, among others. However, this type of roofing installation is very complex and requires a skilled person.
Grind Structure
This is a spatial structure that is formed by connecting several rods through nodes in a particular grid form.
The roofing style has the advantage of small space stress, high rigidity, good seismic performance, and lightweight.
It is ideal for use in roofing buildings such as stadiums, exhibition halls, hangars, theatres, and two-way large column spacing workshops, among others.
However, this type of roofing installation is very complex and requires a skilled person.
Purlins vs. Rafters: What's the Difference?
One of the most common questions in metal building construction is the difference between a purlin and a rafter. Here is a quick comparison:
| Feature | Purlin | Rafter |
|---|---|---|
| Orientation | Horizontal – runs perpendicular to rafters | Sloped – runs from ridge to eave |
| Structural Role | Secondary member; transfers roof loads to rafters/frames | Primary member; transfers loads to columns/walls |
| Material | Typically cold-formed steel (C or Z shape) | Hot-rolled steel, engineered wood, or LVL |
| Load Path | Roof cladding → purlin → rafter/frame | Purlin → rafter → column → foundation |
| Spacing | 12″–24″ on center (sometimes up to 60″) | 10′–30′+ on center depending on building design |
In short, rafters are the primary sloped members that define the roof pitch, while purlins are the horizontal members that span between rafters and directly support the roof sheeting.
What Is a Purlin Roof?
A purlin roof is a roofing type that is designed to use purlins. Metal purlins support the roof’s deck weight. They create a horizontal frame designed to completely offer support for the roof decking no matter the type of material used for the roof.
A purlin roof is more rigid and sturdier. You can create a wider building since a purlin roof incorporates mid-span support. A steel building’s purlin roof can be achieved through two types of metal purlins: the C purlin and the Z purlin.
Types of Purlins
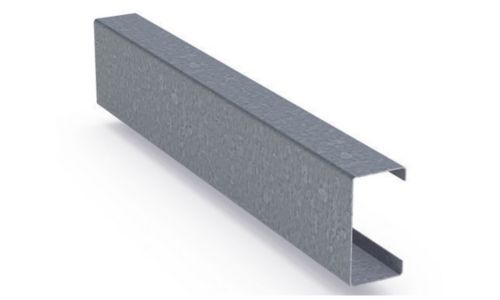
C Purlins
C purlins are also referred to as Cee purlins. They have a C-shaped or U-shaped cross-section, thus the name. The purlins give structural support for beams used for flooring and walls. Besides roofing, C purlins are ideal for floor joists and structural support in walls.
C purlins are the go-to choice for simple, single-span applications and wall girt framing. They are commonly specified for smaller structures such as a 20×30 metal building or a 24×36 metal building.
Note: C purlins are sometimes confused with metal furring channels. While both are C-shaped cold-formed steel members, furring channels are much lighter (typically 20–25 gauge) and are used for interior wall and ceiling framing – not structural roof support. Purlins are heavier gauge (12–16) and designed to carry significant roof loads.
Advantages of C purlins
- Ability to span length
- Assured straightness
- Durable
- No side drilling required
- No cutting required
- Easy to install in single-span configurations
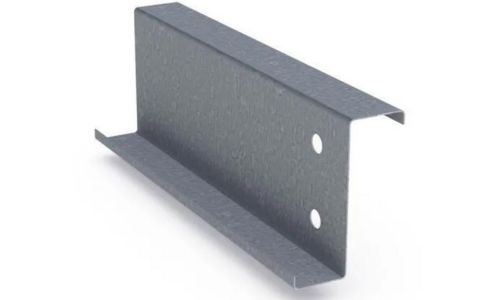
Z Purlins
Z purlins are also known as Zee purlins. A Z purlin is a horizontal beam that forms the roof and wall joists of a building’s shell structure. Just like C purlins, Z purlins derive the name from the shape of the letter Z.
The shape of the purlins helps in overlapping the joints, which makes them sturdier and stronger compared to the C purlins. Because of their strength, Z purlins are used for large structures.
For example, on a 40×60 metal building or a 50×100 metal building, Z purlins are typically the preferred choice because of their superior overlap capability at interior supports.
Advantages of Z purlins
- Superior strength
- Z purlins can be overlapped
- Significantly saves material by reducing the height of the purlins
- Better performance in multi-span configurations
C Purlins vs. Z Purlins: Comparison Table
| Feature | C Purlin | Z Purlin |
|---|---|---|
| Cross-Section Shape | C or U shape | Z shape (angled flanges) |
| Overlap Capability | Cannot be overlapped at supports | Easily overlapped for continuous spans |
| Relative Strength | Good for single spans | Superior – especially in multi-span systems |
| Best Use Cases | Wall girts, single-span roofs, smaller buildings | Multi-span roofs, large industrial/agricultural buildings |
| Ease of Installation | Simpler for basic framing | Slightly more complex but more efficient at scale |
| Cost | Generally slightly less expensive | Comparable; material savings offset any premium |
| Common Applications | Residential garages, small workshops | Warehouses, factories, large agricultural buildings |
While C and Z purlins dominate the market, two other types are worth noting:
Tubular Purlins are hollow rectangular or square steel tubes used as purlins. They offer excellent torsional resistance and are sometimes specified in open-sided structures (such as carports or canopies) where the purlin is exposed and lateral-torsional buckling is a concern. However, tubular purlins are heavier and more expensive per foot than equivalent C or Z sections.
Aluminum Purlins are lightweight alternatives used in corrosive environments – such as coastal buildings or chemical processing facilities – where steel may corrode rapidly even with galvanized coatings. Aluminum purlins weigh roughly one-third as much as steel purlins but cost significantly more and have lower load-carrying capacity. They are a niche product, not a standard choice for most metal buildings.
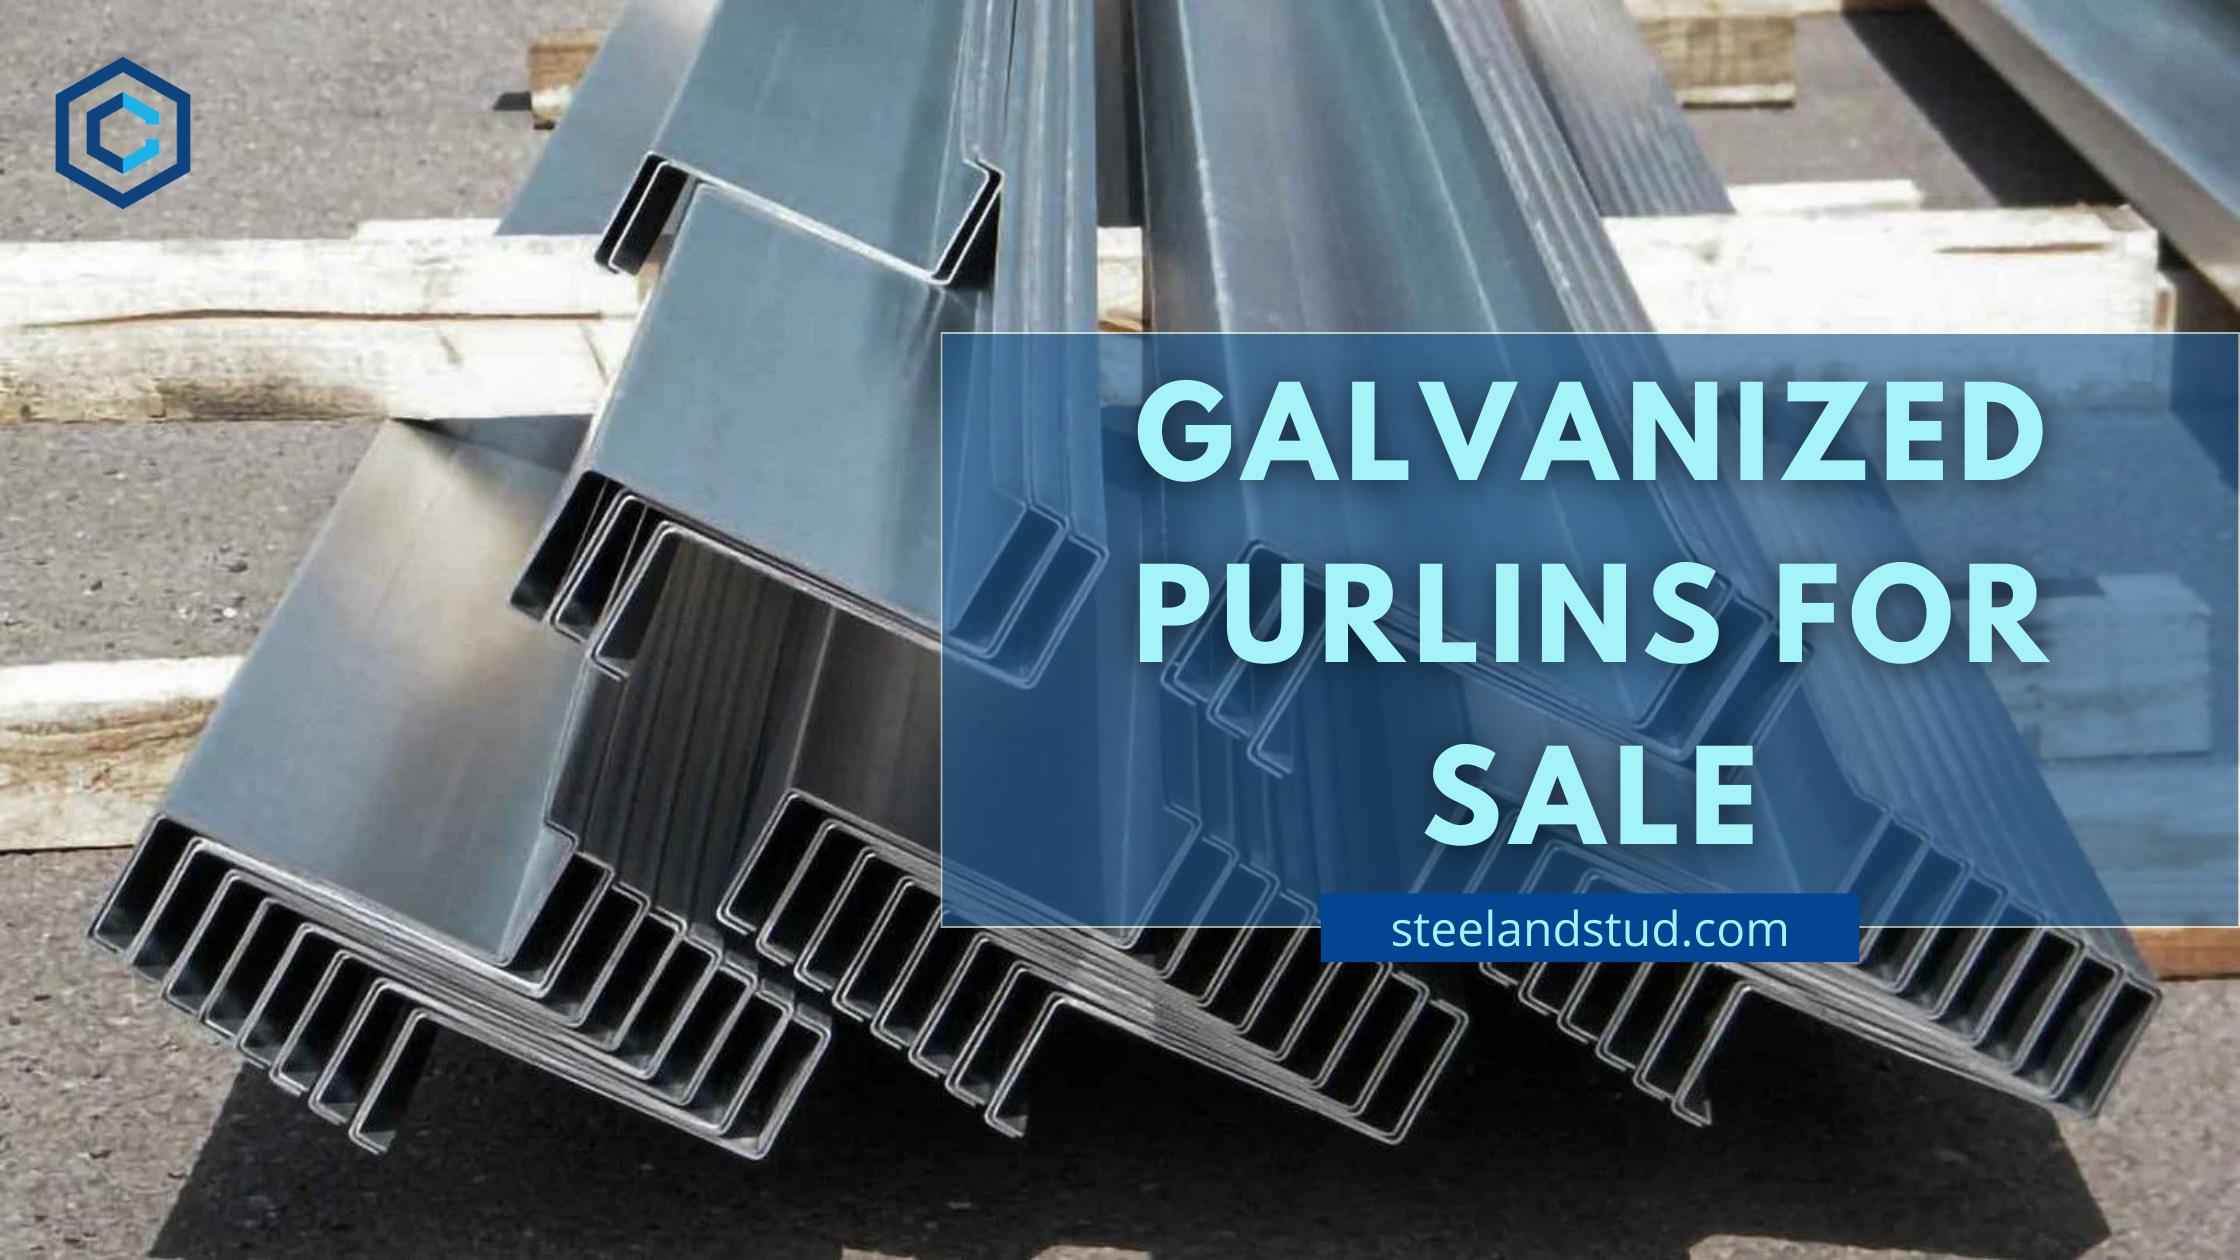
Red Oxide vs Galvanized Metal Purlins
The metal purlins are usually available in the market in two variations: red oxide (also referred to as red iron) and galvanized. Red oxide purlins paired with red iron buildings can disguise the appearance of rust on the structure.
These two types of finishes are meant to protect the steel structure. If the steel structure is left bare for even a few days, it may catch rust from exposure to various elements.
In terms of red oxide, it contains a spray-painted primer with a red finish. On the other hand, the galvanized metal purlins undergo a strict zinc-alloy plating process for a more durable impact. On being plated, the steel becomes resistant to corrosion. Therefore, galvanized metal purlins can avoid damage even in the harshest weather conditions.
Even when the steel structure is deployed near a chemical plant or salt water, galvanized coating will resist damage. Rusting is common in these areas around unfinished steel. However, applying a coat of galvanized steel can help to prevent this.
Galvanized steel purlins for the roof will not be prone to oxidizing but will always carry a risk of developing white rust. This is unattractive and sometimes forms when exposed to moisture. Meanwhile, red oxide metal purlins are also prone to developing rust on the surface if exposed to humidity for too long on the different types of metal roof. However, the benefit in this case is that the red painting will easily disguise the red color of the rust.
| Feature | Red Oxide Purlins | Galvanized Purlins |
|---|---|---|
| Coating Method | Spray-painted primer | Zinc-alloy hot-dip or electroplating |
| Corrosion Resistance | Moderate – primer layer only | High – zinc sacrificial protection |
| Best Environment | Dry, interior, or enclosed structures | Coastal, humid, chemical, or exposed environments |
| Appearance Over Time | Red color hides rust | Silver finish; may develop white rust |
| Cost | Lower upfront cost | Higher upfront cost; lower long-term maintenance |
| Recommended For | Budget projects in mild climates | Any project requiring long-term durability |
In our experience manufacturing and supplying purlins for thousands of metal buildings across the U.S., we recommend galvanized purlins for any structure exposed to the elements. Red oxide is a solid budget choice for enclosed or interior applications.
Purlin Sizes and Gauges
A purlin may be manufactured in varying sizes, also known as gauges. Both the C purlins and the Z purlins are available in three standard gauges: 12 gauge, 14 gauge, and 16 gauge.
Standard Purlin Size Chart
| Gauge | Thickness (inches) | Common Depths | Approx. Weight (lbs/ft) | Typical Max Span (single) |
|---|---|---|---|---|
| 16 gauge | 0.0598″ | 4″, 6″, 8″ | 1.5–4.0 | Up to 15′ |
| 14 gauge | 0.0747″ | 4″, 6″, 8″, 10″ | 2.0–5.5 | Up to 20′ |
| 12 gauge | 0.1046″ | 6″, 8″, 10″, 12″ | 3.5–8.0 | Up to 25′+ |
*Note: Actual span capacities depend on load conditions, purlin spacing, and local building code requirements per AISI S100. Always consult a licensed engineer for final design.
How to Choose the Right Purlin Size
Selecting the correct purlin gauge and depth depends on several factors:
- Span distance – Longer spans between primary frames require deeper, heavier gauge purlins
- Load requirements – Snow loads, wind uplift, and dead loads all influence sizing
- Purlin spacing – Closer spacing allows lighter purlins; wider spacing demands heavier sections
- Building codes – IBC and local amendments dictate minimum design requirements
- Building size – A 20×20 metal building may only need 4″ 16-gauge purlins, while a 50×80 metal building will likely require 8″ or 10″ 14-gauge or 12-gauge purlins
To determine the best gauge for your project, consult your service provider or engineer.
Purlin Spacing Guidelines
Spacing for metal purlins is important to consider before erecting the system. The general rule is that the larger and heavier a metal roofing structure is, the more space is needed between the purlins and the principal rafters.
The common standard distance in most buildings ranges from 12″ up to 24″. However, some buildings are an exception; thus, spacing can be customized depending on the customer’s needs.
Recommended Spacing by Application
| Application | Typical Purlin Spacing | Notes |
|---|---|---|
| Residential metal roofs | 12″–24″ on center | Standard for most home metal roofing |
| Commercial buildings | 24″–48″ on center | Depends on cladding type and load requirements |
| Agricultural buildings | 36″–60″ on center | Lighter loads; wider spacing acceptable |
| Heavy snow load areas | 12″–24″ on center | Closer spacing to handle increased loads |
Manufacturers of metal roof purlins recommend:
- That the purlins should not be more than 30 inches on center when they are being used to support steel framing and the secondary framing, and 38 inches when only carrying sheathing.
When spacing metal roof purlins for long spans during light-frame constructions, contractors and engineers should use good judgment. The following tips can be considered:
- If the number of purlins in a span exceeds 5, then the center-to-center spacing should not be more than 30 inches. In such a case, you can use additional purlins instead.
- In case the roof span is more than 50 feet (15.24 m), then the design of the purlins should come in pairs by incorporating a single higher purlin placed at the center supporting two lower spans placed at spaces of 30 inches apart.
- One end post should be placed for every long span. The end post should be at least 200 feet, fitted to support the purlins with a bearing plate.
The 25% Rule in Roofing
The 25% rule is a widely referenced guideline in roofing and purlin design. It states that if you are replacing or repairing more than 25% of a roof’s structural components (including purlins, decking, or sheathing), the entire roof system may need to be brought up to current building code standards – including wind uplift, snow load, and energy code requirements.
For purlin-specific applications, the 25% rule also relates to purlin lap lengths in continuous span systems. A lap length of approximately 15%–25% of the span at interior supports is typically required to achieve structural continuity. Laps shorter than 10% of the span may fail to provide adequate continuity and should be avoided.
Always verify the 25% rule requirements with your local building authority, as enforcement varies by jurisdiction.
Girts vs. Purlins: What's the Difference?

In a structural steel construction, purlins and girts are two complementary products that you cannot do without. They are primarily used in the roof and walls of the building.
| Feature | Purlin | Girt |
|---|---|---|
| Location | Roof – horizontal between rafters/frames | Walls – horizontal between columns |
| Function | Supports roof cladding/sheeting | Supports wall cladding/siding |
| Orientation | Horizontal on the roof plane | Horizontal on the wall plane |
| Load Type | Gravity (dead + live) and wind uplift | Primarily wind loads (lateral pressure) |
| Common Shapes | C and Z sections | C and Z sections (same profiles) |
In simple terms: if it is on the roof, it is a purlin. If it is on the wall, it is a girt. The steel profiles used are often identical – the difference is entirely about placement and the loads they are designed to resist.
Steel building constructions made by Steel and Stud use girts and purlins that are cold-formed members extruded using high-strength steel that minimizes weight while maximizing capacity for each section. Steel and Stud offer cut-to-length painting and punching services besides offering our clients a complete solution for your construction, thus reducing costs.
What is a Purlin Roof?
A purlin roof is a roofing system that relies on purlins as the primary horizontal support members. Metal purlins carry the roof’s deck weight and transfer it to the main structural frames (rafters or rigid-frame columns).
They create a horizontal framework designed to completely support the roof decking — no matter the type of cladding material used. A purlin roof is more rigid and sturdier than a conventional close-rafter system because it incorporates mid-span support, allowing you to create wider clear-span buildings.
For example, a 40×60 metal building typically uses a purlin roof system with Z purlins spaced at 24 inches on center, enabling the large open floor plan that steel buildings are known for.
A steel building’s purlin roof can be achieved through two types of metal purlins: the C purlin and the Z purlin.
Purlin Roof vs. Conventional Rafter Roof
| Feature | Purlin Roof System | Conventional Rafter Roof |
|---|---|---|
| Primary Support | Purlins span between rigid frames or trusses | Closely spaced rafters carry loads directly |
| Typical Material | Cold-formed steel (C or Z sections) | Dimensional lumber or engineered wood |
| Clear Span Capability | Excellent — suited for wide buildings (40 ft+) | Limited without intermediate supports |
| Best For | Metal buildings, commercial, agricultural | Residential wood-frame construction |
| Weight | Lightweight steel members | Heavier due to closely spaced lumber |
Purlin Span Types
Purlin span refers to the distance a purlin covers between its support points (such as rafters, trusses, or rigid-frame columns). Each span type represents a complete purlin system with different structural behaviors.
There are three types of purlin span systems:
Single Span Purlins
A single span purlin is supported at two points only — one at each end — by bolting the purlin web to a cleat. Under such conditions, inward capacities are not affected by bridging, but the outward capacities vary depending on the available number of rows used for bridging.
Single span purlins are the simplest to install but are the least structurally efficient. They are best suited for short spans (typically under 25 feet) or where continuous members are impractical.
Double Purlin Span
Double purlin spans are supported at three points — one at each end and one at the center. The double span may contain only one long, full-length purlin or two purlins that are lapped together at the central support point.
Lapping at the center support creates a moment-resistant connection that significantly increases load capacity compared to a single span of the same depth and gauge.
Continuous Purlin Span
A structurally efficient continuous beam is achieved by a purlin supported at every endpoint of a series of intermediate supports that are equally spaced. Metal purlins are lapped over each support where the length of the lap is 15% of the span.
For outward loads on continuous spans, bridging is required at the end bays. For internal spans, one fewer row of bridging may be used.
Continuous span systems are the most material-efficient option and are standard in commercial and industrial metal buildings. Per AISI S100 cold-formed steel design standards, the continuous beam action reduces maximum bending moments by approximately 30–40% compared to simple spans of the same length.
Purlin Span Tables and Maximum Distances
| Purlin Depth | Gauge | Single Span (Max) | Double Span (Max) | Continuous Span (Max) |
|---|---|---|---|---|
| 4″ | 16 ga | 10–12 ft | 14–16 ft | 16–18 ft |
| 4″ | 14 ga | 12–14 ft | 16–18 ft | 18–20 ft |
| 6″ | 16 ga | 16–18 ft | 20–22 ft | 22–25 ft |
| 6″ | 14 ga | 18–20 ft | 22–25 ft | 25–28 ft |
| 8″ | 16 ga | 20–22 ft | 25–28 ft | 28–32 ft |
| 8″ | 14 ga | 22–25 ft | 28–32 ft | 32–36 ft |
| 10″ | 14 ga | 25–28 ft | 32–36 ft | 36–40 ft |
| 10″ | 12 ga | 28–32 ft | 36–40 ft | 40–45 ft |
Purlin Accessories
Purlin accessories are the hardware and supplementary components that connect purlins to the primary structure and to each other. Proper accessory selection is critical for structural continuity and long-term performance.
Purlin Laps
Purlin laps are recommended at a length of 15% of the span. Where there are unequal lengths of the span — especially created by reduced end spans — each purlin ought to have 7.5% of the adjacent span instead of 7.5% of the whole purlin span.
The lengths of purlin laps that are less than 10% may not effectively provide structural continuity and may suffer from connection failures.
> Pro Tip from Our Engineering Team: In our experience manufacturing and supplying purlins for thousands of metal buildings across the U.S., we’ve found that under-lapping is one of the most common field errors. Always verify lap lengths against the engineer’s drawings before bolting — a 2-inch shortfall can reduce moment capacity at the support by 15–20%.
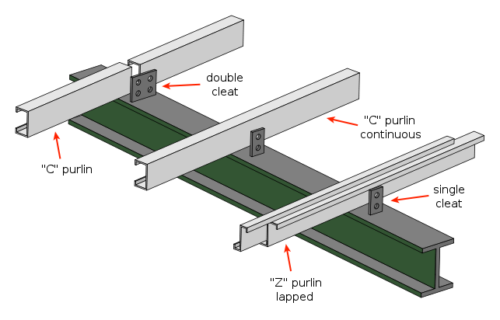
Purlin Cleats (Single and Double)
There are single cleats and double cleats.
- Single cleats are used in many situations, including Z shapes that are lapped onto each other.
- Double cleats are used in instances of successive metal purlins — unlapped purlins — that are butted together.
- Double cleats could also be used in places with high reaction loads to reduce bolt stress.
Bridging and Bracing
Purlin bridging (also called sag rods or sag angles) is a critical but often overlooked accessory. Bridging members run perpendicular to the purlins, connecting them to each other to prevent lateral-torsional buckling — especially under wind uplift loads.
- Sag rods are round steel bars (typically 1/2″ to 5/8″ diameter) threaded through holes in the purlin web and tensioned between the ridge and eave.
- Sag angles are L-shaped steel members bolted to the purlin web, providing more rigid lateral restraint.
- Number of rows required depends on span length, purlin depth, and load direction. End bays of continuous span systems typically need one additional row of bridging compared to interior bays.
Without adequate bridging, purlins can twist or deflect laterally under load — a condition that reduces their effective load-carrying capacity and can lead to premature failure of the roof cladding connections.
Purlin sections assume the roof slope. The spacing of the purlin must be carefully calculated so that it follows the nodal pattern for truss support. In terms of arrangement, the design depends on the supply length of the sections, the loading and roof span, the need to avoid wasteful cuts, and the principal rafter arrangement.
How to Install Purlins on a Metal Building
Purlins are installed horizontally below the metal roofing. They are fastened above the roof rafters or rigid-frame columns, typically with a vapor barrier installed at the top. They provide added support to the metal roof as well as a surface for attaching the drip edge and end panels.
Tools and Materials Needed
Before starting your purlin installation, gather the following:
- C or Z purlins (cut to length per engineering drawings)
- Purlin cleats (single or double, as specified)
- Structural bolts (typically 1/2″ or 5/8″ A325 or equivalent)
- Impact wrench or ratchet set
- Tape measure and chalk line
- Level (48″ minimum)
- Safety harness and fall protection equipment
- Sag rods or sag angles for bridging
- Self-drilling TEK screws (for attaching sheeting to purlins later)
- Crane or boom lift (for buildings over single-story height)
Step-by-Step Purlin Installation
1. Verify frame spacing and alignment. Before lifting any purlins, confirm that all primary frames (rafters or rigid-frame columns) are plumb, level, and spaced according to the engineering drawings.
2. Mark purlin locations. Using a tape measure and chalk line, mark the purlin spacing on the top flange of each rafter or frame. Follow the spacing schedule from the design drawings — spacing often varies between end bays and interior bays.
3. Attach cleats to the frames. Bolt single or double cleats to the rafter web at each marked location. Ensure cleats are oriented correctly for the purlin type (C or Z).
4. Lift and position the first purlin. Start at the eave (bottom edge of the roof). Set the purlin into the cleat and hand-tighten the bolts. Verify the purlin is standing upright — never lay purlins flat.
5. Work toward the ridge. Continue installing purlins from eave to ridge, checking alignment and spacing at every third or fourth purlin.
6. Lap purlins at intermediate supports. Where continuous or double spans are specified, overlap purlins at the support point per the 15% lap rule. Bolt through both purlin webs and the cleat.
7. Install bridging and sag rods. Once a section of purlins is in place, install sag rods or sag angles between purlins to prevent lateral movement. Tension sag rods snugly — do not over-tighten.
8. Final torque and inspection. Go back and torque all bolts to the specified values. Inspect every connection for proper alignment, lap length, and bolt engagement before proceeding to sheeting installation.
> Safety Note: Purlin installation is overhead work at height. Always comply with OSHA fall protection standards (29 CFR 1926 Subpart M) and use appropriate personal protective equipment.
Importance of Roof Purlins
Purlins are fundamental in the construction of metal roofing. They offer support to the metal sheeting above, as well as lateral stability to the walls. Purlins are essential in ensuring that the metal building is sturdy and rigid, keeping it safe from crumbling or caving in from the roof.
Do's and Don'ts for Purlin Construction
Spacing
The spacing of purlins depends greatly on how far apart the trusses are spaced, along with wind loads, dead load, and gravity. It is therefore important to determine the maximum spacing with the design of the truss.
- Maximum spacing should not go beyond 24″ on center.
- If the span is wider, ensure that you factor in the effects of truss bracing, purlin strength, diaphragm strength, and chord forces.
Overlapping ends
- Overlapping of ends is stronger and preferred compared to butting.
- Do not butt longer spans; instead, overlap them for maximum and multiple supports.
- Overlap ends at least 12″ past the truss.
- Do not connect purlin ends through “butt joints” using a thin gauge splice plate.
Purlin Placement
- Purlins should be placed standing up.
- Do not lay purlins flat.
Common Installation Mistakes to Avoid
- Installing purlins with the wrong flange orientation (especially Z purlins, which must alternate direction at laps)
- Skipping bridging rows in end bays — this is where uplift forces are highest
- Using undersized bolts or fewer bolts than specified at cleat connections
- Failing to verify purlin alignment before sheeting — misaligned purlins create visible waviness in the finished roof
Advantages and Disadvantages of Purlins
Purlins are the go-to secondary framing member for metal buildings, but like any structural component, they come with trade-offs. Here is an honest breakdown:
Advantages of Purlins
- Lightweight: Cold-formed steel purlins weigh significantly less than hot-rolled beams of comparable strength, reducing overall building weight and foundation requirements.
- Cost-effective: Less material per linear foot means lower material costs, especially for large-footprint buildings like a 50×60 metal building.
- Fast installation: Standardized sizes, pre-punched holes, and simple cleat connections speed up erection time.
- Dimensional accuracy: Factory-formed purlins maintain consistent dimensions, ensuring straight rooflines and uniform sheeting attachment.
- Versatile: Available in multiple depths, gauges, and finishes (galvanized or red oxide) to suit virtually any building application.
- Recyclable: Steel purlins are 100% recyclable at end of life.
Disadvantages of Purlins
- Span limitations: Cold-formed purlins have lower moment capacity than hot-rolled beams, limiting maximum unsupported spans (typically 25–45 ft depending on size).
- Susceptible to lateral buckling: Without proper bridging and bracing, purlins can twist under load — especially during wind uplift events.
- Corrosion risk: If the protective finish (galvanized coating or paint) is damaged during installation, exposed steel can rust. This is particularly concerning in coastal or high-humidity environments.
- Thermal bridging: Steel purlins conduct heat and cold, which can reduce energy efficiency unless insulated metal panels or thermal breaks are used.
- Not ideal for extremely heavy loads: For very high snow loads or suspended equipment loads, hot-rolled steel beams or engineered trusses may be more appropriate.
> Bottom line: For the vast majority of metal building applications — residential garages, agricultural barns, commercial warehouses, and industrial facilities — purlins offer the best balance of strength, weight, and cost.
Cost of Metal Purlins
Prices of metal purlins vary depending on the size of the purlin, its thickness (gauge), finish, and the job site location. For instance, heavy gauge purlins are more expensive than lighter gauge purlins. Deeper purlins are made of more steel than shallow purlins — a 10″ deep purlin can cost roughly double that of a 4″ purlin.
Purlin Price Comparison Table (2026 Estimates)
| Purlin Size (Depth) | Gauge | Finish | Approx. Cost per Linear Foot |
|---|---|---|---|
| 4″ | 16 ga | Red Oxide | $1.50 – $2.25 |
| 4″ | 16 ga | Galvanized | $1.85 – $2.75 |
| 6″ | 16 ga | Red Oxide | $2.00 – $3.00 |
| 6″ | 14 ga | Galvanized | $2.75 – $3.75 |
| 8″ | 14 ga | Red Oxide | $3.25 – $4.50 |
| 8″ | 14 ga | Galvanized | $3.75 – $5.25 |
| 10″ | 14 ga | Red Oxide | $4.00 – $5.50 |
| 10″ | 12 ga | Galvanized | $5.50 – $7.50 |
> Note: Prices shown are approximate 2026 market ranges for the continental U.S. and may vary based on steel market conditions, order quantity, delivery distance, and regional availability. Contact Steel and Stud for a current quote tailored to your project.
Factors That Affect Purlin Pricing
- Steel market prices: Raw steel costs fluctuate with global supply and demand. As of early 2026, domestic hot-rolled coil prices have stabilized compared to the volatility seen in 2022–2024, but tariff changes can shift pricing quickly.
- Gauge (thickness): Heavier gauges (12 ga) use more steel per foot and cost proportionally more than lighter gauges (16 ga).
- Depth: Deeper purlins (8″, 10″) require more material than shallow purlins (4″, 6″).
- Finish: Galvanized purlins carry a 15–25% premium over red oxide due to the zinc-alloy plating process.
- Quantity: Bulk orders (e.g., for a 100×200 metal building) typically receive volume discounts.
- Delivery location: Freight costs increase with distance from the manufacturing facility.
- Custom fabrication: Pre-punched holes, custom lengths, and special coatings add to the per-foot cost.
Why Choose Steel and Stud for Purlins?
Steel and Stud is your best bet for quality purlins. We have been in the production and supply of purlins for over 15 years, which has made us experts in the field.
We offer quality purlins derived from high-strength steel, manufactured to meet AISI S100 cold-formed steel design standards. Using advanced roll-forming technology, we produce precise measurements and cut purlins with accuracy.
- Nationwide delivery across 43 states — from metal buildings in Minnesota to metal buildings in Louisiana
- Cut-to-length service eliminates field waste and speeds up installation
- Both C and Z purlins available in 12, 14, and 16 gauge — galvanized or red oxide finish
- Engineering support — our team can help you select the right purlin size, gauge, and spacing for your specific building design and local code requirements
- Competitive pricing with volume discounts for large projects
Once you begin the installation of your purlins, we offer consultation services until your project is complete. We also offer various designs to use in your metal building, giving you a chance to try out the most cost-effective and safe roofing styles.
> Ready to get started? Contact Steel and Stud for a free purlin quote or use our Cold-Formed Building Designer to spec your entire metal building online.
Frequently Asked Questions About Purlins
Purlins are very lightweight, dimensionally accurate, and simple to install. Compared to other building materials, purlins usually have a stable dimension, which is vital in adding structural integrity to the metal building. They can also expand and compress effectively in extreme temperatures, preventing significant property damage.
Metal roofing purlins are meant to enhance structural integrity. They are primarily used around the roof, transferring loads from the roof sheeting to the primary structural frames. Moreover, purlins tie the rafters together, stabilizing the entire structure and providing a rigid frame. Purlins can offer an extra support layer when installed between individual framing bays.
Rafters are sloped structural members that run from the ridge (peak) of the roof down to the eave. They carry loads along the slope of the roof. Purlins, on the other hand, run perpendicular to the rafters in a horizontal orientation. They connect to the rafters and transfer the roof cladding loads into the rafters, which then transfer loads to the columns or walls.
Yes — purlins are load-bearing members. They carry gravity loads (dead load from roofing material plus live loads such as snow or maintenance workers) and uplift loads (wind suction on the roof). However, purlins are secondary structural members. They transfer these loads to the primary structural frames (rigid frames, trusses, or rafters), which then carry the loads down to the foundation. Purlins do not typically support wall loads or floor loads.
The Z purlin is generally considered the strongest purlin type. This is mostly because Z purlins can be overlapped at supports, creating a continuous beam action that significantly increases load capacity. They usually feature bigger loading and roofing capacity, which plays a vital role in providing support to structures across larger areas. As a result, Z purlins are commonly used in industrial and agricultural structures.
Purlins need equal support from both ends to prevent significant damage. It is advisable to inspect purlins for damage regularly — especially after severe weather events. Keep purlins clean and ensure the protective finish (galvanized coating or paint) remains intact to prevent the risk of rust. If coating damage is found, touch up with a zinc-rich primer or cold galvanizing compound promptly.
The 25% rule (sometimes called the “25% re-roofing rule”) is a building code guideline found in the International Building Code (IBC) and many local codes. It states that if more than 25% of a roof’s total area is being repaired or replaced within any 12-month period, the entire roof must be brought into compliance with current building codes — including wind uplift, energy efficiency, and fire rating requirements.
For purlin-based metal roofs, this means that a major re-roofing project may trigger the need to upgrade purlin spacing, gauge, or bracing to meet current IBC and ASCE 7 wind load standards. Always check with your local building department before starting a re-roofing project.
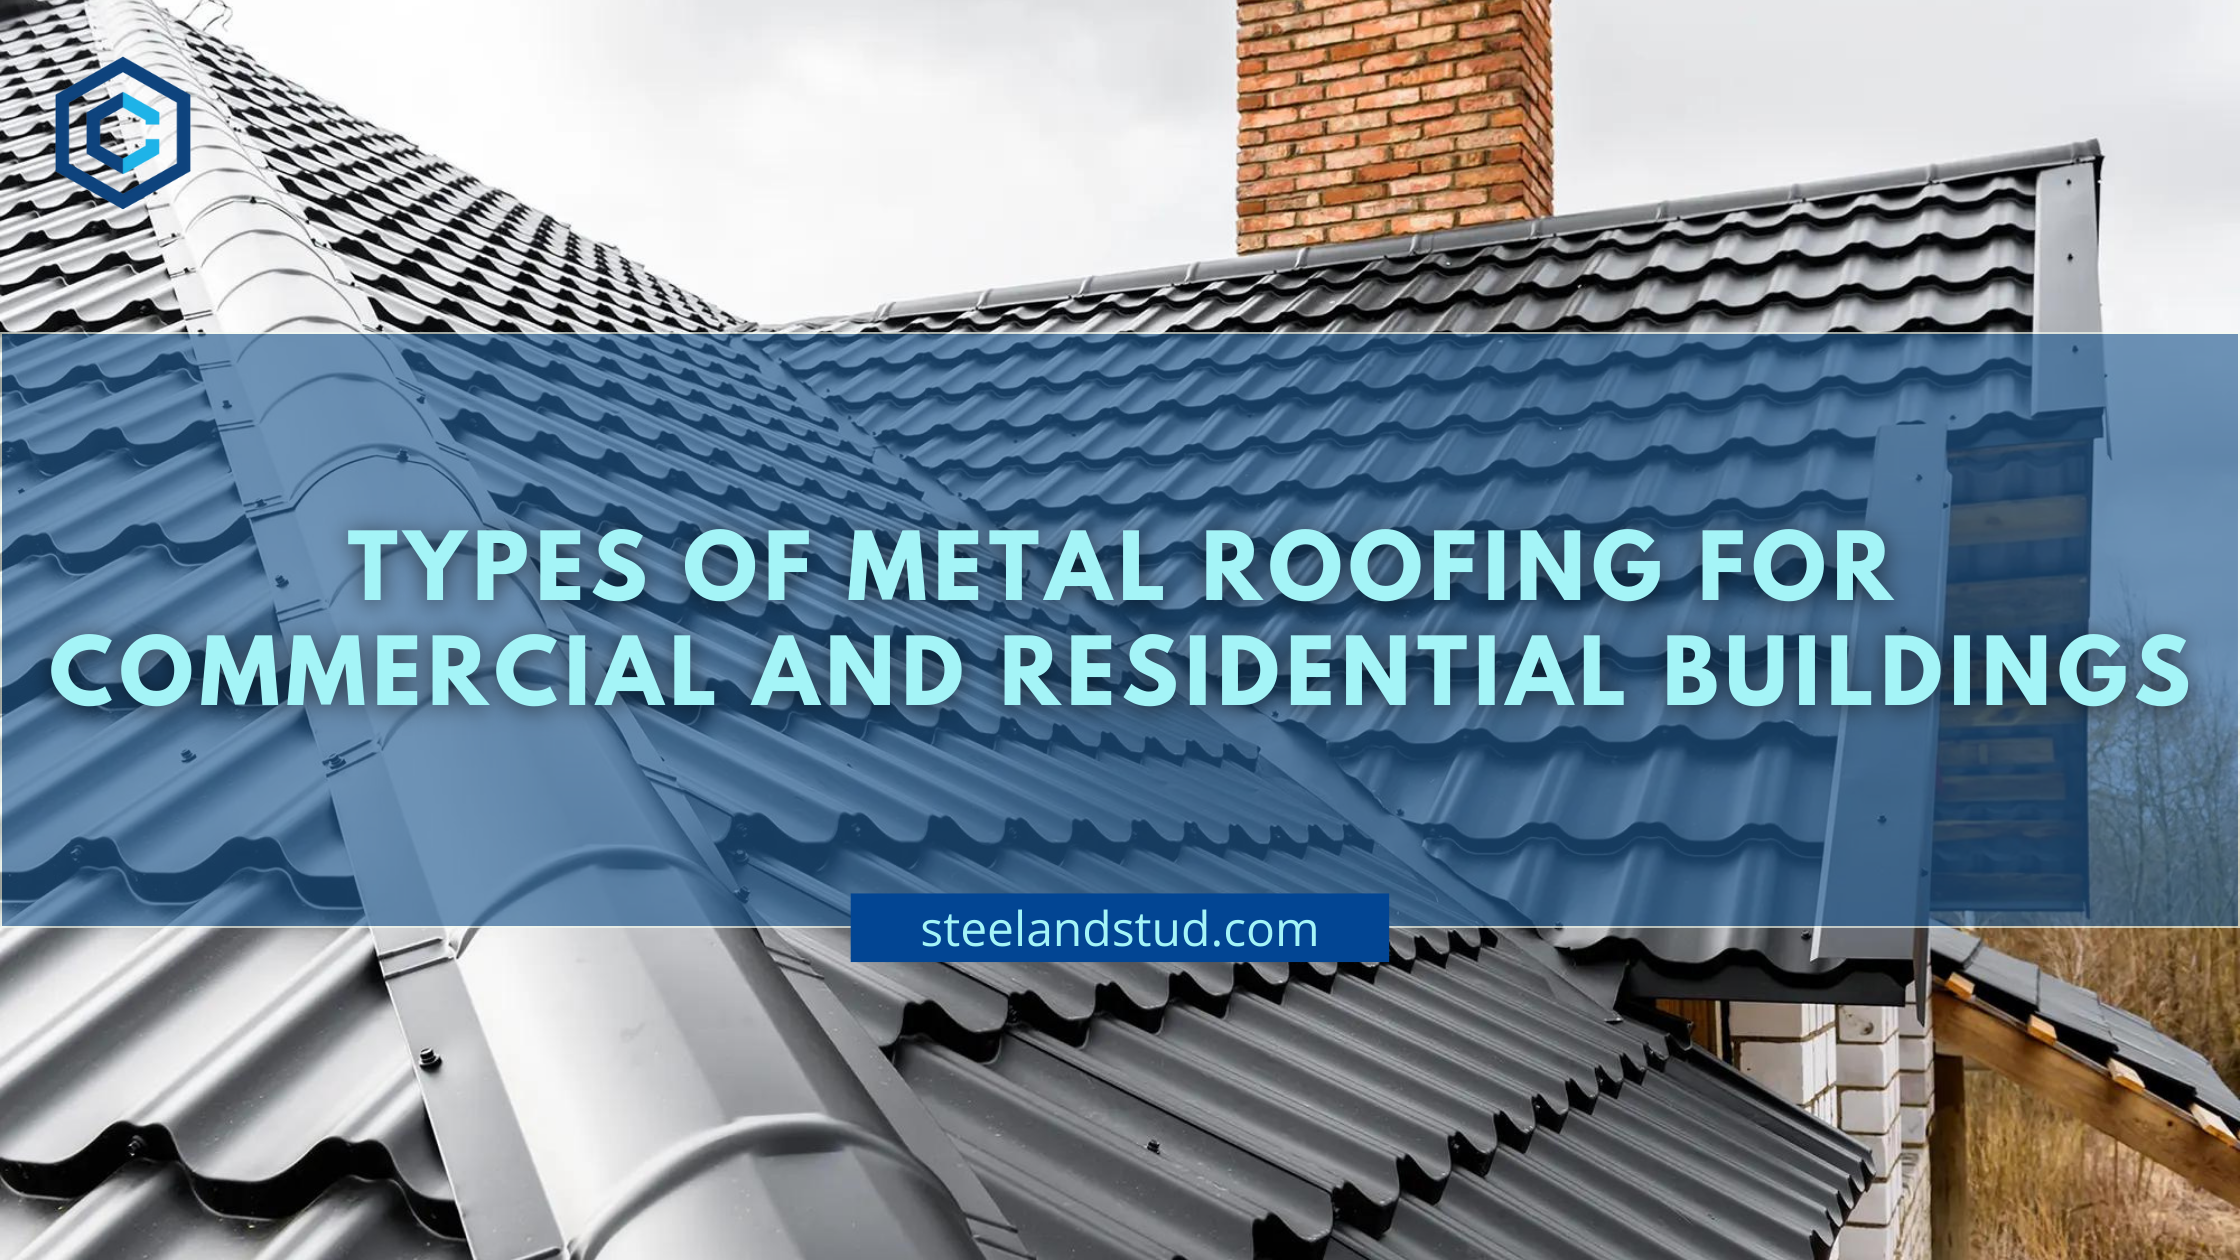
Purlins are long, straight, horizontal steel members that resemble a channel or a flattened “C” or “Z” shape when viewed from the end. C purlins have a cross-section that looks like the letter C — a flat web with two flanges extending in the same direction. Z purlins have flanges that extend in opposite directions, forming a Z shape. Both types typically have small lip returns at the flange edges for added stiffness. Purlins are usually silver (galvanized) or reddish-brown (red oxide primer) in color and range from 4″ to 12″ in depth.
A 4-inch purlin in 16 gauge can typically span 10–12 feet as a single span, or 16–18 feet as a continuous span under standard roof loads (dead load + 20 psf live load). In 14 gauge, those numbers increase by roughly 2 feet. However, actual allowable spans depend on your specific load conditions, building code requirements, and the purlin manufacturer’s certified load tables. Always have an engineer verify span distances for your project.
This is a common point of confusion. C purlins are structural members designed to carry roof or wall loads in metal buildings. They are cold-formed from high-strength steel (typically 12–16 gauge) and are engineered to specific load capacities. Metal furring channels (hat channels) are lightweight, non-structural members used to create a flat surface for attaching drywall, insulation, or interior finishes. Furring channels are much thinner (typically 20–25 gauge) and should never be used as a substitute for structural purlins.
Sources & References
- AISI S100-16 (w/ 2020 Supplement): North American Specification for the Design of Cold-Formed Steel Structural Members — American Iron and Steel Institute
- MBMA Metal Building Systems Manual (2024 Edition): Metal Building Manufacturers Association
- IBC 2021 / IBC 2024: International Building Code — International Code Council
- ASCE 7-22: Minimum Design Loads and Associated Criteria for Buildings and Other Structures — American Society of Civil Engineers
- ASTM A653/A653M: Standard Specification for Steel Sheet, Zinc-Coated (Galvanized) or Zinc-Iron Alloy-Coated (Galvannealed) by the Hot-Dip Process
*Last Updated: April 2026*