Metal Buildings
How To Get Rid of Flies Under Carport?
by Kunal Singh

Flies are common in cars, garages, and around the home. They are a nuisance, especially if you have a vehicle. They can make it impossible to park your car in the garage or driveway. The best way to get rid of flies is to find out where they are coming from and take steps to eliminate them.
Table of Contents

These insects are a problem in areas where there is an accumulation of animal or human waste. It can be true if you have many chickens or other animals on your property. Flies are attracted to the odours from these materials and can quickly become a nuisance.
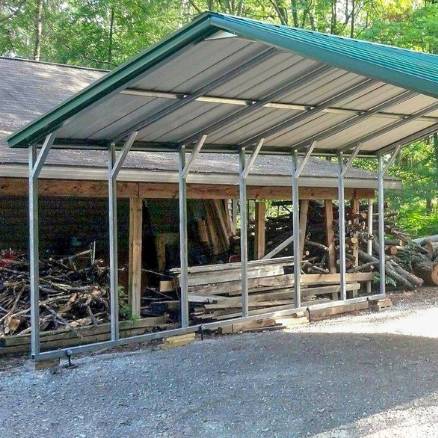
You’re probably familiar with the fly problem if you have a carport. Flies love the surrounding environment, which is warm and moist, just like under your carport, and they can be a nuisance to your family and pets.
They will also lay eggs in your garbage cans and compost piles. Therefore, you need to know how to get rid of flies under the carport.
The best way to prevent flies from congregating under your carport is to keep everything clean. If there are any dead animals or animal waste in your yard, get rid of them immediately. Also, ensure that there aren’t any areas where water is standing still.
Another thing you can do is install traps around the perimeter of your home and garage doors. When they enter, the flies get caught in these traps instead of flying around your patio areas or garage looking for food and water sources.
Read on for more information on how to get rid of flies, why you have flies in your garage and how to prevent them. What’s more, learn the signs of flies infestation.
How To Get Rid of Flies?
Killing flies is slightly different from getting rid of other insects. Flies are more likely to breed in your home, so you need to be thorough when looking for the source of the problem. If you don’t do it right, you could have more pesky flies than before!
The first step is to identify the source of the flies. Are they coming from inside your home? If so, there may be an infestation of mice or rats that have found their way into your home. You need to call a pest control service that specializes in rodent removal before you can take any further action.
If no rodents are present inside your home, then the source is likely outside. There could be an open garbage can near the carport or other area where the flies seem to congregate.
The garbage needs to be taken out regularly and stored in an enclosed area until it can be disposed of properly away from the house.
You also need to check under your carport for any dead animals attracting flies in large numbers. Animals such as raccoons and opossums often crawl under structures such as carports and garages when injured or sick.
They later die unnoticed by humans who live nearby until they become infested with maggots or other insects.
Flies can cause nuisance, and they are considered one of the worst pests. They are known to spread disease, cause skin infections and also affect your health in many other ways.
Even though they may not seem like much of a problem, they can become very dangerous if not dealt with properly.
12 Best Tips to Help You Get Rid of Flies:
1. Remove Food Sources
Flies are attracted to garbage, decaying food, pet waste and dirty dishes. Try to keep these things out of sight and ensure there aren’t any leaky garbage cans or food containers you haven’t cleaned up yet.

If you have pets or if you keep garbage cans outside, you should clean up every day and remove any rotting food scraps from around your house. Flies also lay their eggs in moist soil, so keeping your garden free of mulch will help discourage them from nesting near your home.
Flies are also drawn to food scraps, so you should keep your kitchen clean and free from the garbage. Be sure to throw away all leftovers after dinner. Flies also like sugary foods and liquids; keep your counters clean of crumbs or spills.
2. Clean Your Garbage Cans Regularly
Keep your garbage cans tightly closed at all times, and empty them daily. You should also keep your garbage areas clean so they don’t attract cluster flies in the first place.
Flies love garbage, and it’s common for them to breed inside the trash cans at public parks or other places where people discard their trash regularly. To prevent this, ensure that your trash cans have tight-fitting lids so that flies cannot get inside them easily. Clean out any leftovers immediately after emptying.
You should also empty containers immediately after use and keep trash bins covered tightly when not in use. Clean up pet waste regularly, especially during warm weather, and change the water daily if using a water bowl outside for pets or livestock.
Covering the trash cans at all times ensures that they don’t attract house flies or other flying insects. If you do not have a lid on your, cover it with a piece of plastic wrap or a disposable grocery bag until it is time for disposal.
It will keep pests out of the trash and help prevent smells from attracting more pests into your home.
3. Use Vinegar and Dish Soap
It is a homemade fly spray that works well for small areas like the kitchen or bathroom. Mix equal parts vinegar and dish soap in a spray bottle.
Spray on counters and other surfaces that are prone to attracting flies. The mixture will kill flies as it dries up their bodies and dehydrates them within minutes.
Apple cider vinegar is also an effective home remedy to eliminate flies, especially under the carport. It contains acetic acid, a natural repellent for flies and other flying insects. Wipe down all areas where you spot the flies with apple cider vinegar and water solution.


It will help kill flies or any remaining eggs or larvae that may be present on the surface and stop new ones from being laid in the future. You should also clean using this mixture every few days until all the flies are gone, so they don’t re-infest your home again.
Vinegar has a strong smell that can repel flies. Pour some vinegar into a bowl and keep it in your kitchen or on your patio area where flies gather.
You can also mix vinegar with water in equal parts and use it as a fly repellent spray for getting rid of flies on plants or other surfaces like tables and walls where they tend to land frequently.
4. Use Baking Soda
Baking soda is another effective way to get rid of flies naturally, as it has an unpleasant odour that repels them from your home or yard. Sprinkle baking soda around areas where you see flies gatherings. It could be near garbage cans, compost bins and other areas where food scraps may be present that attract flies naturally.

It will help in eliminating flies from your home, which can spread germs on surfaces such as counters and tables. It could potentially spread disease if you or someone else touch it.
Baking soda makes an unpleasant odour for flies when it mixes with their saliva. You can use this natural remedy by sprinkling baking soda around doorways, windowsills, and anywhere else flies tend to congregate on your property. You’ll need to replace the baking soda every few days since it will lose its effectiveness.
Baking soda also helps get rid of flies because it absorbs odours, making it ideal for eliminating fly infestations. To use baking soda effectively, sprinkle some baking soda on top of any trash cans or other areas where you have seen cluster flies congregating.
Once the baking soda has settled onto these areas, you should see an immediate decrease in fly activity within 24 hours or less!
You can also sprinkle some baking soda around the area where you see lots of flies entering and leaving your carport or garage. It will help keep them away from entering large numbers again.
But how do you use baking soda as a fly trap? Take a large bowl or container and fill it halfway with baking soda — not too much because the mixture will fizz up a bit when you add water to it. Add enough water to cover the baking soda completely, then stir with a spoon until it’s smooth and foamy.
Pour this mixture into a spray bottle, shake well and spray around areas where flies tend to congregate (like window sills). Leave out overnight for the best results!
5. Use Fly Traps
To trap flies, use sticky fly strips or other sticky surfaces that cluster flies land on with their feet and become stuck. You can also try a homemade fly trap made from an empty soda bottle, which can help catch considerable numbers of flies at once.

You can also use organic fly traps to trap flies and prevent them from reproducing. These traps work by attracting flies through colour and smell and then killing them with chemicals once they land on the traps.
Another way is to use fly traps outside your house to catch adult flies before entering through an open door or window. Place sticky traps near doors and other areas where flies may enter your home. However, keep in mind that these traps will only trap adult flies, not larvae or eggs that hatch inside walls.
6. Seal Up Cracks in Windows & Doors
Flies will get into any crack or crevice in your home if there’s an opportunity for them to lay eggs or hide from predators. Seal up cracks around windows and doors, repair broken screens on window air conditioners and ensure outdoor drains have no holes big enough for flies to crawl through.
You can seal cracks in windows and doors with caulk or weather stripping tape to prevent entry points for flies. Where possible, screen these areas off to prevent entry if there are gaps around screens where they could enter your home through them.

Another way to seal up is to repair leaky pipes and screens so that water doesn’t collect in dark corners where flies can breed. Seal off any cracks or holes that may let in flies or pests like mice.
7. Use a Fly Swatter
Flies can be annoying pests when they swarm around your head while eating outside or sitting with friends outdoors. You could be enjoying the weather with friends and family members on the porch area. If you don’t want to use chemical pesticides, fly swatters are ideal.

It is the most basic method to kill flies and acts as a fly bait. Simply take a fly swatter and swat at them until they fall dead. It is not only practical but also very satisfying! In addition, it has strong insect repellent properties.
8. Clean Up
Cleaning up is an excellent way of keeping flies off, especially fruit flies. You should wipe down counters and appliances with a disinfectant wipe to remove any leftover human food that may attract flies. Clean up any spills or messes to drain flies from making them breeding grounds.
Ensure you don’t leave pet food out overnight, and clean up any spills immediately after feedings so they don’t attract insects, including flies.
Another tip is to clean up any dirty dishes or trash. Clean up spills immediately to prevent human food scraps from attracting insects such as flies and ants. You should discard food scraps in the garbage rather than leave them on surfaces where they may attract pests into your home.
9. Turn Off Lights
Flies are attracted to light, so turn off all the lights in your house during the night. It will keep them away from your home. Flies do not like dark places so ensure that you have closed all the windows and doors, especially those near the garbage can or compost bin.
You can also try using yellow bug lights or other bulbs that don’t attract as many flies as regular bulbs do.

10. Install Screens
Ensure windows have tight-fitting screens so that no flies can come inside your home through the windows. If you don’t already have screens on your windows, consider buying or installing them now!

Cover drains with screens so that dead insects won’t fall into them; keep drain pipes clean by pouring boiling water down them occasionally. It also helps prevent clogs from developing that could lead to flooding.
11. Use Natural Repellents
Flies hate the smell of garlic so much that they won’t come near it! You can use fresh or dried garlic cloves or even garlic oil to keep flies away from your home. Put some garlic around windowsills, doorways and any other fly-infested area.
You can also put some garlic inside containers with holes drilled in them. When you water your plants or flowers over time, enough moisture will accumulate inside to produce an odour. It acts as an insect repellent.
Other natural repellents to get rid of flies include clove poked lemons, cayenne pepper, solid cloves, coconut oil, lavender oil, and other natural oils. You can also use essential oils, tea tree oil, instead of residential pesticides.

There are other insect repellents on the market that can apply directly to surfaces, such as countertops and cabinets. These products contain chemicals that repel insects from coming near the treated areas — including flies!
12. Store Fruits and Vegetables Well
It is essential to store fruits and vegetables properly to prevent them from being infested by fruit flies. If you have a garden, ensure that you put some mesh over the stored trays. It will prevent flies from laying their eggs there.

You should store fruits and vegetables in covered containers or plastic bags in the refrigerator until ready to use. Remember to rinse with water before using or serving raw produce to reduce bacterial surface contamination.
Reasons for Flies in the Garage
The first thing to consider when you notice flies in the garage is where they are coming from. Are they entering through a door, or are they flying in through open windows?
A garage is ideal for flies to breed because it’s usually a dark, warm and humid environment. In addition, many garages have high ceilings, which allows the flies to hang out above the floor and drop their eggs onto it.
One reason for flies in your garage is if the door to your garage has been left open. Flies are attracted to light and odours, so if you leave the door open at night, they can come into your garage and even make it into your kitchen or bedroom.
To avoid them from getting in, close all doors that lead outside at night when you go to bed. You should also keep them closed during the day when you’re gone from the house. If there isn’t a screen on your garage door, add one so that flies can’t get inside your home through an open door.
If the flies are coming in through a door, then there is likely something attracting them behind that door. The most common cause is food left out on counters or tables.
If the flies are entering through open windows, it may indicate that there is something outside that they are attracted to. It could be garbage cans overflowing with trash or dog faeces sitting out overnight while you were sleeping. You should keep all garbage cans tightly sealed so nothing can get inside them, including flies!
Signs of Flies Infestation

If you notice flies in your home, there is a good chance that you have an infestation of some sort. The best way to determine what type of fly you are dealing with is to examine them closely.
Fly infestations are a common problem in homes, offices, and other buildings. They can spread disease, contaminate food and make it nearly impossible to eat outside on warm days. The good news is that when flies become a problem, there are ways to get rid of them.
If you’ve noticed that your home seems to be attracting flies, you may have a fly infestation. It results from poor housekeeping habits, but it can also be caused by insects entering your home through cracks or leaks. The best way to avoid an infestation is to keep your home clean and sealed up tight.
If you already have a fly problem, don’t panic. Take note of these warning signs:
- Flies are buzzing around your house or office constantly
- You see dead flies everywhere.
- Your windows are covered with fly specks.
- You find maggots or fly pupae in garbage cans or food containers.
- Flies crawl on the windows, walls, or other surfaces inside your home.
- You see eggs or larvae on any surfaces inside your home, such as furniture, walls, floors, or ceilings.
- You notice flies buzzing outside near windows or doors leading into your home.
- You see flies buzzing around your home or business.
- You see dead insects near your trash can or garbage dumpster.
- You notice dark spots on walls, windows, doors and other areas where food has been spilt or left out for long periods.
- The smell of rotting fruit comes from your trash can or garbage dumpster.
- Your pets’ eyes are swollen from fly bites.
Preventing Flies in the Garage

The garage is a great place to store tools, lawnmowers, and other outdoor equipment. Unfortunately, it’s also a favourite hiding place for flies. If you’re a homeowner, you know what it’s like to have a garage.
Flies are attracted to any food source, including garbage. In a garage, the food source could be grease and oil spilt on the floor or tools and equipment left out in the open. The flies can also lay eggs in these areas, which will hatch into more flies.
To keep flies from entering your garage, ensure that all food scraps are immediately taken out of the garage. Also, clean up spills so there is no chance for flies to lay eggs in them.
Cleaning up any food or garbage in the garage can go a long way to deter flies from hanging around. The less they have to eat and drink, the less likely they will stick around.
If there is any leftover food in a bag or container inside your garage, ensure it is sealed so that flies cannot get inside it and lay eggs there. Seal off possible entry points. You may have noticed that flies seem to sneak into your garage through cracks in the foundation or gaps in doorways. If this is the case, seal off these entry points with silicone caulk or similar materials.
When possible, store tools and equipment away from doors and windows so they do not attract flies from outside. Finally, wipe down counters regularly with disinfectant to kill any germs present.
Metal Carport Delivery & Installation Across the USA:
Customer service representatives will contact you ahead of time to schedule your delivery date in your location. We offer metal carport installation services in 48 US states, including:-
| Locations | Locations | Locations | Locations |
|---|---|---|---|

Frequently Asked Questions
Why Do I Have Flies Under My Carport?
There are many reasons that flies may congregate in your carport. It could be a pleasant place for them to spend the day, or perhaps something is attracting them to the space.
How Do I Get Rid of Flies Under My Porch?
You can try spraying vinegar or lemon juice around the area to deter them from coming back. You could also put a bowl of vinegar with some meat inside it as bait for the flies.
What Smell Will Keep Flies Away?
The smell of vinegar or ammonia is a good deterrent for flies. If you don’t want to spray the entire porch floor, try using a cloth soaked in vinegar water and wiping it down.
Why Are There So Many Flies in My Yard?
- Flies are attracted to the odors of animal feces and garbage. If you see flies or maggots in your yard, it is a sign that you have an infestation of flies.
How Do I Get Rid of a Fly Infestation in My Yard?
Remove any standing water from your yard because this is one of the biggest reasons for fly infestations in yards. It is especially rampant during hot weather when there isn’t much rain to wash away puddles from other sources such as leaking pipes or sprinklers.
How Do I Get Rid of Fries in My Yard?
You can try using a fly swatter, which will work on small numbers of flies. But if you have many flies, you may need to use more effective methods.
How Do You Keep Flies Outside Naturally?
Use natural repellents, including essential oils, cayenne pepper, or vodka-based fly repellents. The smell will keep flies away from their fly zone because they don’t like it!
How Does Vinegar Get Rid Of Flies?
Vinegar is not toxic to flies; it just bothers them enough that they do not want to be around it. Flies are attracted to vinegar because it mimics the smell of rotting food.
What Can I Put Around My Door to Keep Flies Away?
There are different plants that will help repel flies from around your home, but rosemary is one of the best options. Rosemary grows well indoors and can be pruned into any shape or size that you want.
How Can I Turn Metal Carport Into Garage?
by Kunal Singh
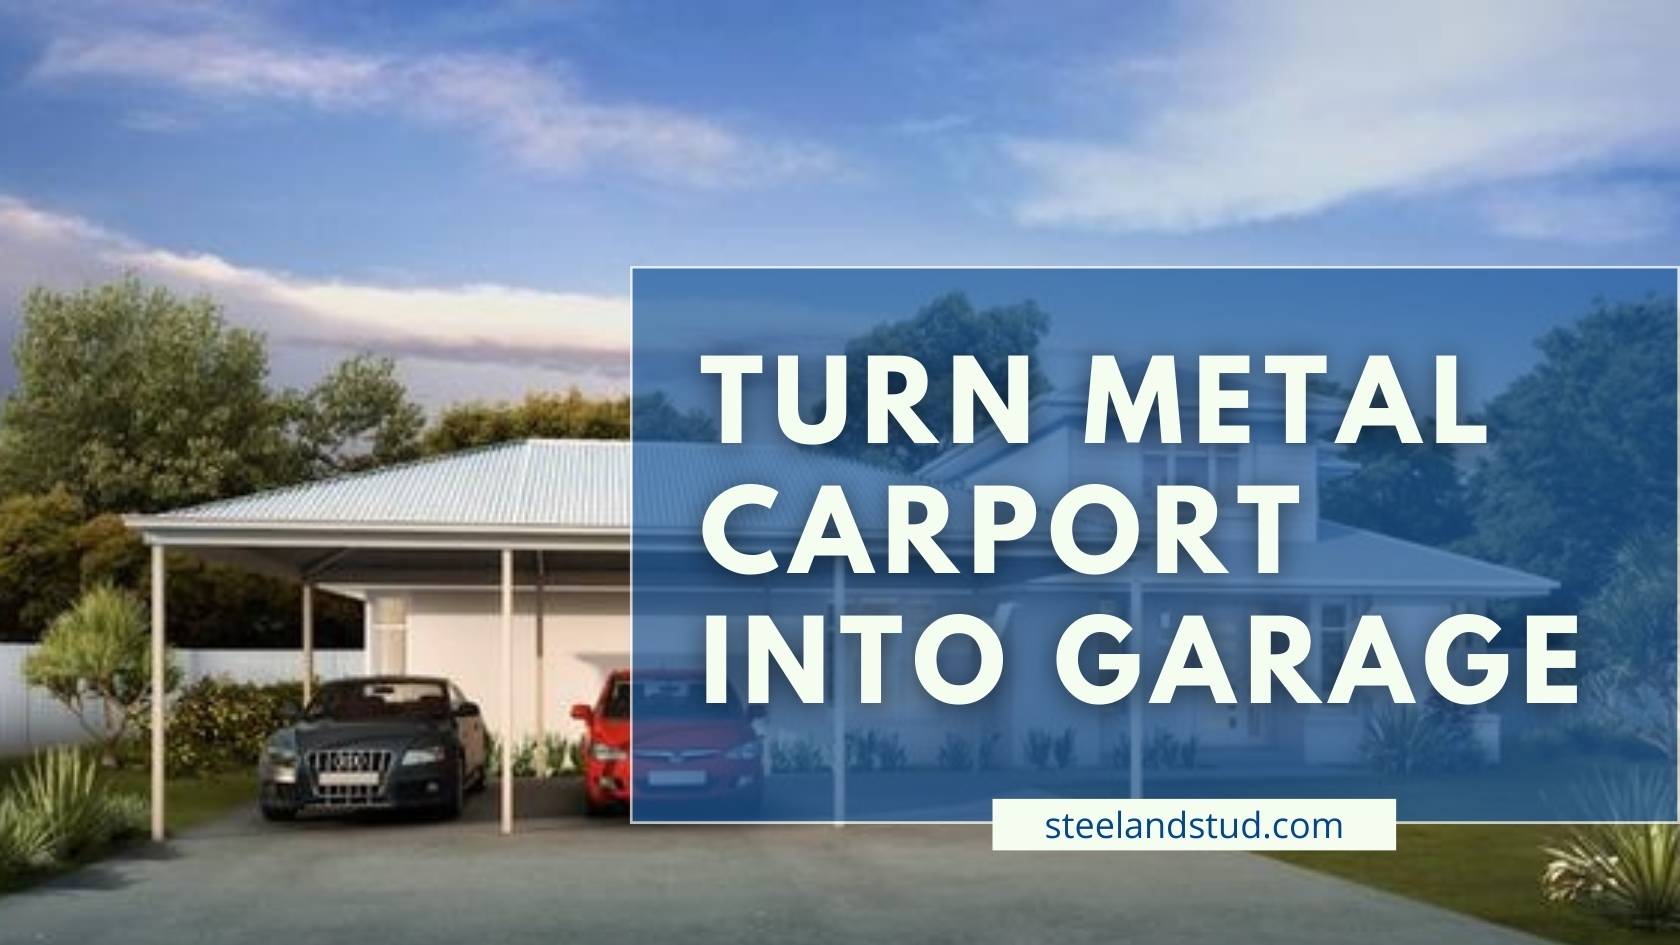
Can I Turn a Carport Into a Garage?
Yes, You Can!
Converting a carport into a garage can be a great way to add extra space to your home. Before starting the conversion project, it would be best to consider several things, so make sure you understand the process and the associated costs.
Table of Contents
Wondering if it's possible to turn a carport into a garage?
You’re not alone! Many people are interested in this topic, and for a good reason. Converting your carport into a garage can be a great way to add extra storage or living space to your home without breaking the bank.
But before you get too excited, there are a few things you need to keep in mind. In this post, we’ll discuss the pros and cons of converting your carport into a garage and tips on making the most out of your new space. So, whether you’re just starting to think about it or you’re already in the process of doing it, read on for all the info you need!
What is a Carport, and why would I want to convert it into a Garage?
A carport is an uncovered parking space, typically attached to the side of your home. They’re usually cheaper and easier to build than a full-fledged garage, so many homes have them. Carports can be attached to the side of a house, or they can be standalone structures. They are typically made of metal or wood and have a roof, but they can also be made with canvas or other materials.
However, carports offer very little protection for your vehicles from the elements. This? Were you combined with the fact that they’re often small and cramped? It can make them less than ideal for parking your car or storing your belongings.
Of course, there are some things you need to consider before starting any construction project.
3 Things to Consider Before Converting Your Carport Into A Garage
1. Cost
The cost of converting a carport into a garage will vary depending on several factors, such as the size and location of the carport, the materials you use, and whether or not you need to hire a professional. Also, consider the labor and material costs, the electrical service, and the carport structure you want.
On average, you can expect to spend between $5000 and $10000 on the garage project. This may seem like a lot of money, but it’s important to remember that this is an investment in your home rather than to cut costs. After a successful conversion, it will add value to your property, but it will also make your life easier, save money in the long run and give you a more comfortable place to park your car or store your belongings like your lawn equipment, and electrical boxes.
2. Permits
Another critical thing to consider before starting any construction project is whether or not you need a building permit. You will need a license to convert your carport into a garage in most cases. The best way to find out is to contact your local building department or city hall and ask about the specific requirements for your area.
- Checking with Your Local Municipalities
- Check Local Building Codes and HOA Regulations
It’s also worth mentioning that, even if you don’t need a permit, it’s always a good idea to consult with a professional before starting any construction project. and check the property line. This is especially true if you’re not experienced in construction or if the project is complex. if there is a case the carport conversion project will be paused, please request a new building permit to continue the construction process.
3. Design
Design is one of the most important things to consider when converting a carport into a garage. This is because the design will determine how functional your new space will be and how much it will cost to build.
It would be best to consider a few things when designing your new garage.
- First, you need to decide how much space you need. And what kind of garage do you want? Is it a garage attached or a detached garage? This will depend on how many vehicles you want to park in the garage or your vehicle shelter and whether or not you want to be able to store other things, like tools or sporting equipment. Always plan ahead.
- Second, you need to think about the layout of the space. This includes where the doors will be located and how much wall space you need for shelves or cabinets. With the help of your concrete contractor, decide if the floor and garage walls will be a pour concrete or slab surface.
- Finally, you need to decide what kind of carport roof you want or if you don’t want to change your existing roof. Also, consider the carport’s roofline carports are usually built with either a gable roof, an inverted V-shape, or a shed roof. The most common type of metal roof for a garage is a gabled roof, but there are other options, like a flat roof or a shed roof.
You’re ready to plan your new garage once you’ve considered all of these things. If you’re unsure where to start, a few resources can help, like books, magazines, and online tutorials.
Assuming you've considered all the above, you're ready to plan your carport conversion!
The first step is to decide what kind of garage you want. Do you need a single-car garage, metal garage, attached garage, or will a metal two-car garage suffice? What about the ceiling height? How much wall framing space do you need for shelves or cabinets?
Once you’ve decided on the basics, it’s time to start thinking about the details. What kind of doors do you want? Where will they be located? What type of flooring do you want? How will you light the space?
Materials And Subcontractors
You will need various materials and subcontractors for your carport to garage conversion. To start with, this carport conversion project.
- You will need a foundation.
- You will also need a concrete slab, bricks, mortar, and cinder blocks
- Doors
- Windows
- Drainpipe
- Insulation
- Nails and screws
- Windows
- Roofing materials (if needed)
- Garage door
- Plywood
- Insulation for garage door and walls
- Lumber
- Particleboard or drywall
- Siding
- Excavation concrete (if required)
- Insulated wire
- Metal conduit
- Electrical boxes
- Switches
- Electricians, plumbers, and HVAC technicians
Once you have gathered all of the necessary materials and subcontractors, you can begin transforming your carport into a garage.
Step-by-Step Process of Convert Metal Carport To Garage
Preparing The Site
Rather than preparing it by yourself, it’s more promising that you hire a professional and let them draw your plans.
Why? Because these professionals will assist you in planning the overall layout, which contains the opening part for your doors and windows.
Also, they respect the setback distances framed by your municipality.
Installing or Updating The Foundation
Now that you’re done with your preparations, you might know or will get to know that your turn carport into garage can be done without even digging the foundation.
But wait, For this to happen, you must ensure that your land is stable, along with a splendid drainage facility.

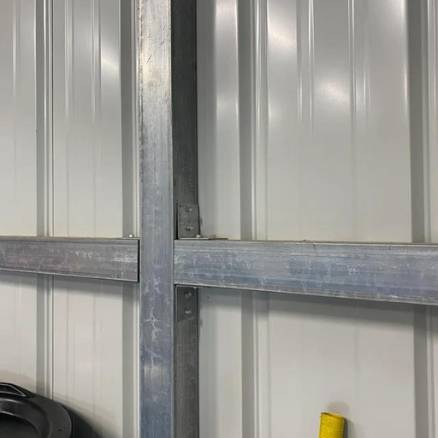
Adding Walls And Securing The Metal Panels
After updating the foundation, you need to erect your wall frames with 2 X 6’s with a distance of 16 inches (ce`ntre to centre is imperative).
Installing The Garage Door
Before installing the door, validate that you check this requirement:
- An adequate slope on the verge of your garage door for proper drainage.
Adding Windows And Doors
After deciding the type, it’s time you add those for the openings and windows of your style.
Roofing Considerations And Updates
You need to get your roof examined by the contractor or by an engineer if you ain’t planning to replace it. If it’s in proper condition, there’s no need to replace it, but if the state is catastrophic, you may have to remove it entirely.
Insulating The Space
Once all the installation and consideration are in place, it’s time you need to insulate your garage. It’s a wise move that sidesteps the loss of heat. Depending upon your interiors, install wood furring strips.
Finishing Touches
Now this factor is subjective as the exterior of your garage may vary. But try to blend it up with the exterior of your home. Besides this, consider some security measures as it’s a dwelling that accommodates your belongings like:
- Install sturdy locks on all doors
- Alarm system to defend against robbery.
- Security cameras for surveillance.
- Motion sensor lights.
Pros and Cons of Converting A Carport Into A Garage
Advantages of converting a carport to a garage
- One of the main advantages of converting a carport into a garage is the increased security it can provide. A garage door can deter would-be thieves and vandals and protect your vehicle from inclement weather.
- Another advantage is the increased value it can add to your home. A garage is typically seen as a more desirable feature than a carport, so if you plan to sell your home in the future, a garage may help boost its value.
Disadvantages of converting a carport to a garage
- Converting a carport into a garage can be pretty expensive, depending on the size of the space and the materials you use.
- Another disadvantage is finding a suitable location for the new garage can be challenging. If your home doesn’t have enough space on the property, you may need to get creative with your design.
Despite the disadvantages, converting a carport into a garage can significantly add value and security to your home it can also give you a comfortable garage. With careful planning and help from a professional, you can create the perfect space for your needs.
How much does it cost to convert a carport into a garage?
According to Angi, a website connecting consumers with service providers, the average cost to convert a carport into a garage is between $8,000 and $10,000. However, the actual price of the project will vary depending on the size of the structure and the materials used. If you want to cut costs, you can rent tools as an option.
For example, your costs will be higher if you have a more oversized carport or want to use high-end materials. Additionally, you will save on labor costs if you choose to do the work yourself. However, it is essential to note that this complex project requires building permits and inspections in most cases. It is generally best to leave the work to a qualified contractor.
By considering all of these factors, you can better understand what it will cost to convert your carport into a garage. So, if you’re thinking about transforming your carport into a garage, get estimates from multiple contractors before making a decision. You can also contact your designer to decide what is a perfect garage design for you, if it is an enclosed carport, if it has an automatic garage door, or a standard garage door opening.
Therefore here are the estimates regarding the same:
Size
| Garage Size | Average Cost |
|---|---|
|
Single Car |
$9,000 – $12,000 |
|
Two-Car Garage |
$18,000 – $23,000 |
|
Three-Car Garage |
$24,000 – $42,000 |
Drywall And Insulation
| Square Foot | Cost of Insulation |
|---|---|
|
A Square Foot |
$1 – $3 |
|
4 Foot by 8 Foot Panel |
$8 – $12 |
Reuse
- You can complete your carport conversion using the same slab & roof, but only when the original structure is rescued.
- In terms of expenses, the average amount you can be levied is close to $6,000.
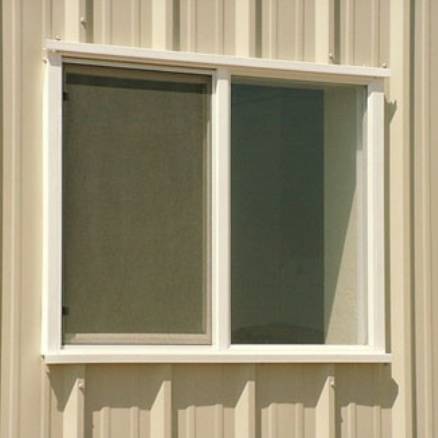
Windows
- Installing a single window unit (standard size) could cost you around $200 – $1,300. Factoring in the labour charges, it will go around $150 per window (extra) or $40 an hour.
Electricity
- If you’re installing a new outlet, then it runs from $75 – $500.
- Or if it’s a new lighting fixture, it’ll cost around $75 – $125.
- It’s recommended that you add more than one outlet to save yourself from these extended electrical chords immediately needed for pumping tires, supplying additional power to tools, or for further appliances.
Roofing
- If you replace your garage roofing, then it’ll cost you around $1,000 – $2,000.
Does Converting a Carport to a Garage add value?
While the answer may vary depending on your location, converting a carport into a garage can add value to your home. A garage is typically seen as a more desirable feature than a carport, so if you plan to sell your home in the future, a garage may help boost its value.
There are a few things to keep in mind;
- First, as mentioned above, the cost of converting a carport into a garage can be expensive.
- If you are not planning on staying in your home for a long time, you may not see a return on your investment.
- Additionally, if you live in an area where most homes do not have garages, your home may not be valued differently.
Ultimately, it is essential to speak with a real estate agent in your area to get a better idea of how converting a carport into a garage will impact the value of your home.
Final Thoughts
By considering all of these factors, you can better understand what it will cost to convert your carport into a garage. So, if you’re thinking about transforming your carport into a garage, get estimates from multiple contractors before making a decision.
Now that you know everything you need about converting a carport into a garage, it’s time to get started! Just remember to take your time, plan carefully, and consult with a professional if you need to. With a little effort, you’ll be able to turn your carport into the garage of your dreams.
Frequently Asked Questions
Is it worth converting the existing carport to a garage?
The answer may vary depending on your location, but converting a carport into a garage can add value to your home.
Can a metal carport be converted into an enclosed garage?
Yes, a metal carport can be converted to a garage. However, the process will be more complex and costly than converting a wooden carport into a garage.
Is a carport cheaper than a garage?
In most cases, a carport is cheaper than a garage. However, the actual cost will depend on the size of the structure and the materials used.
How long does it take to convert a carport into a garage?
The length of time it takes to convert a carport into a garage will vary depending on the size of the structure and the project’s complexity. However, it will take several weeks to complete the work in most cases.
Do I need a permit to convert carport to garage?
Yes, you need a permit to convert a carport to a garage.
What is the difference between carport and garage?
The primary difference between your garage and a carport is that a garage is made with enclosed solid walls, at least one door and a roof. On the contrary, carports are made with a simple structure with an overhead cover.
How much does it cost to turn a carport into a garage in 2023?
If we consider the foundation, it costs approximately between $18,000 – $23,000. To get the precise price you can contact our sales representative.
What ceiling height is needed for a garage conversion?
The minimum ceiling height you need to convert metal carport to garage is 7’6″. Also, the concrete foundation must be 6 inches high.
How to Turn a Metal Carport into A House?
by Kunal Singh
What do you do if you need additional room in your house and already have a metal building standing? You retrofit it into a house! And metal carports retrofitted into metal building homes are gaining popularity. Indeed, metal buildings are no more confined to agricultural, industrial, and garage purposes. The residential sector is increasingly considering it a lucrative way to build homes. Because they are affordable, weather-resistant, and can be made into notable homes.
After retrofitting into a house, Metal garages are an excellent idea because it provides you with extra living space, increase your property resale value, and you can earn more money by putting the additional room on rent!
But the big question is, how to turn a metal garage into a house?
Table of Contents
How To Turn a Metal Garage into A House?
Turning a monotonous, vacant garage into a livable space makes for a perfect solution. But how you do that is the challenging part. Below are a few ideas to evolve your storage space into a house.

Ensure the Metal Building Is In The Right Zone
Before construction, the first step is checking whether the to-be living area is built in a residential or commercial zone. This will ensure you do not face any hassles while procuring the building permit.
Also, ensure the room would receive an adequate amount of sunlight.
Preparing the Foundation
The next step is figuring out the type of foundation you would need. The foundation you choose depends on your property’s area and the soil around that area.
Plan Energy Efficiency
Adequate planning for insulation, heating and cooling systems, and energy efficiency would go a long way in keeping the metal building sturdy for the years to come. Thus, adequate insulation and energy efficiency planning should be at the forefront of your building plans.
Begin with The Roof
Beginning with the roof, check if your existing metal carport is sturdy enough to be converted into a liveable space. If not, consider buying a new one.
Most carports come with a warranty of 20 years or more, and with proper maintenance, they can last you even longer. You just have to get the metal carports roofs cleaned from time-to-time.
A key point to remember here is that load calculation will yield different results than when used as a carport because it is the question of human life now. You can take professional advice here.
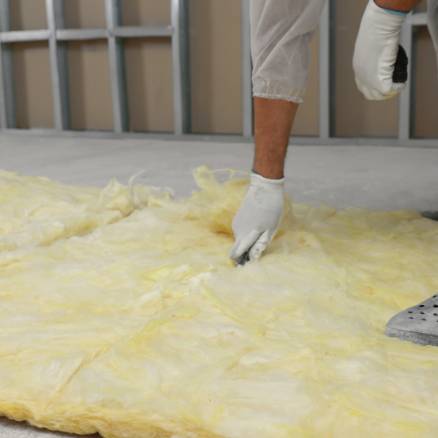
Using Adequate Insulation and Framing
The next step is to begin framing the ceiling and the interior walls of the carport. Next, work on insulation by insulating the structure properly with spray foam. Adequate insulation will keep the cabin cozy and energy efficiency and even reduce the noise levels inside it!
Ensure Adequate Lighting & Ventilation

Keeping your brand-new metal building homes airy and bright will go a long way. It will serve anybody who uses it much better.
Thus, apply appropriate lighting techniques like skylight and windows wherever possible. This will provide you with natural light saving you some on electricity bills too!
Also, taking care of appropriate ventilation will keep the metal building airy and keep you colder in the summers.
Include Electricity and Plumbing Plans as Priority
Adding a toilet or kitchen to your metal buildings can substantially increase your property value and utility as a rented house.
Thus, if you plan to add a toilet or sink to your metal building, prepare your plumbing before building your steel building. The same goes for electricity work. Plan your charging ports and fixtures and get the plan approved by an electrician.
Get Done with The Finishing Touches
Now that your structure is almost complete finish it off by adding extra insulation between you and the walls. This step will ensure better soundproofing so that the rain pattering on your steel building will not disturb you as much.
These were some of the best ideas for constructing your own metal guest house. And the best part about this guest room would be you do not need to worry about mold and foundation issues as much. Also, it is very sturdy against the natural elements of rain, wind, snow, and earthquake.
How to Prevent Condensation Issues in Metal Buildings?

Metal buildings are better than standard concrete buildings because they are relatively inexpensive and can handle rough weather like magic.
But with the plusses come the minuses. Metal buildings bring some issues that other materials buildings do not struggle with. And condensation and water damage top the list.
The biggest reason condensation is such a massive issue with steel buildings is the lack of insulation. Without insulation, the metal gets cold, and water vapor forms. And since steel rusts, water damage is not only a structural issue but an aesthetic one too.
It is essential to tackle this issue while planning your structure. And the first step toward protection is to understand the reasons behind the problem. So, let’s start!
Lack Of Insulation
Whenever there is a considerable temperature difference between the exterior walls and interior walls, the water starts condensing on the cooler side, and metal roofs and walls easily collect it.
This can become a serious issue with time due to the resulting molding, rusting, and pooling water eroding the foundation.
Most often, the reason for these troubles is a lack of insulation. This leads to temperature difference, and the cooler surface against the warmer, more humid air starts observing water vapor.
But this problem is relatively easy to solve. Insulation material like spray foam insulation can be added to almost any metal building type. This small detail will keep the temperature inside the structure cooler and prevent problems arising out of condensation away!
Be it steel sheds or metal buildings; all can benefit from insulation.
Insulation Issues
But simply adding insulation is not all. You need to do that well. Because wrongly done insulation is worse than no insulation at all.
Poorly done insulation means that the insulation is not appropriately sealed from the outside air. And if rain enters it, insulation like fiberglass or spray foam insulation can quickly get soaked with water and end up causing issues like mildew, mold, odor, and problems like rot, illness, and allergies!
So, how to tackle the issue?
Easy, seal the top and bottom spaces with a vapor barrier or vinyl backing. This will keep the humid air and run out. Also, since it is completely disconnected from outside air, it will insulate better, giving you better results!
Here are a few tips for insulating your metal building better.
What Are the Benefits of Insulation?
A well-insulated metal building can match any wooden or concrete structure’s comfort, given you plan early on. Here are some reasons for planning spot-on insulation:
- The most straightforward reason to insulate your steel building is to keep the inner temperature stable. Adequate insulation ensures the internal temperature is neither too hot nor too cold.
- Energy efficiency is another huge benefit. Whenever you heat or cool your metal carport, the insulation would ensure it stays on the desired temperature for longer, saving you energy and bills.
- Condensation, a common issue with metal buildings, can be prevented by insulation. It reduces the open-air access to the steel structure. Thus, considerably lowering the chances of other problems like mold, mildew, rot, and allergies.
- Lastly, it reduces the sound that can enter your metal building homes. Thus, preventing you from the loud thuds of pattering rain, hailstorms, and passing vehicles.
Which Is the Right Material for Insulation?
Different materials suit different projects and budgets. You must keep in mind the material’s qualities and your budget in mind while choosing the material. Below are some of the most common insulation materials.
Loose-Fill Insulation
It is a popular choice, but it is not attached but instead blown between two surfaces. Thus, particular construction methods like interior walls like drywalls, sheetrock paneling, or drop ceiling panels are required. You need an extra surface to hold it in place. Unfinished walls cannot use this technique.
But this technique has its benefits. It can be blown into small places where it is hard to insulate manually. It is an outstanding insulator as well. And lastly, it is best to make it for a living space or workspace.
Fiberglass Batting
Fiberglass batting is a prevalent and inexpensive insulation material. It comes in various thicknesses and insulation values, which can be used for multiple climates and projects. Also, fiberglass is easy and quick to install and can be used on unfinished walls.
But there are a few downsides to this material. It’s bulky and difficult to handle if you are inexperienced. Also, it tends to leave fibers on the surface of the surfaces and clothes, which is very unpleasant for the eyes.
Rigid Board Insulation
The rigid board is quite similar to fiberglass batting, but it is in the form of heat-resistant polyurethane sheets instead of bulky blankets. These sheets come in varying insulation values and are lightweight too! They are suitable for horse barns and workshops that are more prone to fire.
But despite all the advantages, they are challenging to install. Being solid sheets, they need to be cut into shape to be fixed on walls and adjusted with wall studs and ceiling joists. Also, it isn’t easy to fit them in hard-to-reach places, and there is always a risk of leaving air gaps.
Spray Foam Insulation

Spray foam insulation is the final and the best type of installation found in metal buildings. It is similar to lose fill insulation. It is blown in between two surfaces and requires interior walls like drywall etc. But being better than loose-fill, it self-adheres to surfaces.
Thus, it quickly reaches hard-to-reach places when you blow it in and leaves little to no air gaps.
But its downsides are that it requires special equipment and should be done by trained professionals. Also, its cost is on the higher side.
Should You Use Radiant Barriers for Extra Insulation?
Radiant Barriers provide extra insulation by reflecting infrared rays and heat toward the exterior wall. They also play an active role in preventing condensation problems and helping insulation last longer and work better.
Like insulation, they come in various types but ensure you place them before putting in insulation.
You can talk to your contractor for more details about whether you require one or not and, if yes, which one is best for you. Please do it early on to save a lot of hassles and have a better decision.
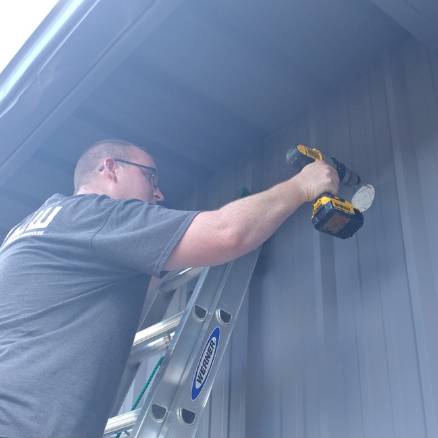
Why Should You Add Electricity to Your Metal Building?
You need electricity to power appliances, use Wi-Fi, light, cooling and heating systems, etc. And a metal carport without electricity wiring lacks value.
But before you start wiring, you need to have a plan in mind. The first question you need to ask yourself is, “What am I going to use it for?” And the answer would just be knocking on your doors.
Perse, you only want to add some lights and utility; direct wiring from your home’s main electricity connection would work. But if you want it to be a full-fledged metal building, you need a higher-capacity solution.
Depending on the quantity of work, you should be done with the electrical wiring in a day or two.
How Should You Add Electricity to Your Metal Building?
This feat might seem like a tough job, but surprisingly it isn’t! However, if you aren’t an experienced DIYer, you can always take help from an electrician. Let’s get to know the steps.
Plan The Conduit
It is essential to figure out the route of the wire before you start laying it. The best and easiest way is to use the power from the main panel. This will ensure you are not putting too much load on any other house circuit. But in this case, you will need the help of an electrician to make the final connection.
If your main panel is not accessible by the metal barn, you can use another junction box or circuit of the house, given you are not putting too much load over it.

Pro Note: The National Electric Council says while planning your wiring route, you cannot ‘bend’ the wiring more than 360 degrees while you are running them through an electric pipe.
This implies that you can take only one 180-degree bend or two 90-degree bends because you probably already have two 90-degree turns planned—one going towards the ground and the other towards your metal carport.
Now that the conduit is planned, it is time for action. The easiest way is to run standard electric wire through a rigid metal conduit, like a thin metal pipe. This pipe needs to be buried 6 inches underground in the earth. Other types of underground cables like electric feeders should be buried 12 inches deep inside the ground.
Dig The Trench
This step involves digging a narrow trench to accommodate the wiring. The trench should be such that the rigid metal conduit (RMC) is 6 inches below the ground. You can use a pick or a mattock to get the trench of the desired width. Also, remove the sod and grass as you go.
Laying The Conduit
After digging the trench, the next step is to lay the conduit. To do so, assemble the lengths of the RMC first, and then make markings where the bends should go.
You would need a pipe bender to make these 90-degree bends. You can rent these out at a hardware shop if you do not want to buy them.
After laying the conduit, the last step is to make connections. It is easiest done by using connectors called LBs. LBs have access panels at the back to access the wires easily. Plan out where you would want the connections for your house and metal building to be, and mount them on the walls at that exact place. You may need long drills to complete the circuit.
Fastening The Pipe & Pulling the Wires
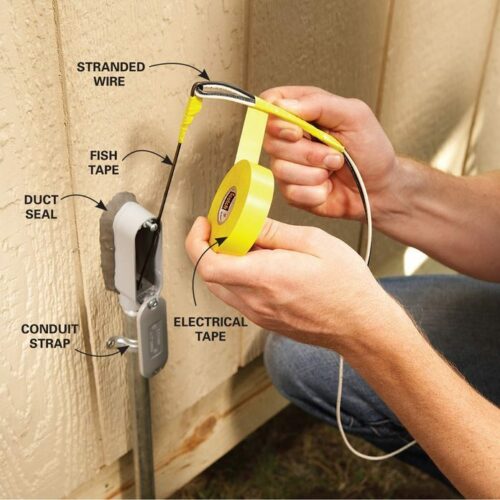
This part includes running the wire through the laid conduit. Make use of pipe wrenches to fasten all the RMC units with each other. After assembling the conduit, use a compression fitting to attach the RMC to LB at your metal carport.
Now time for the trickiest part- running the wire through the steel pipe. But relax, it’s almost fun. Pull fish tape through the complete length of your conduit and ensure to attach a guide string at the other end of the fish tape.
Attach the wire to this guide string and pull the fish tape carefully out, bringing out the wire. This job is best done with two people, one at both ends of the conduit.
Pro Tips:
- Never pull the wire with only the fish tape. Always use a guide string in between.
- You just need two wires, red and black, for a simple circuit. However, if you make a three-way switch and multiple circuits, you may need more wires.
Pull the wire through the conduit and feed it into the wall through the LB. Lastly, do not forget to add a power disconnect switch where the power enters the metal garage. Now you have successfully connected power to your metal building, and you are free to power the insides as per your wish. Only remember not to put too much load over the circuit.
Converting Existing Steel Buildings to Livable Space

Converting the existing metal building into livable spaces is an excellent idea as it provides more space for the family. Here is a small process on how to go about the task:
Check the Zoning Rules
Zoning rules define the local building rules. Thus, you need to check with your local building department, or county zoning rules whether a steel garage can be used as a residential place or not?
Procure A Building Permit
Again, check with your county or local building department whether you would need to procure a building permit or not.
Create and Execute a Renovation Plan
Converting steel buildings into residential buildings requires more insulation than any other building. Proper insulation hinders the heat transfer and maintains the temperature inside.
Once the insulation work is complete, the next job is to cover the interior with sheetrock or drywall. You can color these sheetrock walls if you like, and your additional metal house is ready.

Conclusion
Modern metal buildings are the perfect solution to create an additional room for children, hobbies, or even rentals. They add value to your property and earn you some extra cash if you put the metal barn on rent.
However, the construction of a metal house can be a daunting task. But no worries, as Steel and Studs supply the best quality metal building homes, we even assemble metal buildings & metal carports at lowest cost possible to you!
Steel and Studs is your ideal metal building partner, as we can fulfil all your shelter needs, from metal carports to greenhouses to metal storage sheds to portable garages, solar carports, aluminium carports, portable carports, etc. Interested in knowing more about our services and products, please feel free to email or call us! Our customer service representative will guide you with your zoning rules and further queries on a free consultation call!
Metal Carport Delivery & Installation Across the USA:
Customer service representatives will contact you ahead of time to schedule your delivery date in your location. We offer metal carport installation services in 48 US states, including:-
| Locations | Locations | Locations | Locations |
|---|---|---|---|
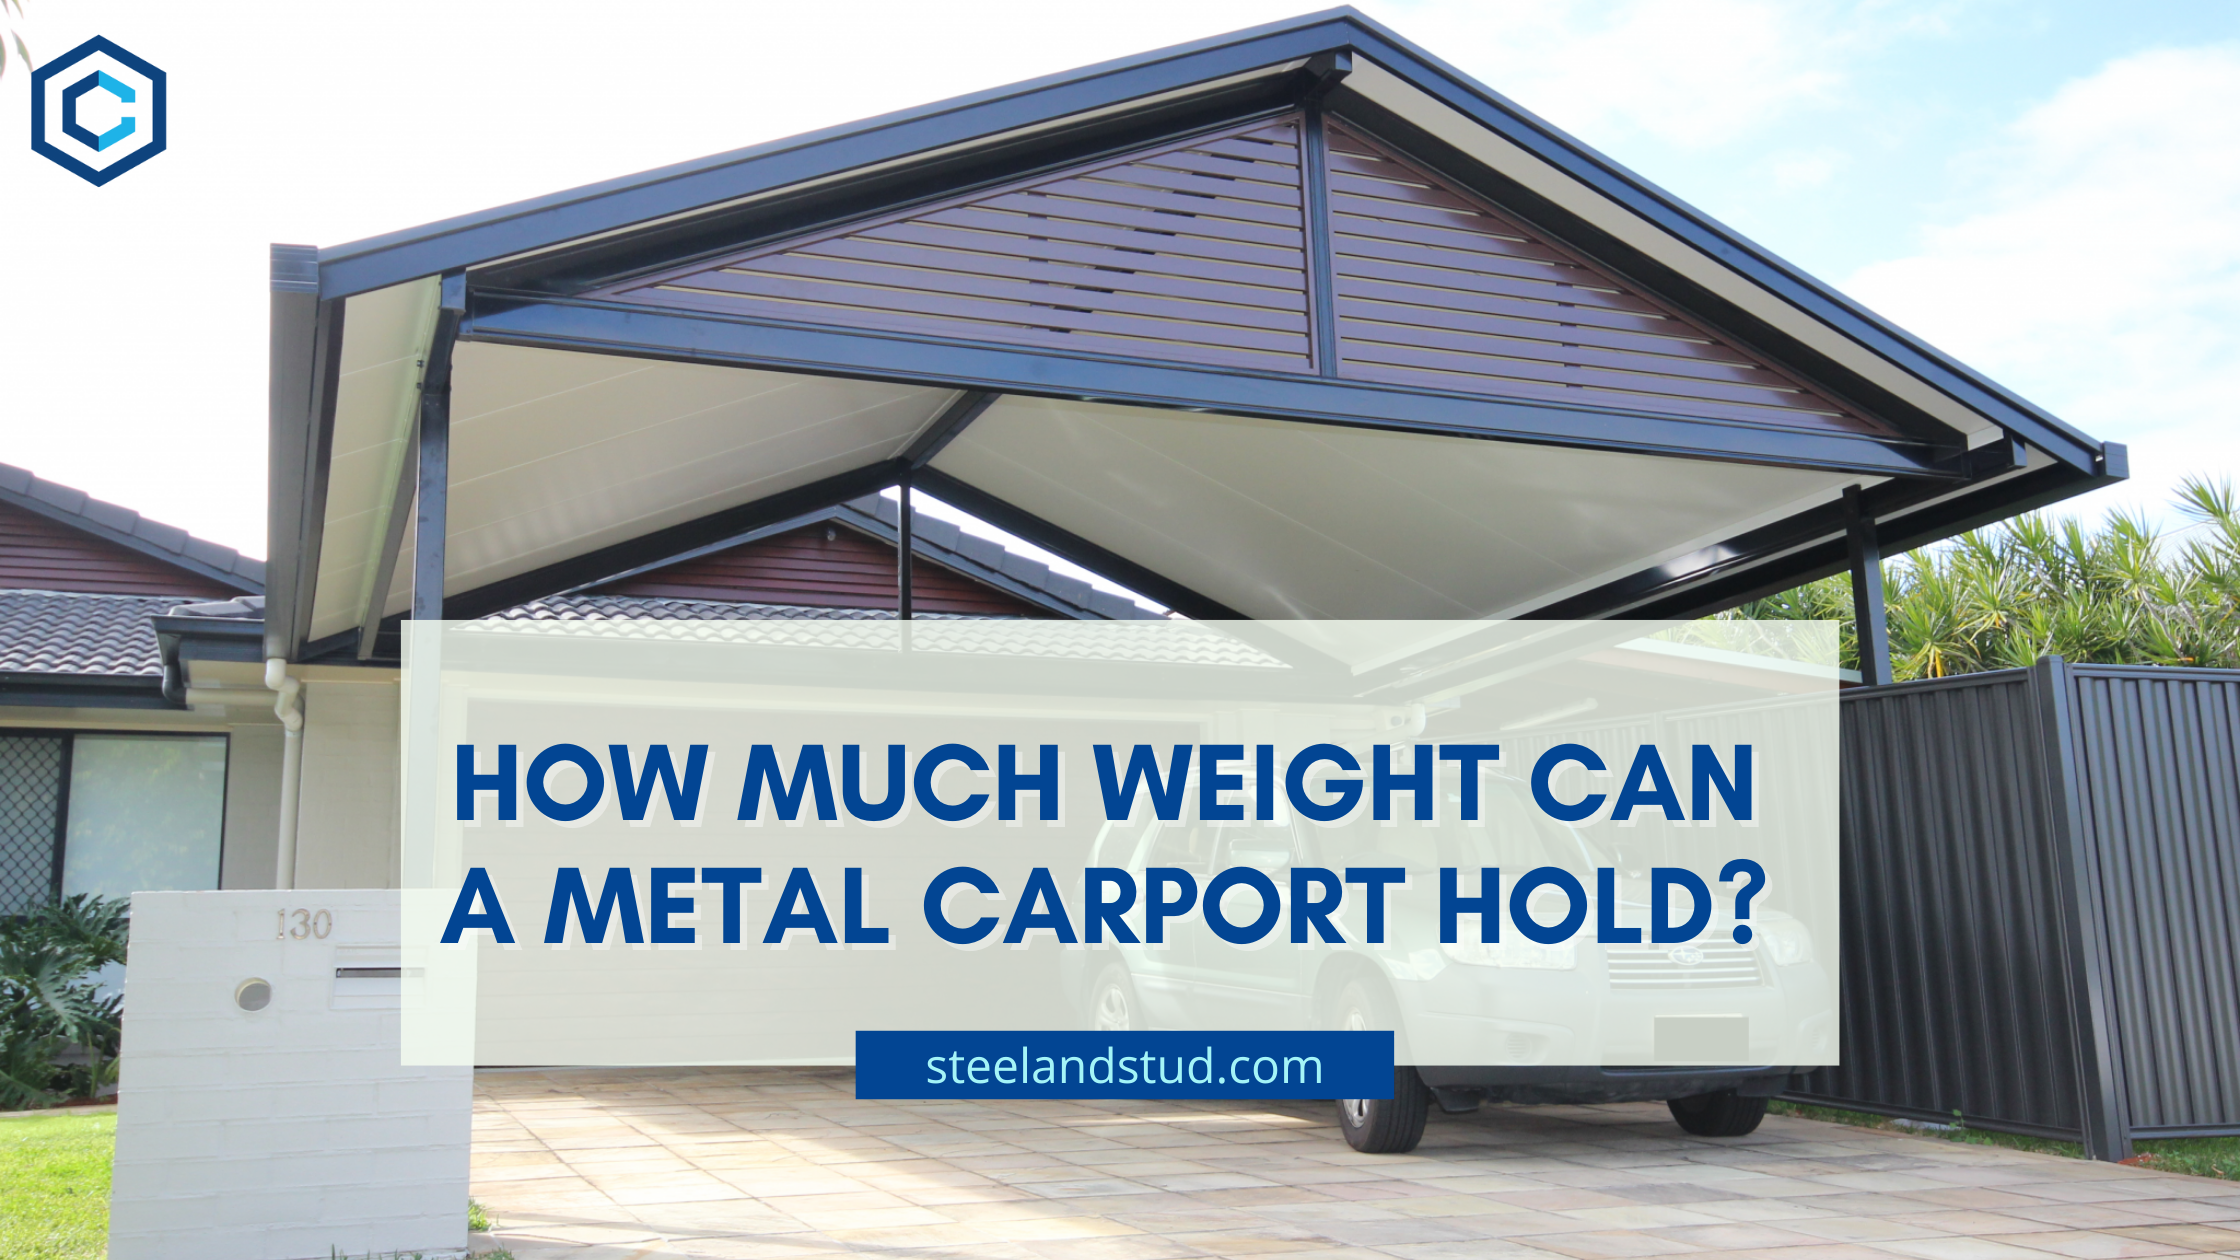
How Much Weight Can A Metal Carport Hold?
by Kunal Singh
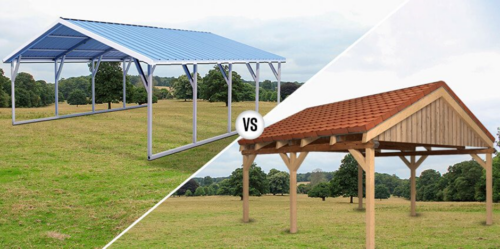
A metal carport is a structure designed to protect valuables like cars from harsh weather conditions like heavy rain, high mountain snowfall and direct sun. It also protects your car from falling debris. There are different types of carports made in different designs and using different materials.
Table of Contents
Metal carports are considered to be stronger and more durable as compared to carports made from other materials. They are considered to be safer options for barn storage buildings and protecting valuables. They are strongly anchored, thus, giving better protection against strong winds. Their sheet metal buildings are safer in case of fire.
Metal is quite a fire resistant as compared to wood, or plastic and are also rodent resistant thus making them more efficient than wood. Generally, galvanized steel is the material that is mostly used in making metal carports, thus, having a relatively lighter weight and maintaining an overall strength that is greater than wood.
How Much Weight Can Metal Carports Hold?
In determining the strength of a carport; roof loads, snow loads and wind loads are very important to consider. There are Winter Carports that can withstand heavier snow load, stronger snow load winds or other roof loads are considered to be stronger, and thus, more efficient. The loads are calculated by taking into consideration the column dimensions, the size of the beams and joists. Other additional factors that can be used in determining the weight of the carports are live-load capacities and dead-load capacities.
Protection of your car during snowy seasons must be guaranteed by a sturdy metal carport, which will not cave in to the amount of weight exerted on its roof by the snow. Fortunately, for most metal carports, they can withhold up to 20 pounds per square foot (PSF) of snow. The metal carports are metal buildings made in such a way that they are sturdier than regular roofs of wooden carports. Other metal carports have the capability to withstand up to 18kgs or 40 pounds PSF of snow.
Moderate snow might seemingly look light and therefore; one can conclude that it cannot cause havoc to a carport. However, the weight of each snowflake, when added to another upon another, and thus dealing with an accumulation of over an inch of snow, the weight could be recorded up to 20lbs per cubic foot. This results into a force of 1.25lbs exerted per inch of depth over a square foot.
Therefore, if your metal carport is more than 200sq feet, and there are two inches of snow accumulated, then there would be 500lbs of snow in the roof. This weight could vary depending with the shape of the snowflakes.
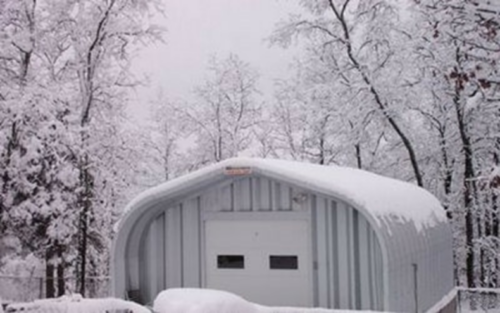
With such amounts of weight accumulating on the roof, there is a likelihood of the roof collapsing. Partial collapse can happen to some of the carports leaving a part of the carport broken, crumbled or bent. If not taken care of, the carport may completely crumble and destroy the items underneath. There have been cases where carports have fallen destroying completely cars and other valuables stored in the carports.
It is not advisable to assume that carport suppliers and insurance companies can automatically pay for the damages. In most cases, home owners have been left to pay for the damage themselves, after having found out that the companies cannot be liable since they are the ones who chose the type of carport design.
A good number of the carports that are sold in areas where snow is a possibility include the snow load capacity in their metal structures’ features. People living in areas that experience snowy weather conditions should estimate the heaviest ground snow load that has happened in the area and then look for a carport that exceeds that amount by 10% or more.
This is important as it assures safety even from snowstorms that are unpredictable. Besides, the carport should have a stronger framing, and a thicker metal roofing for it to manage to hold up snow weight.
Properly installed flat roof carports have the capability to withhold more than 30lbs PSF. This means that the difference in the roofing style of a carport determines the efficiency in which a carport can withhold weight. Different roofing styles ensure that loads are handled differently.
Some loads can be swept off easily from roof tops by using a snow rake, while others are withheld on these rooftops making them hold more weight in the long run. Other roofing styles have been made in ways that they reinforce their strength making them sturdier and able to withhold inclement weather conditions.
What are Some Roofing Styles of Metal Carports?
Regular Roof Carport
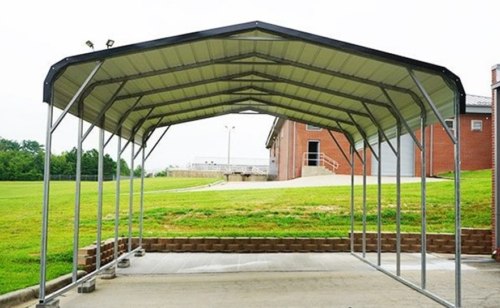
Regular roof carports have edges that are rounded. They are efficient for mild rain, mild wind and sun thus holding up well to ensure the items inside are safe. Rain water washes across the roof panels making sure that the items underneath are dry.
However, during harsh weather conditions like heavy rainfall, significant snow, or intense winds, regular roof carports are not ideal for the job. This will call for more sturdier roofing options.
A Frame Roof
A-frame roof is also referred to as boxed-eave roof. Such roofs operate more like the regular roofs. Notably, if the carport is more than 31feet in length, the A frame might not be an ideal type of roofing to use. The carport A-frame roof is also very efficient for use in areas that receive mild weather conditions. Strong winds might be destructive to the roof angles and thus, damage the carport and the items underneath.
Vertical Roof Carport

Vertical roof carport is the strongest option to consider. It is capable of withstanding more severe weather conditions and do it for quite a number of years. Of the three mentioned roofing styles, the vertical roof style is the strongest of them all.
The strength of the vertical-roofed carport is derived from the vertical panels that begin at the peak of the carport and run over to the eaves. When dealing with strong winds, pilling snow fall and very heavy rainfall, this roofing style is the most ideal for the carport. Besides, it is less likely to rust compared to the regular and A-frame carport roofing styles. If the carport extends in length to more than 31 feet, the vertical roof is very much ideal. The roofing style ensures that there is less likelihood of leaking around the seams.
How Much Does a Metal Carport Weigh?

The weight of carports varies depending on the material they are made of. Carports can reach the weight of 2,000lbs. However, most of them weigh between 700lbs and 1000lbs. Metal carports, are lighter than wood carports whose weight is attributed to their solid nature.
The examples below provide an illustration of a rough estimate of how much metal carports could weigh.
Consider a metal carport of dimensions 18ft W x 20ft L x 7ft H: This steel carport as a whole package weighs about 861lbs which is a very common weight. These steel carports have the capabilities to hold up to 22lbs of snow. It can also hold wind velocities reaching 90mph.
Another metal carport of dimensions 20ft W x 20ft L x 7ft H can weigh up to 918lbs and thus withstand weights of snow up to 22lbson its roof. The carport can also withstand high winds of velocity 90mph. The use of versa tube technology – a technology that focuses on prefabricated structures – ensures that the structures are light weight but also very strong.
The technology is also lauded for ensuring that the carports fit particular and specific dimensions during their pre-fabrication stage, thus ensuring that wastage of material is reduced and ultimately raising the cost reductions to about 60%.
Why Does the Weight of the Carport Matter?
The weight of the carport matters a lot and should be considered. In determining the durability of a carport during extreme weathers, weight-to-strength ratio of the carport should be considered. This means that the carport’s weight should be distributed in such a way that it is not too heavy that it causes trouble while being moved and also that it is not too light that it can be swept off by strong winds or collapses to heavy snowfall.
The weight of your carport matters to you since it affects the mobility of the carport. Someday when the need to move the carport arises, and the carport is heavy, it will be tiresome to break it down and re-assemble back the structure at the installation site. Besides, transportation of the structure after it has been broken down might require you to use heavy machinery that could make the whole process costly.
Wind Load Certification
Wind can manifest itself in various forms depending on its strength and speed. Hurricanes for instance, are classified from 1 all the way through 5. Hurricanes recorded to reach category three and above are considered to be major hurricanes; due to the risk they impose on property damage and death. Category three can have speeds of wind varying between 111-129 mph, category 4 at 130-156mph and category 5 at 157 and above.
Certified metal carports have the ability to last these extreme levels of wind and hurricanes. A homeowner is advised to check the highest ratings of wind tolerance by finding out the wind load calculations of their area.
Tornados are very strong and it is very difficult for a carport to withstand the sweeping strength of the tornados, especially if there are debris carried by the tornado, that would hit hard the carport.

Despite the strength of the wind experienced in a particular area, it is paramount to check keenly the wind ratings of the carport that you want to buy or install. To ensure you purchase or install the metal carport that will serve your desires and match the weather challenges in your area, ensure you ask the metal carport dealer to show, explain and make available the engineer drawings which are stamped by the engineer, and licensed within the state in which the carport is being built in.
Reputable dealers such as Steel and Stud will undoubtedly provide such documents. If one does not, then it is advisable not to buy from that dealer. Installation of a carport without having checked the wind load certification could frustrate you in the long run.
Need Help to Prepare for Your Carport Installation? Call Us
Does this feel like too much work or too complicated? But there is no need to feel overwhelmed by the installation process. Steel and Stud’s team of able engineers are always eager to help you with the installation.
Just give us a call, and our customer service representative will instantly get in touch with you. The representative will guide you with every question, from which carport fits your needs to county regulations and when a team of engineers can arrive at your doorstep to install your carport within a day or two.
The best part? We offer professional carport installation services at very competitive rates so that you can enjoy a perfect installation and have the best bang for your buck!
Metal Carport Delivery & Installation Across the USA:
Customer service representatives will contact you ahead of time to schedule your delivery date in your location. We offer metal buildings with living quarters installation services in 48 US states, including:-
| Locations | Locations | Locations | Locations |
|---|---|---|---|
Frequently Asked Questions
Are Metal Carports Safe to Use?
Carport or metal building are stronger and sturdier. They are safer to use as compared to carports made from wood.
How Much Weight Can a Carport Hold?
Different carports hold different amounts of weight. It is important to look at the snow load specification, wind load certification and other weight features detailed by the engineer of a particular carport.
Can Carports Secure Other Valuables Other Than Cars?
Carports are not limited to storage and securing cars only. You can store and keep safe other valuables like machinery. Besides, you can use your carport space as an outdoor workshop, or use it for any other purpose.
Can Carports Be Blown Off By Wind?
There is a possibility to have your carport blown off by the wind. However, having qualified personnel installing your carport will ensure that the carport has a stable anchorage on the ground and thus, cannot be blown off easily. It is also important to purchase a carport that matches the wind loads of your area. Consult engineers for such advice.
Are Carports Fire Resistant?
Fire resistance is determined by the type of material used in the construction of a carport. Wood-made carports are not resistant to fire and can easily be consumed by fire. However, steel carports, just like any other metal building, are fire resistant. Metal carports can hold fires and protect your valuables underneath. Besides, metal carports protect your valuables against animals like rodents since metal cannot be consumed by rodents.
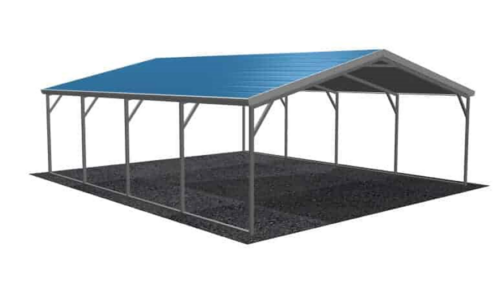
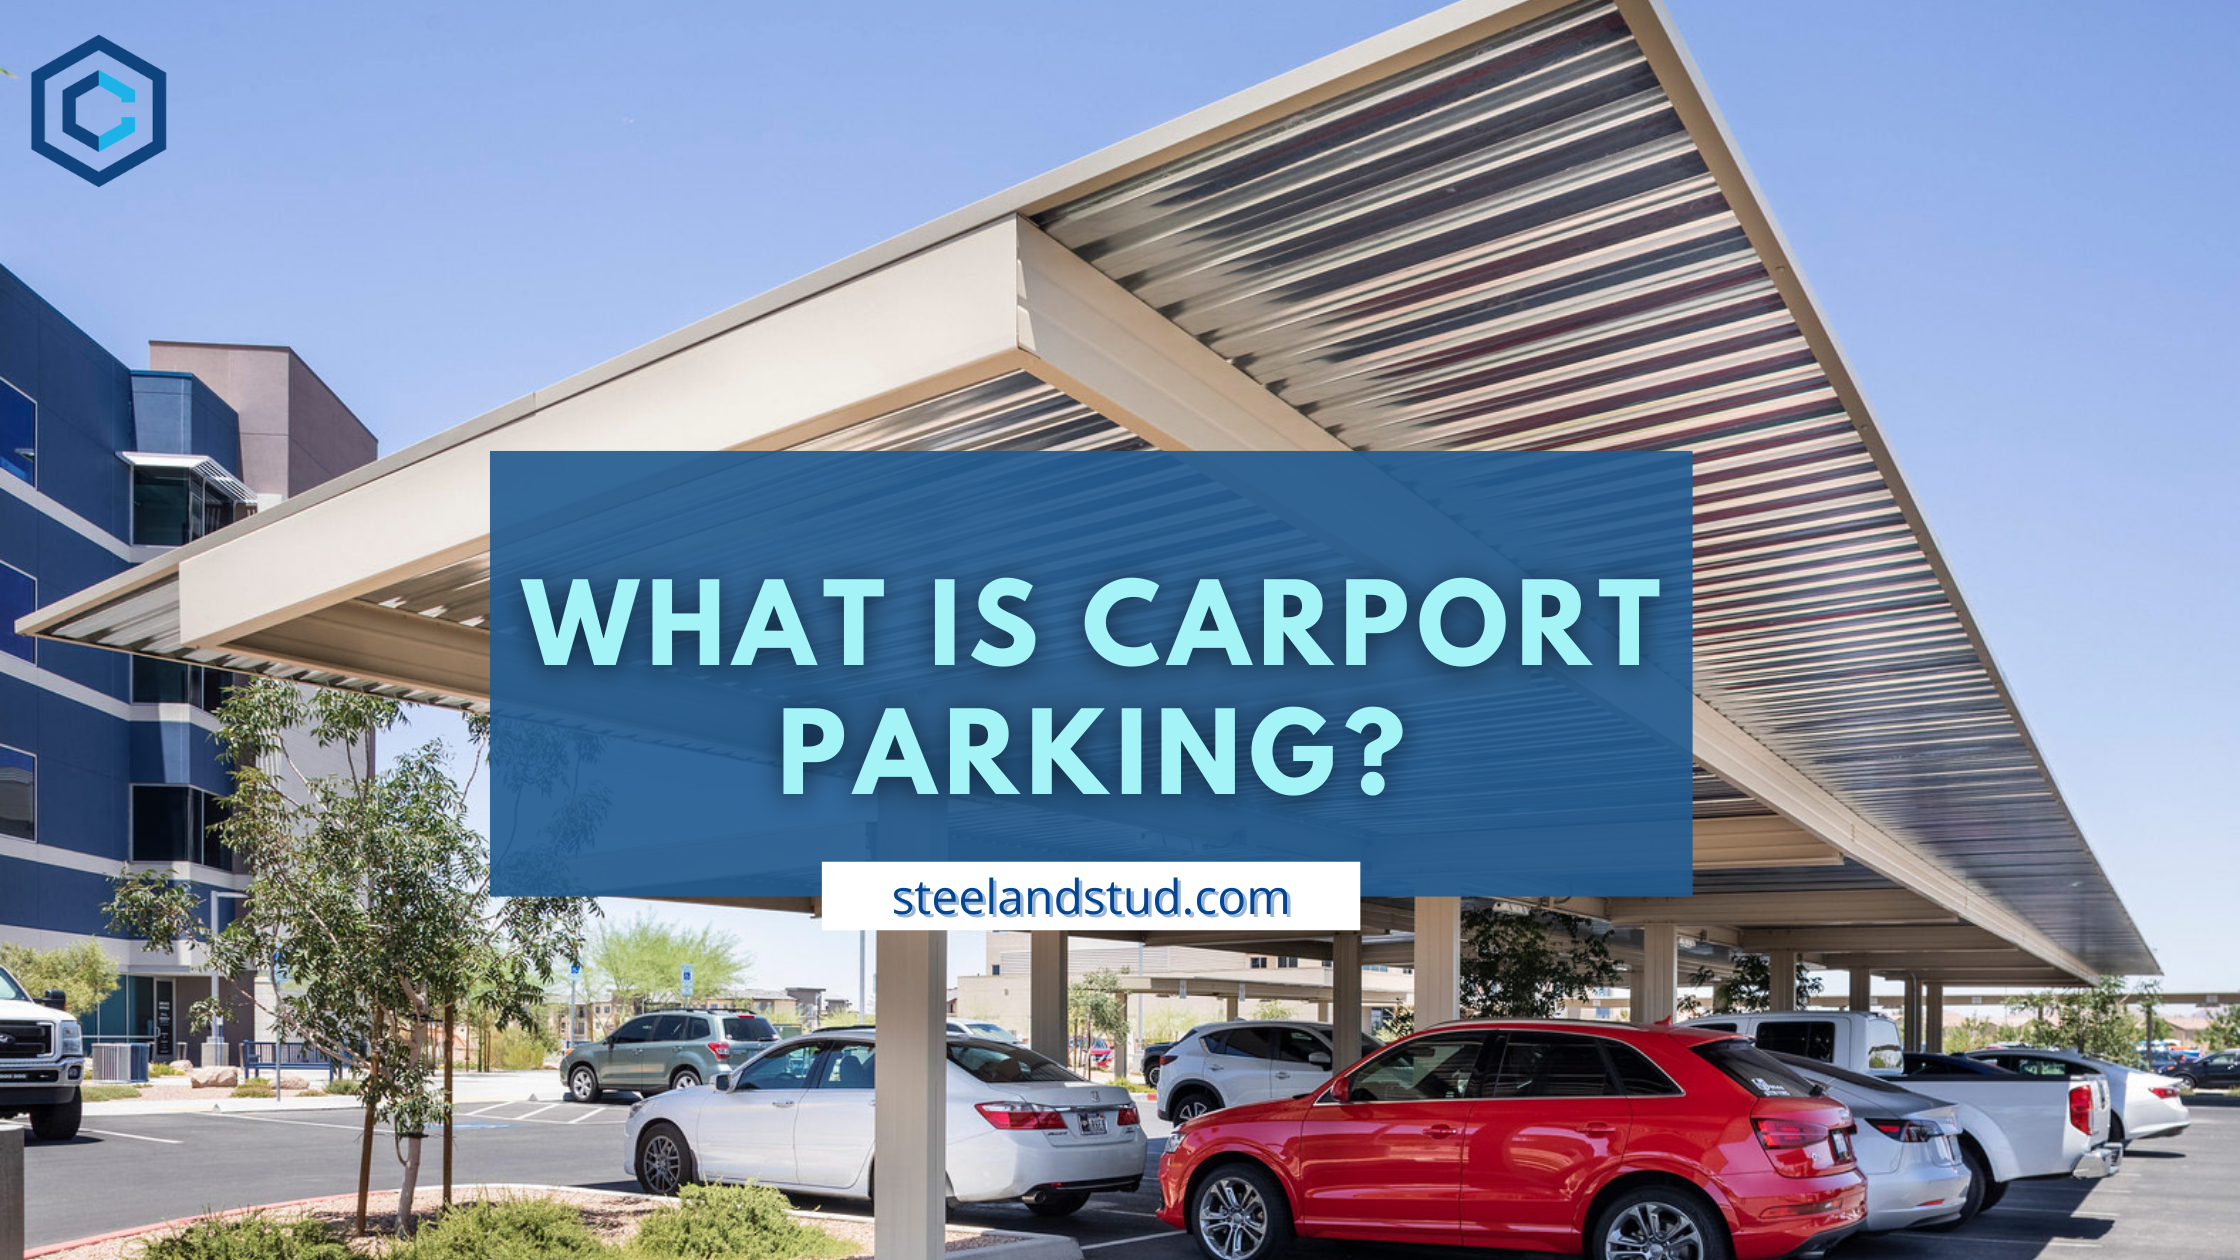
What Is Carport Parking?
by Kunal Singh
Carport parking is a car parking arrangement where a carport is installed over a car parking spot around an existing building or as a standalone structure. This parking arrangement aims primarily to shield vehicles from weather elements, including rain, sun, and hail.
In case you are wondering what carports are?
Carports are steel structures with a roof supported by metal posts with or without covered sides usually used for parking cars, RVs, and trucks. Traditional carports are typically attached to a house, while some may be free-standing.
Table of Contents
Benefits Of Carport Parking
These are some of the benefits of carport parking:
Weather Protection
The risk of torn tree branches, tree debris, and extreme weather affecting your vehicle can be significantly reduced with a carport. Your vehicle remains in a user-ready condition while parked under your carport compared to the terrible state it may be in if it were not parked under a carport.
Provides Some Security
Carports directly attached to a home offer basic protection to vehicles by allowing owners to see their cars from inside the house. This may not be realistic for standalone carports.
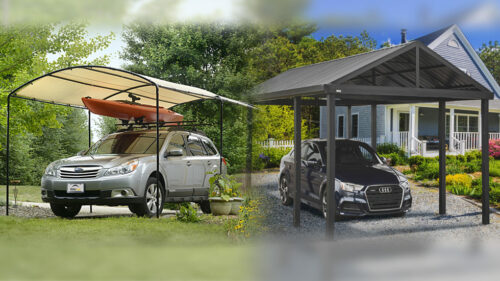
Cheap to Build
Car owners looking for an economical option for a garage can build a carport on their properties. Standard carports for one or two cars cost less than $10,000, while similarly sized garages may cost over $20,000. Modern carports made of fabric also exist for the benefit of buyers who wish to save even more costs.
Easy to Set Up
Carport building kits from Steel and Stud are shipped to clients most carefully, with each section appropriately sized for site installation. Although we provide professional installer services, if you are a DIY enthusiast, our carports are easy to install if you follow the attached instructions. They are easy to install on both new and existing construction properties.
Add Value To Your Home
Carports can serve as high-value features that attract buyers and tenants. For buyers, the only deciding factor for some investors is the availability of covered parking asides from other conveniences available in the house. Carport parking can help you retain your tenants longer, while you can charge a monthly fee for the use of installed carports.
Fast Council
Carports are more easily approved compared to other structures. Most carports structures do not conflict with most local town planning regulations, especially when they are standalone. Council approvals still take longer for building extensions like garages and metal structures when attached to buildings.
Solar Carports
Modern carports are compatible with solar panels allowing vehicle owners to charge their electric vehicles and power some home appliances. Solar panels can be bought for a structure or sold as kits. It may require expert services to install.
Under-cover Activity Area
Facilities such as gyms and family play areas can be created using carports. This brings further value addition to a family’s home experiences.
Carport vs. Garage
Carports can be wrongly used interchangeably with garages. Although both structures are primarily used to protect vehicles, they have distinctive structural features, varying costs, and protective features. The major differences between carports and garages are discussed below:
Structure
A carport is a covered structure supported with metal posts on at least four points which increases depending on the size of the carport structure. These structures may or may not have a covered side and can be used to park a car, truck, or recreational vehicle. Carports offer a minimalistic use of materials compared to traditional garages.
Comparatively, garages include an enclosed construction model. They are typically walled on all 4 sides with a standard roof structure.
Protection
Carports offer limited protection from weather elements such as rain, sun, and snow. The most common metal carports are metallic and modular in style—the new modular carport style compromises rigidity. Also, the lack of one or two walls puts vehicles at risk during extreme weather conditions such as thunderstorms and heavy snowfalls, which are rare.
Garages provide the highest level of protection. Vehicle owners who require elaborate shelter can be sure of better protection in extreme weather conditions. Walls also protect vehicles and other properties against vandalism and robbery.
Affordability
Garages can be constructed to accommodate varying numbers of cars which attracts considerably higher costs. According to Forbes, a two-car garage can cost over $20,000 to construct on a property. Comparatively, carports cost less than half as much as garages. Carports come in prefabricated construction kits shipped to the client to be installed on-site.
Different Parking Kits Available with Steel and Stud
There are two major parking types: on-street parking and off-street parking. On-street parking means parking on the street because there is no parking space on your property. Comparatively, off- street parking is where Steel and Stud’s parking kits come in. Several off-street parking kits are available for sale with Steel and Stud.
Breezeways: These are built between two structures
Carports: Our carport kits are roof extensions of a house structure used for parking.
Detached Garages: They are in different sizes and shapes and typically accommodate more than one vehicle.
Indoor Parking: The parking area is completely enclosed in this case, which applies to our barndominiums.
Conclusion
Carport parking is an excellent addition to any property. Although their primary use is to protect vehicles, they can add value to properties and offer utility areas around a building. At Steel and Stud, we sell premium quality carport kits and other metal building kits. Contact us today.
FAQ’s
- Is Covered Parking Good for you?
Covered parking garages are good for you because you can enjoy several benefits by installing one. It offers protection from various natural elements helping to preserve your car’s life and performance. - How long can a car stay parked in front of your house?
In most areas, cars parked in front of the house should not be left unattended for more than 72 hours. - Can I park on my street overnight?
It is dependent on local laws, but in most areas, drivers are permitted to park on the street overnight without a permit. - Is it illegal to park on the street in front of someone’s house?
No homeowner can reserve a parking spot on the streets in front of their houses. However, it is generally not an inconsiderate move. - Is the street public parking?
Public parking spaces are off-street parking areas that have a capacity of over 4 spaces. However, all street roads are designated public property. - Can I park on a street with no signs?
You can park legally in all public spots with no “no parking” sign to say otherwise. - What is on and off-street parking?
On-street parking refers to vehicles parked on the roadside, while off-street parking is a parking arrangement provided within parking lots or a garage. - What counts as a residential parking area?
Residential parking areas refer to parking arrangements made for residents of a building. - What is considered street parking?
Street parking refers to parking spaces available for vehicles to park on a street in an area - Does a carport protect your car?Carports can protect your car from weather elements, including rain and snow.
- Does a carport add value to your home?
Yes, a carport can considerably raise the value of your home. - How do I make a homemade carport?
Buy a carport kit from us at Steel and Studs and proceed to install it by yourself using a manual. - Do you need a building permit for a metal carport?
Depending on local laws, a building permit may be required to build a carport structure on your property. - Which angle parking is best?
45 to 60 degrees are perfect for all parking spaces. - How does a car park system work?
A car park system works by minimizing overall land usage for parking such as an Automated Car Parking (APS) system. - What is car parking?
It is the act of halting a vehicle to leave it unoccupied. - What is the difference between a car park and a parking lot?
A car park is used in British English while a parking lot is used in American English.
How to Anchor a Carport?
by Kunal Singh
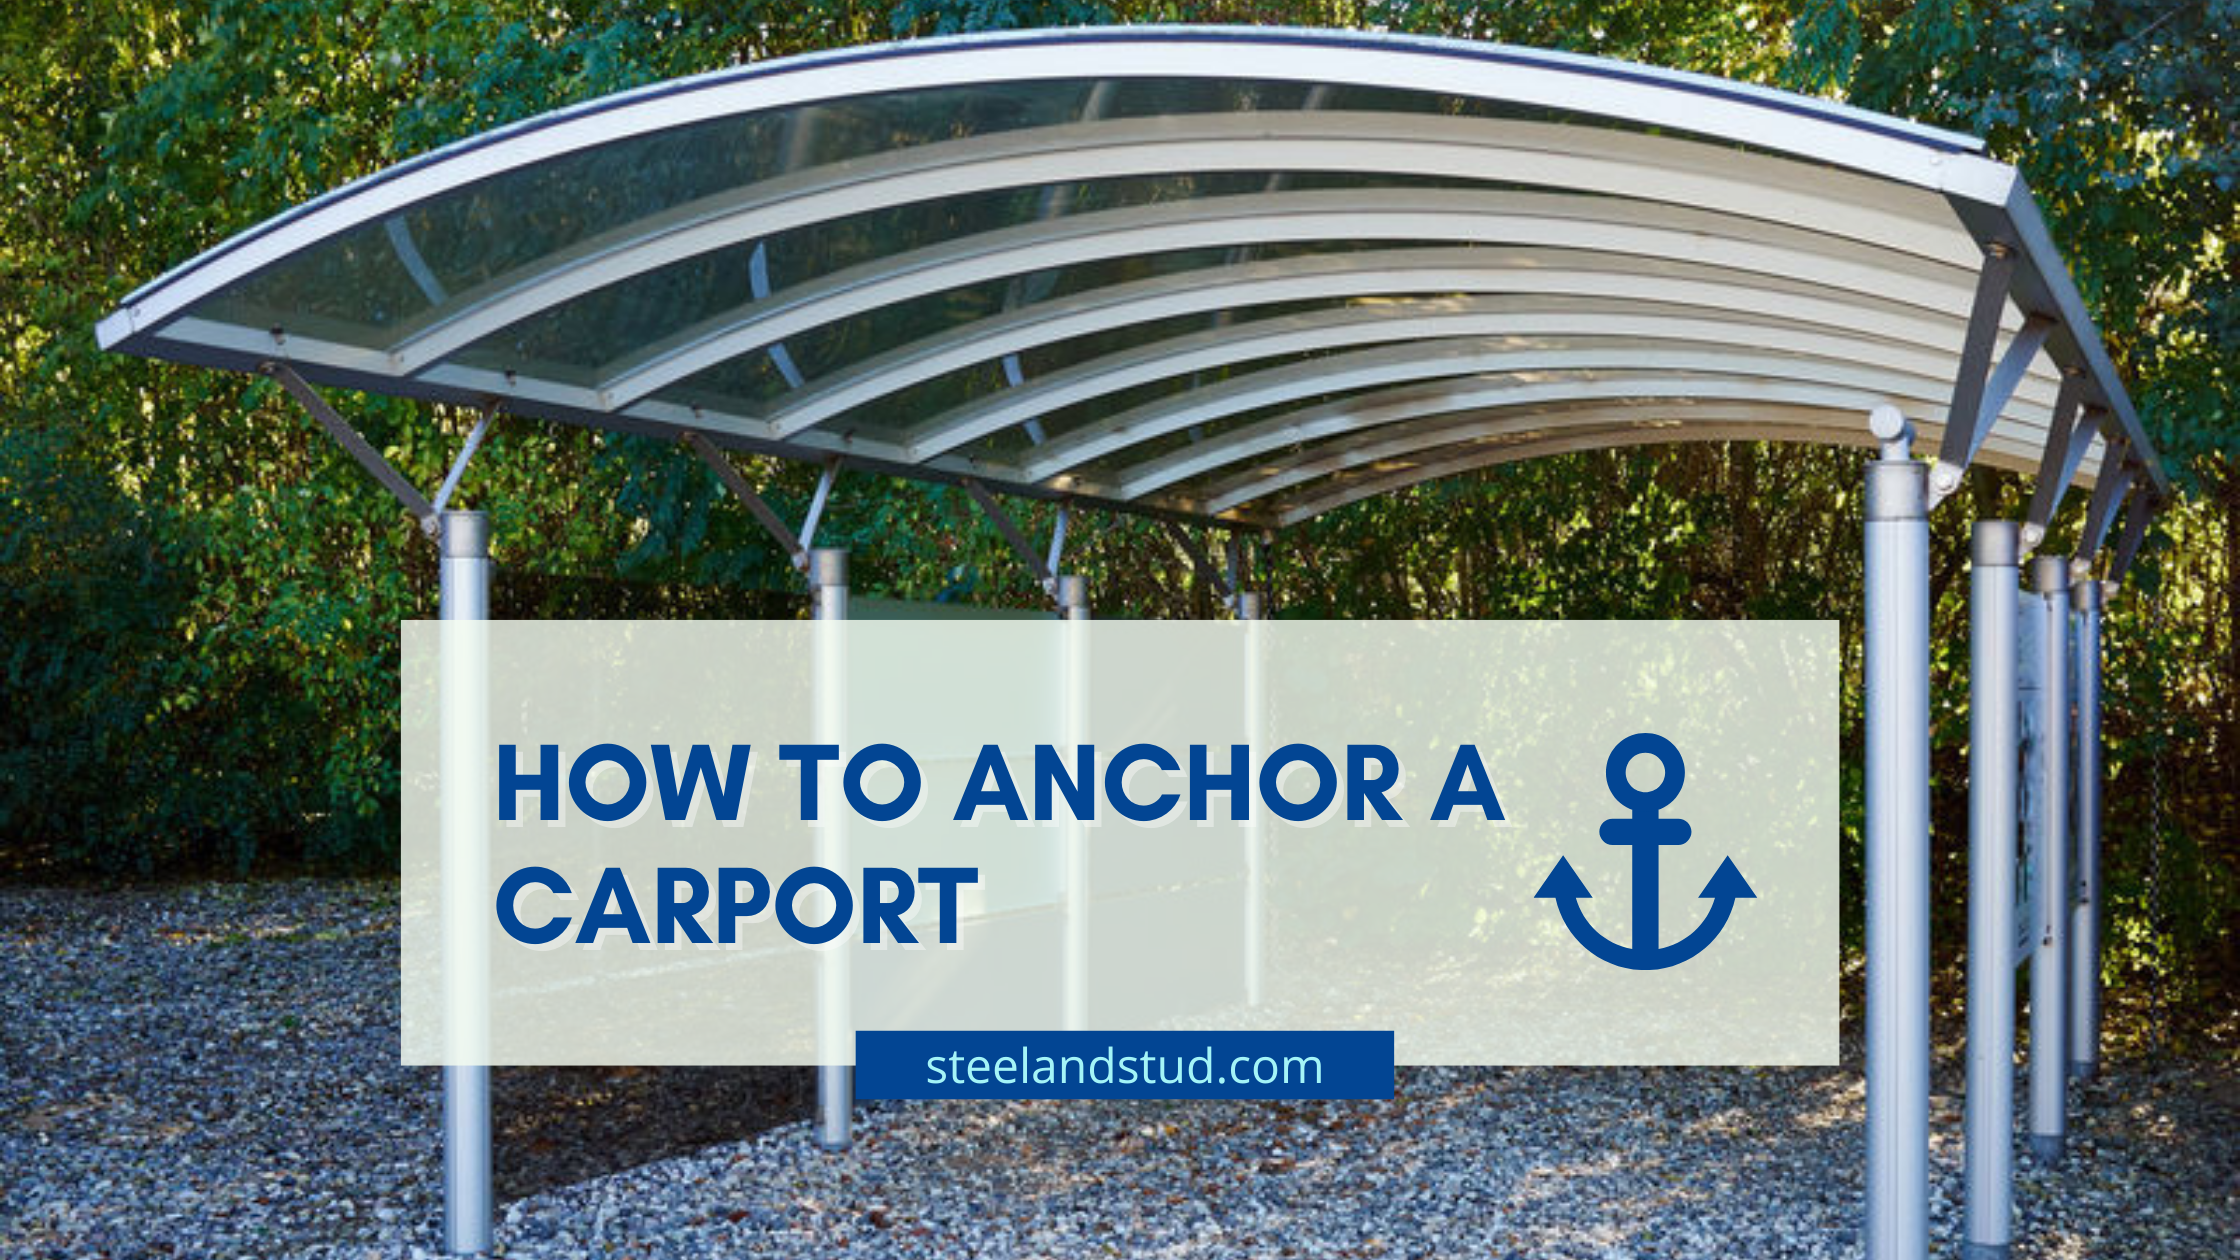
Have you been wondering how to anchor a metal carport? The process of anchoring a carport to dirt is simple and basic. It all depends upon the anchoring parameters affected by the region influence in which the structures will be constructed.
Whether you have a certified building (the one that has been designed to withstand particular snow and wind loads) or a non-certified building (one that may be constructed in locations where certain construction codes, such as snow and wind loads, are not required), It’s critical to ensure that your metal carport is properly anchored to the ground as part of your installation so that it can withstand strong winds, snowdrifts, and severe rains, among other harsh weather condition. The makers and manufacturers of custom metal carports provide step-by-step installation instructions. Anchoring the carport is a vital part of the installation process. The carport will be protected from harmful winds by strong carport anchors.
Let us start from the basics before understanding metal carport and how to anchor a carport!
Table of Contents
Metal Carport-Protective Shelter
Carports are not as large as the usual garages we see. Still, they are designed to give some space and shelter for an automobile and to keep drivers and riders out of the rain and other weather conditions while entering or exiting one.
Carports come in different types and are identified by their construction materials far more than garages are. Carports are generally made out of a roof having one side linked to a structure such as a house and supported by pillars. Preparing the carport base before installation is a must to anchor a carport. Whether you want to build a metal structure on your property, check with your local city or county planning offices to see if you need a construction permit. The type of foundation you pick to set your steel carport or metal building on determines how much groundwork you must do to prepare your site before our experts arrive to install it.
A few Benefits Of Owning A Carport Includes
- Carports are simple to operate.
- Theft and vandalism are deterred.
- It offers a basic and attractive design
- This product is suitable for any type of car.
- Carports are a low-energy storage alternative on the ground.
- Carports provide additional space that may be used in various ways, and it comes in different types.
Tools And Materials Needed for Concrete Anchor
For concrete anchor, below are the tools & materials needed –
- Portable metal carport
- Cement, Shovel
- Concrete drill bit
- Hammer drill
- Anchor bolts with wide thread
The carport will set you back roughly $1600. It’s possible that a bag of cement will set you back approximately $40 to $50.
The average cost of a shovel is roughly $20 to $30. The cost of a nice concrete drill bit is around $30 to $40. A regular hammer drill will set you back around $70. As a result, the total cost of this treatment might be $1650 or less.
Anchoring System of A Carport –
While understanding how to anchor a carport, follow the stages given below mindfully.
Stage 1: Make a grid around the location where your carport’s foundation or poles will be.
Stage 2: Insert the concrete drill bit with direct pressure on the hammer drill. Create a center hole in the design using these two. You may dig the trenches as deep as you wish, as long as you don’t compromise the height of the carport. It is best to have a deep foundation for the carport to stand on, rather than one too short for your car to fit into or stand on. Make sure there is less dirt.
Stage 3: Assemble the cement mix. Make a shallow crater in the cement powder’s centre. The crater must be around half the pile’s length or diameter. Fill the little crater with water. The recommended formula is one part water to three parts cement. Thoroughly mix the water and cement with your shovel. You may adjust the texture of the mixture by adding additional water or cement.
Stage 4: Pour the mixture into the four holes that have been made. Every hole should be covered by approximately an inch or two. This will be the foundation for the cement mixture.
Stage 5: Pour cement into the holes where the carport’s support or poles will be installed on the surface of the ground.
Stage 6: Fill the sidewalls of the holes completely with cement. Apply a uniform layer of cement over the whole surface. Ensure that no one steps on the cement until it has hardened.
The process is done. You may now enjoy your carport once the cement has dried completely.
How To Anchor A Carport To Concrete
Stage 1: The first stage in constructing a carport on a concrete slab is to verify that the surface is smooth and level. Here we are providing a guide on How to Level ground for carport for your ease.
Stage 2: Whenever your concrete slab was just placed, you’ll want to make sure it’s entirely dry before drilling into it.
Stage 3: To identify the optimal location for placing the anchoring points, see the manufacturer’s paperwork provided with your carport type.
Stage 4: Now, you’ll need to drill holes in both the cement and the foundation rails of your carport for your concrete anchors, ensuring sure they line up. Use a masonry bit and a drill with enough power. You might also hire a handyman or a contractor to conduct the drilling for you.
Stage 5: Place additional concrete expansion material in the holes you’ve drilled and begin tightening the nuts with locking washers, making sure you have the suitable length anchors for your installation. Before you finish tightening the bolts and nut, ensure all of your anchor points are accommodate the spines and is aligned properly.
Stage 6: Attach the carport foundation or poles to the cement anchors that have been erected.
The process is done!
How to anchor a carport to gravel (Crushed Stone)
Stage 1: To begin, evaluate the surface for levelness and the presence of any foreign materials such as bigger rocks or branches. Any uneven gravel may be evened out using a rake.
Stage 2: The anchor holes in the foundation rails of your carport construction should then be located. If they haven’t already been drilled, drill each of these holes. Make sure there is no dirt.
Stage 3: You might have to use a post digger or another instrument capable of drilling a hole large enough to accept the anchors you’ll be using, based on how hard the ground surface underneath the gravel is.
Stage 4: Push each anchor into the ground surface under the carport by threading it through the matching hole in the foundation rails. You’ll need to either prop the anchors up or have a second pair of hands to assist you to keep them stable.
Stage 5: With the sledgehammer, pound the anchor into the ground surface, being sure to strike straight down on the anchor head.
Stage 6: Placing each anchor into the ground surface until it is flush with the base rails is the final step.
Stage 7: Connect the carport foundation or poles to the anchors that have been placed.
The process is done!
How To Anchor A Carport to Dirt
Stage 1: Begin by evaluating the installation location to ensure that it is level and free of any obstacles. It’s good to measure and record the measurements of the area you’ll need for the carport, as well as to leave some additional space around it.
Stage 2: If the anchor holes in the foundation rails of your carport construction are not pre-drilled, drill them out. Make several pilot holes in the ground right beneath the anchor holes in the foundation rails as well. Make sure there is no dirt.
Stage 3: An auger anchor, also known as a mobile home anchor, is the most commonly suggested form of anchor for putting a carport in mud or soil. These anchors have a large thread that allows them to be screwed into the ground.
Stage 4: Push each anchor into the ground under the carport by threading it through the matching hole in the foundation rails.
Stage 5: Drive the anchors into the ground by sliding a metal rod, the handle of a robust tool, or something similar into the eye hole of the anchor and twisting clockwise. Continue to screw each anchor into the ground until it’s flush with the base rails.
Stage 6: Connect the carport foundation or poles to the anchors that have been placed.
The process is done!
How To Anchor A Carport To Asphalt
Stage 1: Make absolutely sure the asphalt surface is level, polished, and clear of any debris or tiny bits , dirt or impediments.
Stage 2: Find the holes you’ll use along the foundation rails of your carport and drill them out if they aren’t already pre-drilled.
Stage 3: Drill your anchor holes in the asphalt using a masonry bit, aligning them with the holes in the foundation rails. You don’t want to use too much force; instead, let the drill do the work.
Stage 4: Fill the holes with grout or another bonding medium, but immediately install the anchor straight, as these materials dry quickly.
Stage 5: Thread the asphalt anchors or earth drive anchor through the base rail holes and into the previously bored underneath holes.
Stage 6: As the bonding compound dries, make sure your anchors stay upright, holding them in the location if necessary.
Stage 7: To the asphalt anchor, secure the carport foundation or poles.
The process is done!
How To Anchor A Portable Carport –
Barrels of water:
This is an old-fashioned means of fastening above-ground structures, but it will suffice in an emergency. Even a handful of barrels can provide adequate anchoring because a single water-filled barrel can provide up to 500 pounds of resistance.
Sandbags:
Sandbags are another easy and cost-effective solution for weighting and stabilizing your carport. They are not, however, suggested for long-term usage to sustain harsh weather conditions like high winds and heavy snowfall.
Precast concrete blocks:
Another alternative is to secure your carport using concrete blocks. Just keep in mind that they can weigh anything from 500 to several thousand pounds, making relocating them difficult.
How to anchor RV carport
Stage 1: Place post anchors in the concrete or dig holes for the posts and pour concrete in each hole. Make sure there is no dirt.
Stage 2: Your post holes should be evenly spaced. They’re around 8 feet apart. Make one side of the carport pillar longer and the other shorter to give the roof a tilt.
Stage 3: Connect the beams to the footing hardware using bolts. Ascertain that the beams are properly aligned.
Stage 4: Attach the rafters to the side beams. Make sure that all of the rafters are equidistant from one another.
Stage 5: Use a steel roof or fasten the plywood roof planks to the rafters
Stage 6: Caulk the plywood roof seams to make the roof watertight, and cover it with synthetic paper.
Stage 7: Metal plates should be used to attach rafters, beams, and plywood roofs to reinforce the joints. This will help to reinforce the framework even further.
The process is done!
There are several options for setting up your base, and some even enable construction on the ground using just concrete piers. The foundation of your construction is significantly influenced by your demands and the function of the structure. Your geographic location, local construction requirements, and the project’s intended function all determine how your metal building is anchored. To hold your metal construction in location, each foundation type requires specific anchors from rebar anchors, concrete anchors, auger anchors, asphalt anchors and more, all of which are carefully chosen.
Concrete Anchors: Different Styles and When to Use Them
People wish to possess and install a carport for a variety of reasons. It can be used for municipal, commercial, or residential purposes. These protect properties and people from the sun’s damaging UV radiation while also protecting them from the elements. They’ve been designed to withstand even the worst weather conditions.
Specifications and characteristics of anchors vary as well. The strength of the fastener material, the hole size (diameter), the length, and the thread size are all crucial factors to consider. Some anchors are detachable or non-permanent in terms of characteristics. Others are labelled bulk-fed and are intended for use with power equipment.
2022 Best Anchors for Metal building Anchoring System
Steel and Stud ensure only the best anchoring system for upcoming projects that require mounting metal buildings to solid concrete, a brick, or a block surface. Our technicians check the site and accordingly choose the best concrete anchors for a given application.
Rebar Anchors
The rebar anchor is a concrete steel bar with a stainless steel friction-welded threaded section. Exceptionally high tensile loads may be injected into the foundation material due to the concrete’s great load-bearing capability. It is great for mortared overlap joints, connecting reinforcements, and needlings.
Mobile Home Anchors – Auger Anchors
Mobile house anchors or Auger anchors are the first choice for anchoring prefabricated buildings on the unpaved ground. While mobile homes are frequently utilized as year-round, permanent residences, they may still be carried or moved if necessary. The ties, also known as straps, are usually made of steel and are meant to wrap around the mobile home and attach to ground anchors or earth drive anchors, or to secure the mobile home unit from beneath it and stick to the ground anchors.
Concrete Anchors
Anchor bolts or concrete wedge anchors are screw-bolt fastening techniques for attaching things to concrete. L-anchors, concrete I-bolt anchors, concrete strike anchors, sleeve bolt anchors, and floor anchors are examples of variations.
Asphalt Anchors
Asphalt anchors are a type of anchor that is meant to be used on asphalt surfaces. They’re ideal for affixing curtain barriers and walls, as well as installing road signs, stands, speed humps, bollards, fences, and other similar structures that require direct attachment to asphalt surfaces.
Metal Building or Carport Structure Delivery and Installation
Get in contact with Steel and Stud immediately if you’re seeking high-quality carports or metal buildings for your work vehicles or equipment storage. We are experts in metal building or structure with Delivery and Installation Included!
Carports are an excellent investment. They safeguard your automobile, which is the second most precious item in your home. It protects your automobile from precipitation, frost, hail, UV rays released by the sun, and much more.
Metal Building Styles Available with Steel and Stud
Steel and Stud guarantee that you will receive only the best carport for your house or company. Carports are simple to construct, but instead of dealing with the hassle, our customers receive expert carport installation regardless of where the steel carport kit is delivered.
RV Carports
An RV Carport is a tall covered metal structure that protects your Recreational Vehicle or Motorhome from severe weather. Customize and Order Your Metal RV Carport for the Lowest Deposit Online.
Steel Carports
Whether you like your automobile or simply want it to endure as long as possible, you’re undoubtedly well aware of the advantages of having it covered on the ground.
A carport is a steel cover that protects automobiles from the weather. Carports, unlike garages, have a roof but no sidewalls. Aside from making them more economical, this also means they don’t require construction permits, can be built in tighter locations, and are quick and simple to install.
Utility Carports
Utility carports are unique in that they have a tiny covered storage room on one end, allowing you to safely install your lawn tractor, outdoor maintenance equipment, or even your motorbike!
A utility metal carport combines strength, purpose, and flexibility to provide adequate weather protection for your cars.
Storage Sheds
An outdoor shed may transform the home by providing more storage space. You may lighten the weight in your house by using and installing creativity, ingenuity, and a little elbow work to make it more roomy and easier to live in.
Portable Storage Sheds
A portable, demountable, or transportable shed is one that is intended and constructed to be moved rather than fixed in the ground.
Canopies
A canopy is more than just a piece of cloth that is draped to provide shelter from the weather; it may also be decorated for outdoor festivities. A canopy is simple and easy to install, and it provides instant shade. A canopy, for example, may be used to shade your outdoor table or your favorite reclining chair.
Greenhouse kits
A prefabricated greenhouse is a kit that includes all of the essential components for installing a greenhouse. A prefabricated unit with cladding, a frame, and ventilation openings are included in the package.
And the list goes on. You may purchase any of the above or other materials from Steel and Stud without the assistance of a salesperson.
Metal Buildings Prices
Whenever it comes to metal building prices, the prices differ due to factors like material quality, door roofs, and more. You must have noticed that it varies from company to company. At Steel and Stud, we make sure to provide the most reasonable and best rates as compared to the market.
Contact us now for installing and to get an estimation of your desired customized carports.
Why Steel and Stud?
Steel and Stud have been newly established itself and aim to be the most reliable one-stop shop for metal carports, steel garages, metal sheds, and more. We aspire to be the finest and most admired supplier of economical and high-quality metal and low-maintenance structures in the United States.
We at Steel and Stud offer real-time pricing, as well as delivery and installation, and streamline the carport purchasing process, which had previously been difficult. Furthermore, if we have an offer or discount, we will apply it to your order instantly, so you won’t have to waste time looking for a code.
One of our workers will arrive shortly after your purchase to install your new bespoke metal structure. Please make sure the installation location is level, clear of waste and foliage, and that the installation team has adequate room to transport their vehicle to the site location.
Frequently Asked Questions
The depth of the footings varies depending on a number of conditions and can range from 0.75 to 1.5 meters; in rare cases, they can even go deeper in the ground.
Because concrete is less prone to break if moisture evaporates slowly, spraying it with water several times each day for the first week after pouring the project will make it considerably stronger. The fresh concrete should be sprayed more often as the weather becomes hotter and dryer.
- Follow the below steps –
A). Existing Roof Covering Must Be Removed
B). Examine the Underlayment on the Roof
C). Purchase Metal Roof Sheathing and Flashing by Measuring
D). Place the roof flashing against the house wall.
E). To support the metal roof, use wood strips.
F). Install the roof
G). Rake Flashing should be installed.
Concrete, asphalt, and gravel can be placed under a carport
Using a shovel, add 3/4 inch of crushed gravel to the carport floor to make it even with your string line.
Screw anchors can be used by screwing them into the ground next to the base rail. To connect the base rail to the anchor head, small wires are required.
It’s a good idea to put a concrete slab on your land to act as a foundation for your new carport.
For the best defense and firm hold against swinging and heavy rains, you should attach your carport to the concrete slab. Winds aren’t powerful enough to raise a concrete slab off the ground.
You can cross brace the carport’s vertical supports. Cross bracing your carport can maintain it, provide extra stability, and protect it in low winds or other weather conditions. The additional support also ensures that the structure remains stable in all weather situations. For more support and affordable option, contact Steel and Stud today.
How To Put A Ceiling In A Metal Building
by Kunal Singh
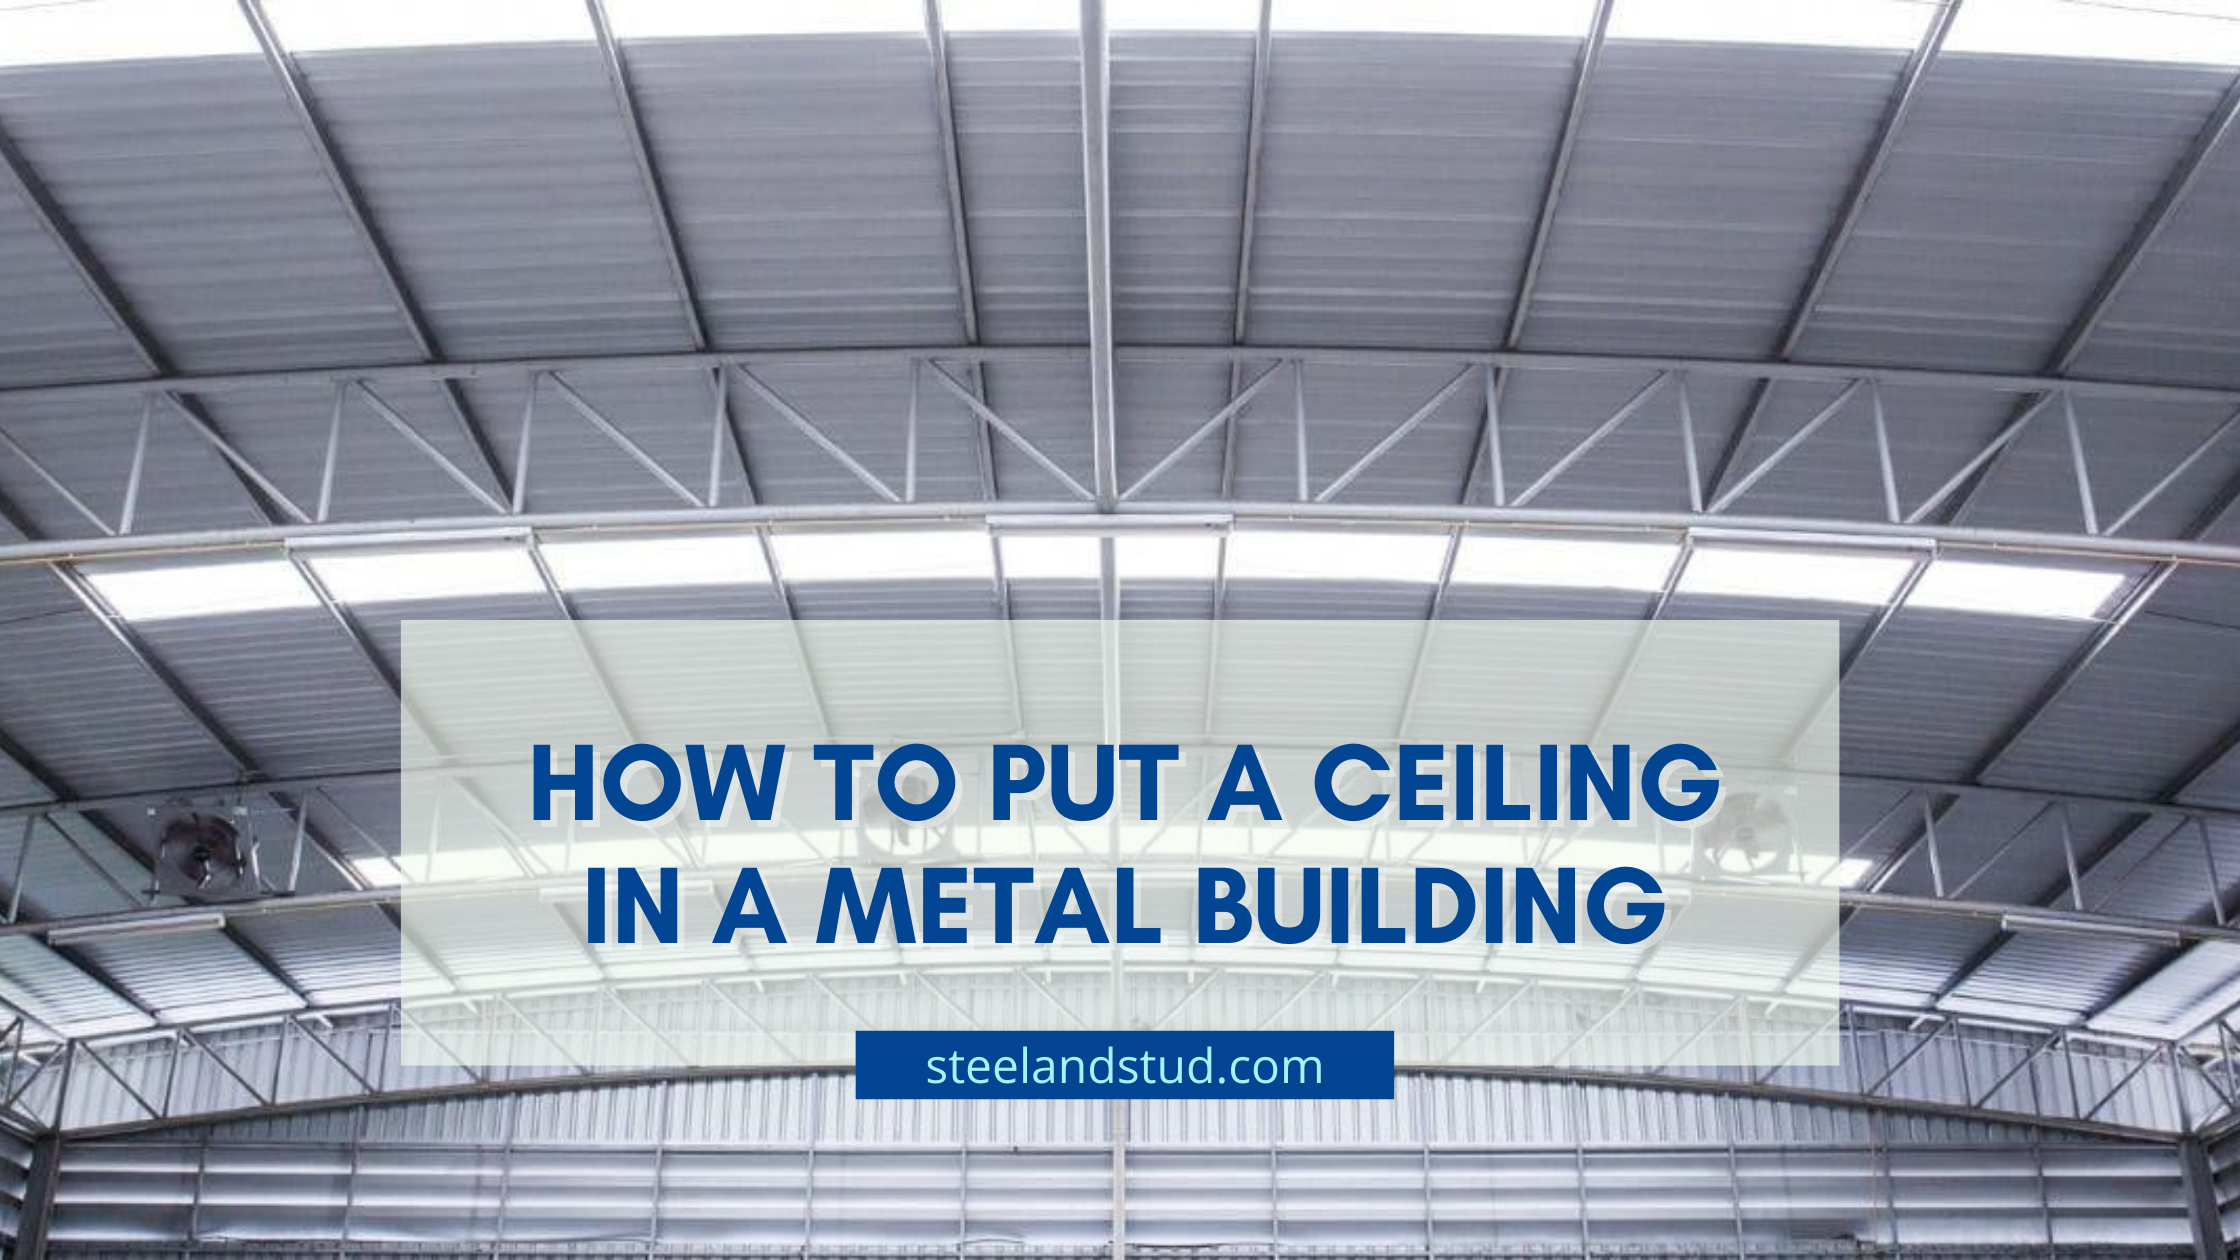
Buying custom metal building kits has a huge benefit of design flexibility. These kits are generally walled on all four sides with metal sheets, functional structural framing, and roofing sheets.
On the interior, starting with the roof, everything is void and makes a structure that is not energy efficient. The sheer emptiness of the structure offers a rare opportunity to customize the interiors to your taste and needs. Commercial and residential spaces especially may not be able to work with such plain looks, while industrial users may be fine with it.
A key area for metal building insulation is its ceiling system. Various insulation options include steel liners, plywood, ceiling tiles, and drywall. Other considerations that owners have to make include finished and unfinished ceilings. This article discusses how you can put a ceiling in your metal structure:
Table of Contents
Things to Consider Before Putting Metal Ceiling on Metal Buildings
Design flexibility is a major benefit owners enjoy when buying a custom metal kit. When your metal building construction is complete, the space you get is one to enjoy. Subsequently, you must make some major considerations before adding other interior designs, such as ceilings.
For example, construction permits are a first step to beginning the remodeling of your building interiors if you had not obtained one for the interiors before construction. Also, to carry out the ceiling installation, what tools such as power tools and scissor cranes would you need?
Interior Framing
Steel framing of metal structures has considerable strengths, such that they offer clear spans up to 200ft apart. This provides ample space for users to attach ceilings and create partitions all across the building since walls do not break the space into bits initially.
Steel framing provides superior durability over traditional materials like wood and brick walls. Ultimately, the metal framing is pest and moisture resistant, allowing owners to save money on maintenance and repair costs. The relationship of the interior framing to your ceiling installation is that you will have a strong base to attach your ceilings to without the risk of sagging and leakages.
Choose Insulation Material
Condensation within steel buildings occurs when there is a difference between exterior and interior building temperatures, which raises the humidity within the building. The buildup of condensation within the building increases the corrosion rate of the metal building. Hence, the quality of experience within the structure is compromised with the attendant risk of health problems and investment losses.
Insulating a prefabricated metal building can help protect the building by regulating its internal temperature. Insulation allows companies to heat or cool their buildings and save energy costs considerably.
The reason for avoiding insulation for many metal building owners is the ability to save costs. However, the cost-saving capability is case-dependent because steel buildings with living quarters and commercial steel buildings need building insulation. The U.S. Environmental Protection Agency estimates that homeowners can save roughly 15% of their heating and cooling costs with the proper insulation installed in a building.
The location also plays a crucial role in building insulation installations. For example, areas with high humidity rates across the U.S. require insulation more than areas with low humidity levels. Some metal building insulation choices include spray foam, rigid boards, and fiberglass.
Finishing Metal Interior Walls
Owners who prefer a traditional look for their metal building interior would love this option. The metal interior of the building can be finished with drywall and wooden panels. This option allows owners to preserve the durability of their metal building and its default aesthetic. All wiring, fire protection devices, lighting, and plumbing must first be installed and inspected before the walls are finished.
Start Putting Metal Ceiling on Metal building
When finishing off the interior of your metal building, you have various insulation options to choose from, depending on your design preferences. Modern ceiling designs leave steel beams exposed. It is a cost-saving design that provides a higher headroom, makes the space appear bigger, and creates a contemporary look for the building.
Prepare the Ceiling Beam
The ceiling beam must be appropriately prepared before a metal ceiling system is installed. The roof beam provides support for the ceiling grid to be installed. The drop ceiling protects the unappealing electrical wiring and other accessories from public view.
Wooden frames or steel beams may support ceilings in metal building spaces. With the use of specialized clamps to hold wiring to beams, the strength of the beam will not be compromised. If there are multiple roof beams to use, spaces may vary, which you can then fill with metal ceiling tiles and beams with wooden strips.
Measuring and Cutting
Metal ceiling panels can either be cut onsite or at the factory. The benefit of using factory cut panels is that it helps owners save on labor and time onsite, although their upfront costs are typically higher. Onsite cutting, however, allows owners to cut panels into custom size requirements on site.
A middle point between both onsite and factory cut panels is best for most projects where owners get a large number of panels factory cut with only a few left to be cut onsite. This approach will help save costs and eliminate errors on site.
It is best for all ceiling panels to be measured and verified onsite. Measurements should then be taken after the ceiling profile and perimeter have been installed. Lighting fixtures, fire protection devices, and other accessories should be accommodated in the ceiling panel measurements.
Make Space for Outlet
Lighting is the first set of outlets owners need to create spaces for. Each light fixture should have its plug attached right to the ceiling. The plugs should be installed to allow the lights to drop down.
Sound systems also get installed into metal building ceilings according to client requirements. This is particularly useful in workspaces that double as living spaces. Stereo systems require wooden shims to tilt well enough to allow the sound to reach the open spaces better when working. You may need to create spaces for other accessories, including sprinklers and smoke detectors.
You can watch more here: https://www.youtube.com/watch?v=9Zv3Q-v1oQ4.
Put the Installation of Metal Ceiling on Metal Building
Using scissor cranes allows owners or contractors to finish their roof work better because they can reach just about anywhere in the structure’s roof. Contractors can finish their work faster if they use this great equipment. Heavy-duty versions like the 20ft version can carry both humans, ceiling panels, and their tools everywhere around the metal building for the installations to be done. With two people working per time from the top of a scissor crane, contractors can make a 3-set pattern which helps them achieve great stagger joints.
Stagger joints are overlaps of the metal panels used for the ceiling in a metal building. They usually about 2 inches overlap between 16ft sheet panels allowing contractors to flush them at the end of the truss. The staggers enable the contractor to keep correcting themselves. The capability to correct the installation process every 9 or 3 sheets makes a better finish.
For additional information watch : https://www.youtube.com/watch?v=MQqNAppdVoY.
Conclusions
Ceilings are great additions to steel buildings. They add more aesthetics and insulation to the building. With added insulation, owners can improve the building’s energy efficiency and lower their energy costs. Suppose you want to have a ceiling installed in your metal building; you need to buy a ceiling kit and your building kit. Contact us at Steel and Stud today!
Frequently Asked Questions
We install steel buildings and our metal building kits for buyers who require the services of our professional installation team.
We deliver our metal building kits to clients’ sites without extra costs.
Our metal building kit manufacturers offer a minimum of 20-year warranties.
Most metal building kits come with installation manuals that allow you to install them easily.
Steel buildings are generally stronger than wood-framed buildings.
Spray foam insulation, rigid boards, and fiberglass are ideal insulation materials for metal buildings.
Rust is a maintenance issue. If you insulate and maintain your steel building properly, rust is minimized.
You can finance your metal buildings with some of our trusted banking partners or third-party loan providers.
Our metal buildings do not come with foundation drawings.
We have installers in most locations we deliver to who will reach you quickly.
Most vendors supply to the client’s site but may not offer the labor to offload it onsite, especially for DIY enthusiasts.
Equipment including scissors lifts, power tools, measuring equipment, and protective gear is needed.
Concrete slab foundations are the best foundation types for metal buildings.
Available roofing panel options include vertical standing seam panels and standard PBR panels.
All exterior paints work for steel buildings, but you can also use a metal-specific paint like
The typical wind load on a steel building is 80mph or 16lb.ft2
We require a 10% down payment and monthly installment payments after completion of the building.
You can get standard orders within a month of placing an order, but custom steel buildings extend further.
We always contact buyers within one month of placing a building order.
How to keep birds out of carport
by Kunal Singh
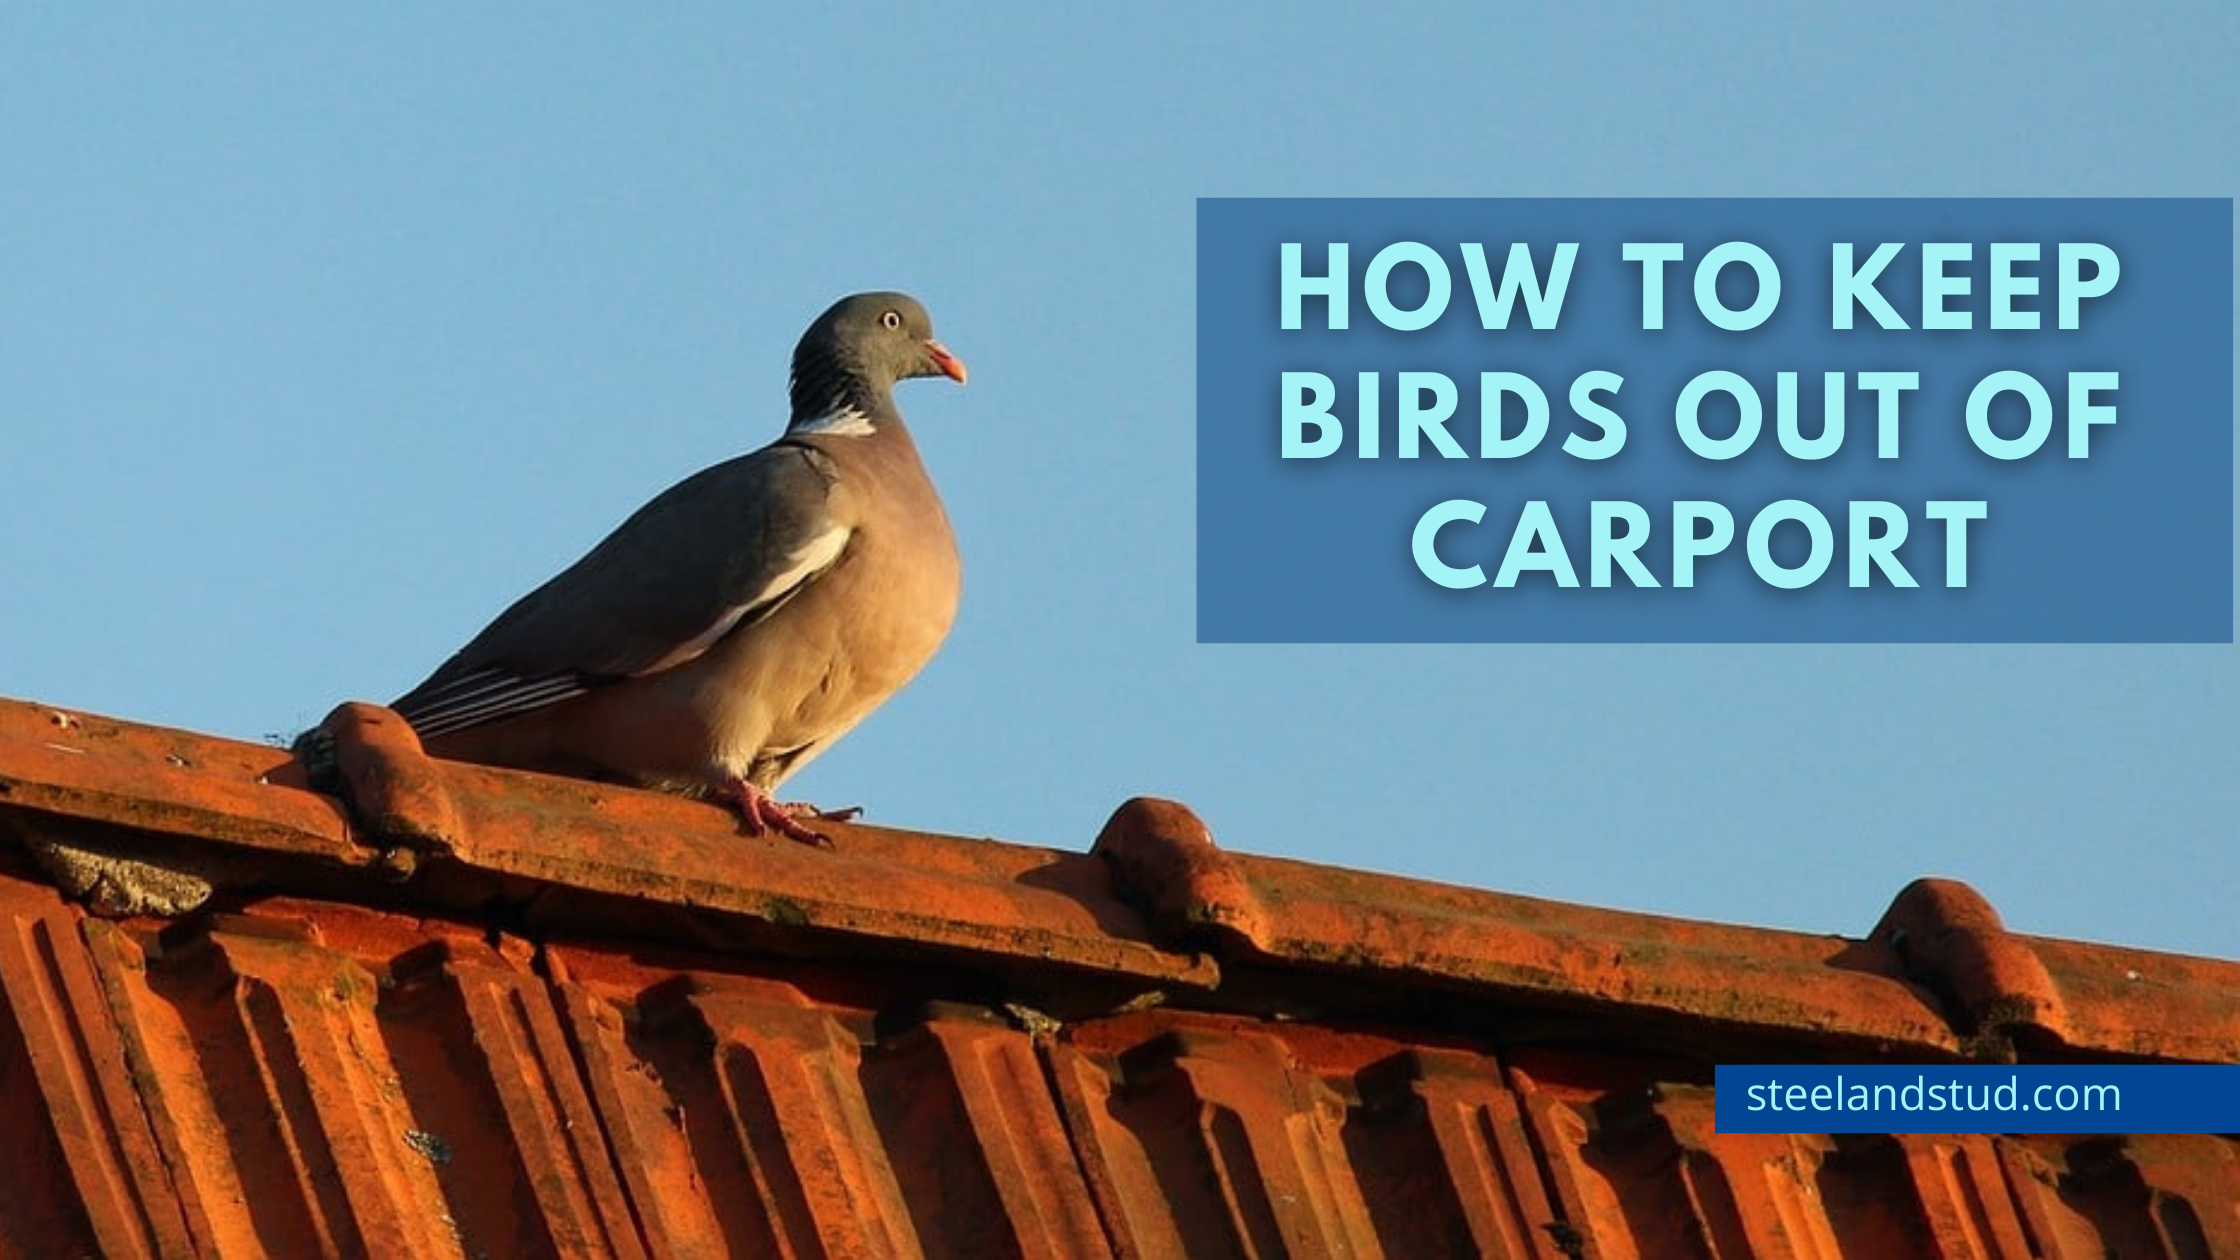
Carports protect vehicles and other properties from harsh weather elements, including rain, hail, tree debris, and other specks of dirt. The open design of carports gives them some major advantages over closed garages, such as easy accessibility, easy installations, and low purchase and maintenance costs.
Along with these advantages comes the likelihood of birds building nests in the corners of your carport. As a car owner, birds shouldn’t nest in your carport because of the attendant risk of your car being messed up or damaged by bird activities in the carport. You must therefore find ways to discourage birds from nesting in your carport. This article discusses these methods, but first, what attracts birds to carports?
Table of Contents
What Attracts Bird in Your Carport?
There are two main attractors for birds: food and a place to build their nests. The presence of either of these features will make birds hang around your carport. The longer the birds hang around, the more difficult it will be for you to take them out of the carport.
Birds looking to build a nest prefer top rafters in your carport because of the inaccessibility to predators, including humans and land animals. They strategically choose locations where the structural roof pieces are joined together, which provides a strong base for the nest.
Different Ways to Keep Birds Out of Carports
If you have been wondering how to get rid of birds in your carports, there are multiple means you can use to eliminate the presence of birds in your carport. These solutions can keep birds out of your open garage by removing food sources and protecting the safe corners of your carport where the birds love building nests.
Owners must remove bird nests already built in their carports. Deterring birds from your carport may also involve drastic steps, which are further discussed in this article:
Eliminate Food Supply
Carport owners should make efforts to keep their carport clean. You cannot always know what looks like food to a bird, but cleanliness can eliminate the existence of any item similar to food. Birds may go around looking for leaves and debris to bite on. As the fall season approaches, owners should prioritize sweeping through their carports more frequently.
Don’t drop food crumbs or litter in your carport, and always dispose of pet food appropriately to reduce the activity of birds in your location. Ultimately cleaning your carport regularly would make it unlikely for birds to seek food in your carport.
Install Bird Netting
Birds looking to build a nest will more likely target the carport’s structural members. The structural joints of the rafters provide perfect support for a bird’s nest. You can protect your rafters using bird netting and bird-control strips. The bird netting should span the entire length of a carport’s rafters to deter birds from nesting in your rafters.
Bird nets provide a physical barrier for the rafters, thereby limiting their access to the rafters. Bird nets should be available at the closest convenience store to you and are generally easy to install. If you are not used to home repair activities, you could employ the services of a contractor to attach the net to the struts.
Use Methyl Anthranilate
Methyl Anthranilate is food-grade pest control for birds. It is a derivative from grapes that is nontoxic and biodegradable. It is not harsh like most chemical pest control methods. Menthyl anthranilate gives a lovely grape smell to human surroundings and is available to purchase in convenience stores near you.
Applying a few sprays of menthyl anthranilate every few weeks will keep birds from your carport. After consistent use, birds will know not to come near your carport. Carport owners must note that the use of menthyl anthranilate does not give a permanent solution to the bird problem in your carport.
Show Them Reflection
Birds can be kept away by the effect of reflective surfaces such as mirrors and foil tape strips. It could serve as a decoy making the birds believe that the location is already occupied and they should look for a new location. For best results, mirrors and other reflective materials should be flat against the carport and scatter small mirrors scatter along the carport’s roof.
External reflective surfaces can also bounce light into the surrounding environment, causing new birds to fly away from your carport. Using reflective materials in a strategic location where birds may see them can permanently eliminate birds from your carport.
Several patents have explored using reflective surfaces to prevent birds from approaching carports and other buildings. You might be able to find such equipment at a convenience store or online. However, ensure you buy only devices with positive reviews from previous buyers.
Install A Fake Predator
Birds are consistent creatures; they keep coming back to the same place regardless of your efforts to keep them away. An effective way to solve their coming back is to strategically position a fake predator, such as a snake or predatory bird, where the birds can see it. Examples of predatory birds include owls and scarecrows.
A dummy snake and an artificial owl can help scare birds looking to build nests in your carport away. For effectiveness, it is advisable to occasionally switch up the fake predator so that birds don’t get used to a single predator. Installing constantly moving objects like balloons and inflatable objects can discourage birds from nesting in your carport.
Spray Non-Stick Cooking Spray
A domestic option for preventing birds is the non-stick cooking spray. With this material sprayed across the horizontal and vertical surfaces in your carport, you can prevent the nests from sticking on these surfaces.
Non-stick cooking sprays prevent mud and thistles, which sometimes blow in the surrounding, sticking on carport surfaces. This discourages birds from nesting in a carport. Owners are advised to reapply the non-stick cooking spray in the new spring seasons to prevent the presence of new birds in the carport.
Install Bird Spikes
Bird-control strips are commonly known as “porcupine wire” or “bird spikes,” They consist of thin metal spikes that protrude multi-directionally. By attaching this to the structural members of your carports, you can prevent birds from coming to your carport. Bird spike installations should be targeted on the top corners of the rafters, especially to avoid the continued presence of birds.
In case you are wondering, bird spikes do not hurt birds. Instead, it prevents them from building a bird nest in your carport because they won’t find a space to land. Birds quickly notice dangerous areas, which means if they can’t find a place to nest in your carport, they will stop coming eventually. Bird spikes are permanent solutions to birds visiting or nesting in your carport.
Conclusion
Keeping birds out of your carport can only be achieved by taking deliberate steps to clean out your carport and applying other preventive measures highlighted in this article. If the presence of birds is one of the reasons you were reconsidering buying a carport, that shouldn’t be a problem anymore. You can place a carport order today at Steel and Studs with our online purchase tools or call us today.
Frequently Asked Questions
Birds generally hate sharp smells, reflective objects, and predators.
Birds are not scared of aluminum foils, but they generally don’t like them. The reflection of light on aluminum foils also discourages birds from coming to a location where they are.
Birds can visit any porch, but porches with reflective surfaces such as CDs and mirrors can keep birds away. Also, the general cleanliness of your patio will keep birds away because of the lesser possibility of finding food there.
Fake predators such as scarecrows, coyotes, owls, and snakes are effective bird deterrents. Shiny objects are also great means of preventing birds from your structure.
Existing bird nests may cause gutter damage to your roofs. This is caused by the clutter of gutters with the nest materials such as debris and thistles.
Mothballs are ammonia, a chemical substance that repulses most bird species. Its smell is generally nauseating to birds.
Fake owls can effectively drive large and small birds of prey away from your carports and homes.
How to Paint a Metal Building
by Kunal Singh
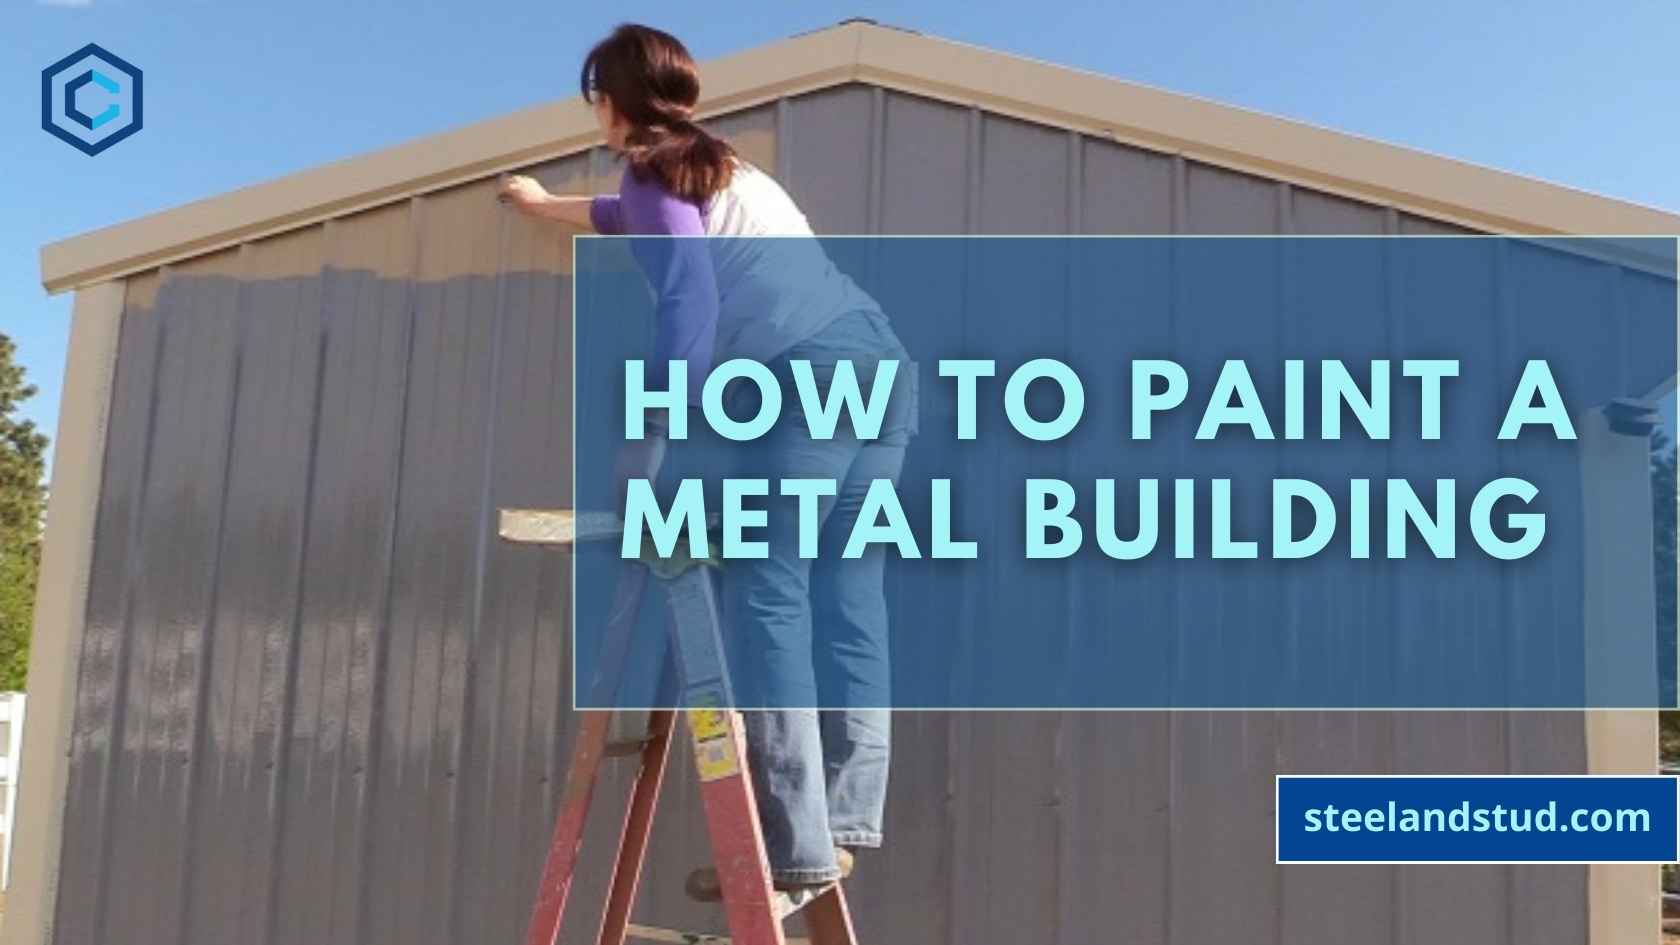
A metal building is strong and sturdy; however, maintaining them can become challenging due to wear and tear issues. It is ideal to hire the best professionals in town if you dont want to try out the DIY techniques while painting a metal building. A good amount of time and money is saved in acquiring supplies such as an airless sprayer, airbrush dispenser, paint roller, organic rust converters, protective coating, mild household detergent, and primer.
Painting metal buildings isn’t as simple as painting the regular structures, and it is pretty tricky. Barnardos, pole barns, Equestrian buildings, sheds, storage buildings, RV storage, carports, and garages need to be painted time and again to keep them functional for several years.
Table of Contents
Profound Benefits Of Painting A Metal Building
Paint for metal buildings not only provides functional and visual benefits but also enhances the overall sustainability of your metal structure.
Reduces Rsuting
- One of the concerns that usually a metal building owner has is the fear of his/her structure accumulating rust.
- And one of the best solutions for this concern is by repainting metal buildings.
- You see, metal structures are more prone to rust, and a coat of the best paint for metal buildings can offer maximum protection that increases the livelihood of your building.
Functional Finish
- Steel And Stud, metal building painting services, offer a multifaceted finish that not only excels from the aesthetics and visuality POV but also delights the latter in terms of performance.
- And is also great for exposed steelwork.
Increases Lifespan
- Investing a couple of bucks in painting metal buildings can prolong the life of your metal structure, especially in areas with unpredictable weather conditions.
Types of Paint Suitable for Metal Buildings
Choose a high-quality paint that adds value to your metal building structure in the long run.
Acrylic Latex Paint
- Acrylic paint is known for being the most versatile steel building paint. Acrylic paint is often merged with acrylic latex paint because both these paints are made from acrylic resin.
- Notably, acrylic latex is the most promising exterior paint for metal buildings in regions prone to extreme weather conditions due to its flexibility and resistance to cracking properties.
Oil-Based Paint
- Oil-based paints are known for their durability, providing long life to your metal structures.
- And the most notable thing to consider here is that these oil-based paints possess a remarkable resistance to moisture trait, automatically making them rust-resistant.
Direct To Metal Paint
- These solvent-based paints are specially formulated to be used on metal surfaces.
- DTM paint metal building claims that it can work (both) as a primer and paint.
- It also helps simplify the finishing process by reducing labour costs and coating inventory reduction.
When to Repaint Metal Buildings?
It is a great idea to repaint a building; however, seeking the manufacturer’s recommendations could be highly beneficial. They would be able to guide you in choosing the perfect tools and protective coating needed to enhance the structure’s aesthetic appeal.
For example, if the metal shed or pole barns are installed recently as part of your property, repainting them isn’t needed as they would last long for several years.
However, if they have developed rust or flakiness, painting them with acrylic latex paint can be the best option. The only times when you need to paint metal buildings are:
- When they develop a Chalky appearance
- Fading of colour
- If you notice peeling on the metal panels
- Development of rust or corrosion
- Discoloration of the sides that are constantly exposed to high sunlight.
How to Paint a Metal Building?
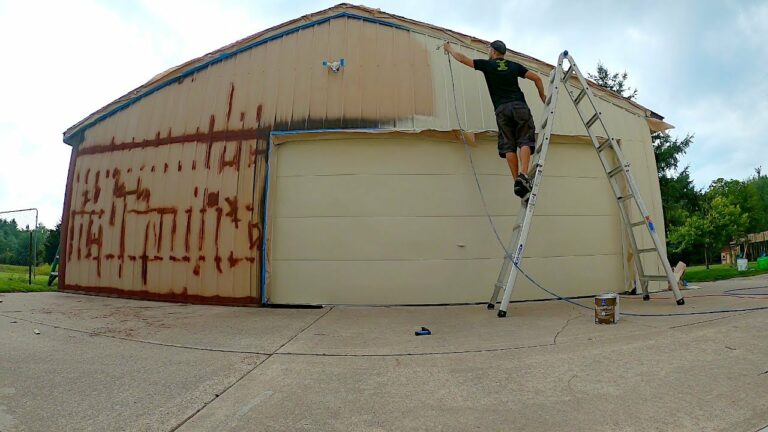
Painting metal buildings isn’t similar to any other concrete building. Following a step-by-step procedure coupled with the manufacturer’s recommendations and thorough preparation can help restore the aesthetic appearance largely.
And please make sure that you’ve gathered the following tools before commencing the painting procedure:
- Driller.
- Primer for metal.
- Power washer.
- Plastic sheeting.
- Metal primer.
- Soap.
- Paint roller or paint sprayer.
- Solvent.
- Duct tape.
- 120-grit sandpaper.
- Detergent.
- Airless sprayer.
- Ladder.
Firstly, it becomes important to understand the areas of imperfections, and the systematic rust removal, corrosion, and flakiness using organic rust converters. Rusted areas can cause severe structural damage. Thus, removing them entirely is mandatory before you decide to paint.
For dirt residue removal using soapy water, a wire brush, and a pressure washer, we apply a protective coating on the doors and windows using a taping plastic sheeting. This must be made to prevent the dripping of substances. Only after carrying out the surface preparation, the actual work at the job site begins.
As already stated, metal buildings aren’t similar to normal concrete structures; thus, incorporating the right techniques while painting different parts of buildings becomes mandatory.
Installed wrought iron railings require the most superior quality exterior painting to keep them functional for several years.
An airless sprayer is helpful if the painting is sprayed; else, we can use a paint roller or a brush to give an even coating without any air bubbles.
Metal doors and windows also require a lot of attention as they are an integral part of every building. The painting process is slightly different from metal buildings with glasses or metal roofs. The activity begins with removing external hardware elements and cleaning the metal from grease using soapy water and mild household detergent.
Note: Make sure whenever you’re removing the door or windows for paint purposes, always do it in such a way that it doesn’t jeopardise security.
After a thorough cleaning, eliminating dirt and grease and smoothing the surface using sandpaper has to be done before applying primer as part of the preparation process.
Note: If you don’t prime or coat it properly, the paint you’ll apply in the following steps won’t adhere for long.
As a final step, choose your favorite acrylic latex paint color and cover the surface evenly. Allow the first coating of new paint to completely dry, and then proceed with applying the second coat. While painting roofs, applying thick layers of a primer using a paint roller and allowing them to dry thoroughly is extremely crucial to increase their lifespan and keep them protected.
Easy DIY Steps for Painting a Metal Building
Painting metal buildings can be done by hiring professional services or DIY techniques. Many people at the job site prefer the latter as it allows them to experience the painting activity independently.
By following a few simple steps, you would be able to restore the aesthetic appearance of the cover doors, sidewall, doors, windows, and roofs quickly and effectively.
- Take time to inspect the areas of imperfection on the pole barn, roofs, and sidewall of the metal buildings.
- Before starting the painting project, list down the severity of the issues, such as the development of rust, corrosion, flakiness, or chalky appearance.
- Choose the right tools, primer, and paints to paint metal buildings.
- Clean the surface thoroughly using a power washer, wire brush, and sandpaper.
- Protect the other parts of the building using plastic sheeting.
- Apply primer either using a roller brush or an airless sprayer (Application of a solvent thinned primer is needed while working with a paint sprayer).
- Allow it to completely dry, and then start the painting process.
- For larger buildings, a second coat using a paint sprayer would be good after the first layer is completely dry.
Some of the benefits of repainting include
Repainting activities of metal buildings time and again would help in:
- Increasing the lifespan and the functionality of the overall structure.
- Contributes towards enhancing the aesthetic appearance of the metal building.
- Reduction of heat and energy costs during summer if a new metal shed or a barn is painted with lighter colors.
- Saves a lot of money toward maintenance.
Maintenance Tips for Painted Metal Buildings
Here are some invaluable tips curated by our experts on preserving the allure of your personal and commercial metal building painting.
- Schedule bi-annual washing to protect the original glossy colour of your metal building.
- Replace or repair your damaged insulation. Because without proper insulation, the metal panels will condensate, which causes moisture.
- Repaint your metal building structure with oil-based or acrylic paint because new paint gives a pristine look to your existing structure.
- Try to address rust spots, if any. Why? Because removing them as soon as possible can prevent further corrosion.
- If you notice any stains on your metal building, address them promptly using a mild abrasive cleaner.
Additional Considerations
Besides the provided tips for upkeep, here are some considerations that you need to keep in mind:
- The first factor which you need to view is the climate of the region where you reside. If you live in a hot and humid area, go for light colours because they help keep your structure cooler and result in low energy costs. Conversely, if your region is relatively colder, go for darker colours, as they absorb sunlight and keep your shelter warmer.
- Ensure the colour you prefer for your metal building harmonises with your surrounding environment, elevating your overall aesthetics.
- The metal building colour can also impact its durability because some colours are resistant to fading and chipping while others are more prone to it.
About Steel And Stud
Steel and Studs is a trustworthy supplier and manufacturer of metal and steel buildings. We provide high-quality steel building material kits along with customized installation services. Contact us if you are looking for contractors for remodeling your metal buildings. In addition to painting old metal buildings we can also assist in choosing the frames for house or basement walls. Our services are easily accessible to all 48 states and are affordable. On top of that, we are considered the most durable option. All our metal structures are resistant to fires and other environmental adversaries while being easy to maintain.
Frequently Asked Questions
Can I use regular house paint on metal?
No, You cannot use the regular house paint on metal as they do not adhere well.
What kind of paint do you use on a metal building?
Acrylic-latex paint is regarded to be the best to paint on metal buildings.
When to use a wire brush while painting the metal building?
A wire brush is used for dusting the dirt, dust, and flaking paint.
Can you paint metal with any paint?
Metal buildings are way too different from concrete structures; thus, choosing a metal-specific paint would enhance the lifespan.
What type of paint will stick to metal?
Acrylic-latex paint is the best option else, and you might as well metal-specific versions too.
Can you use exterior latex paint on metal?
Yes, it works well and prevents the chipping of the metal.
How do you permanently paint metal?
Painting a metal permanently can be done by systematically following the step-by-step procedure.
How do you paint a galvanized metal building?
Cleaning, rinsing, polishing, application of primer, and painting are the steps involved.