Has your storage outgrown your garage space? If so, a metal carport is an investment-worthy option. A carport can protect your valuables like the car, ATV, boat, farm tractor, and so on from the elements and provide shelter for outdoor parties and recreation. And being available at such competitive prices at Steel and Studs makes perfect sense to invest in one. But the big question is how to install a metal carport?
But before this big question comes to another question. Which metal carport type to install? Steel and Studs provides a variety of do-it-yourself metal carport kits.
So, before learning how to build a metal carport, let’s first see the various types of kits available.
Table of Contents
What Are The Various Types Of Metal Carport Kits Available With Steel And Studs?
Our metal carport kits are completely customizable. They can match the color of the roof to your building’s exterior, forget the thickness of the steel frame customized to your requirements.
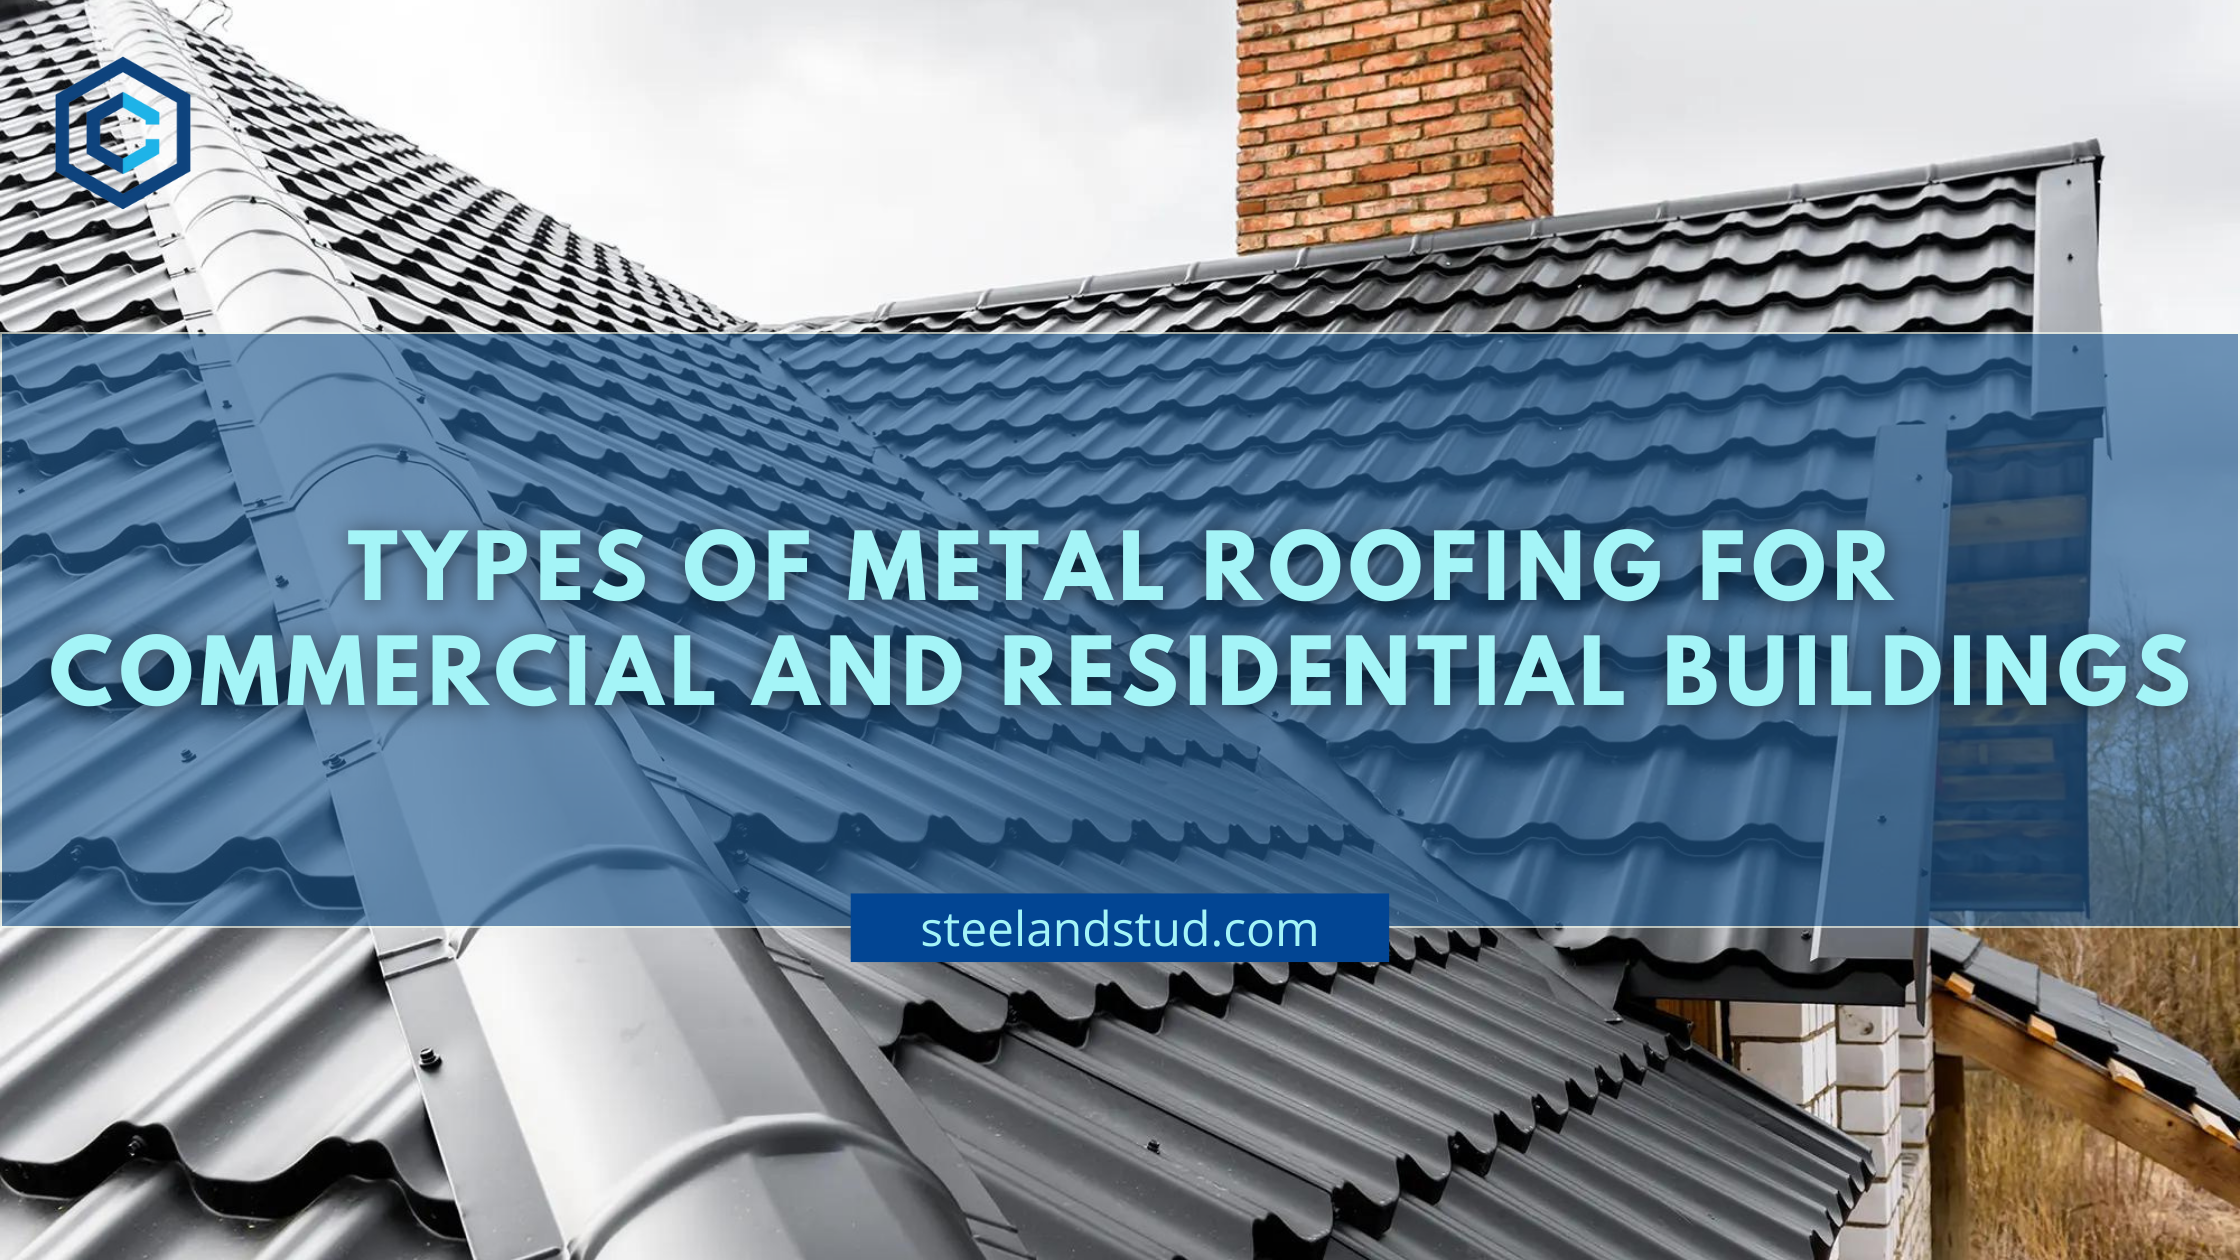
There are three distinct types of metal carports kits depending on the type of roof your weather demands.
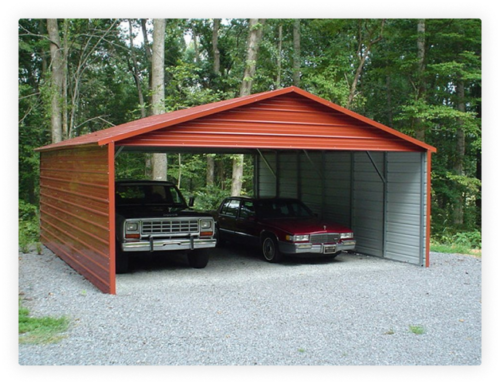
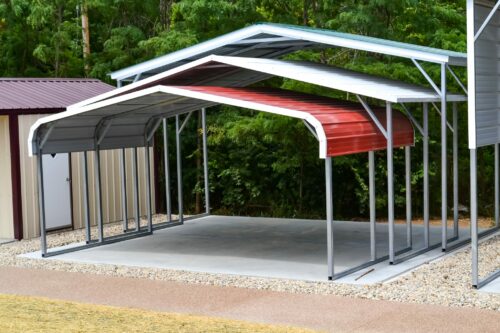
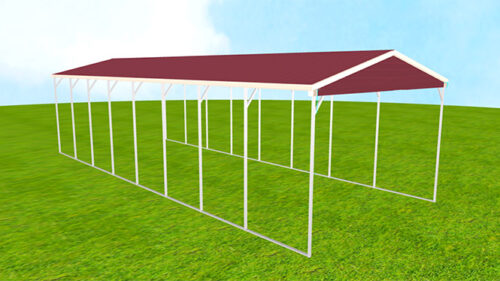
- Standard Horizontal Roof Style – The standard horizontal roof is the most cost-effective and practical choice. It might not have the bells and whistles of the other two roofs but protects your valuables from sun, rain, and snow.
- A-Frame Horizontal Roof Style – They are a little pricier than the horizontal roof style but are more stylish too. Also known as the boxed evade style, its most interesting detail is that it has sheet panels running from the sides for added protection.
- A-Frame Vertical Roof Style – It is the most expensive option but comes with additional ridge caps that provide a lot of stability. These are especially useful for those living in harsh conditions.
Whenever you buy from us, we not only provide free on-time delivery across the US but also help you get permits from your respective city or county regulations. We also ensure that our structure meets the local development standards.
Benefits of Installing a Metal Carport
Flexible Design
- When it comes to metal carports, there isn’t a single type of construction.
- This is due to the versatility of these metal structures, which allows them to be built to match their owners’ preferences.
Low Maintenance
- In contrast to a wooden garage, a metal carport requires very little maintenance.
- Their smooth surface naturally inhibits mould growth and does not require repainting at any point during their lifetime.
Cost Is Lower
- In light of our large production volumes and high manufacturing efficiencies, Steel And Stud have a reputation for offering great value for your money.
- Construction costs may be reduced by 60% on a metal carport compared to conventional construction.
Versatility
- It isn’t just cars that are stored under metal carports.
- Many of our clients utilize their carports for various reasons, including storing RVs, motorcycles, trucks, motor lawns, products, etc.
- Carports provide more than just car protection! They simplify your life in many ways!
Tips on Buying a Steel Carport
Steel carports are indeed crafted to last for a long time. However, consider a few factors before purchasing.
Building Codes
- A steel carport must comply with local building codes prior to purchase.
- A carport installation may be subject to specific requirements set by local building jurisdictions.
- If you reside in a private housing community that sets forth concordant conditions and curtailment for residents in the community, ensure that you inspect the Covenant’s Conditions and Restrictions before buying a steel carport.
Steel Gauge And Grade
- The steel’s grade and gauge determine how well the metal carport will endure harsh weather conditions.
- Ideally, the carport you choose should match the weather conditions in your area.
Coating
- Make sure you ask about the carport kit’s coating before buying it.
- When intruded upon by the weather, a poorly manufactured carport will rust, and the coating may peel.
- Steel And Stud build steel carports that are saturated with coating during manufacturing, ensuring the coating lasts a long time.
Assembly and Installation
- A carport is usually delivered as a package and instate on-site.
- Furthermore, your carport must be well-secured to withstand the next windstorm.
Materials Checklist List For A Metal Carport Kit

Electric Wires
If you want to add lights or other charging points to your steel carport, you must do the required electric wiring. It is suggested to plan the wiring before starting the carport building. You can consult an electrician for the same.
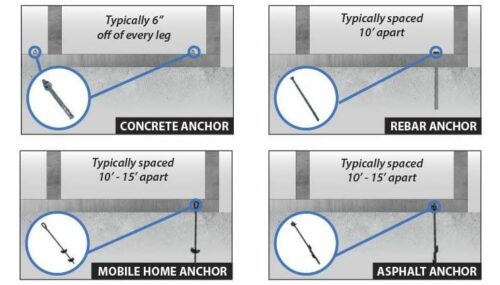
Anchors Bolts
Different anchor types are used for various foundations. Mobile home anchors are primarily used while using a dirt foundation. They are fixed on the bare surface without any foundation. However, you need to level the surface for a good hold. At the same time, concrete anchors are used where concrete footings are made.
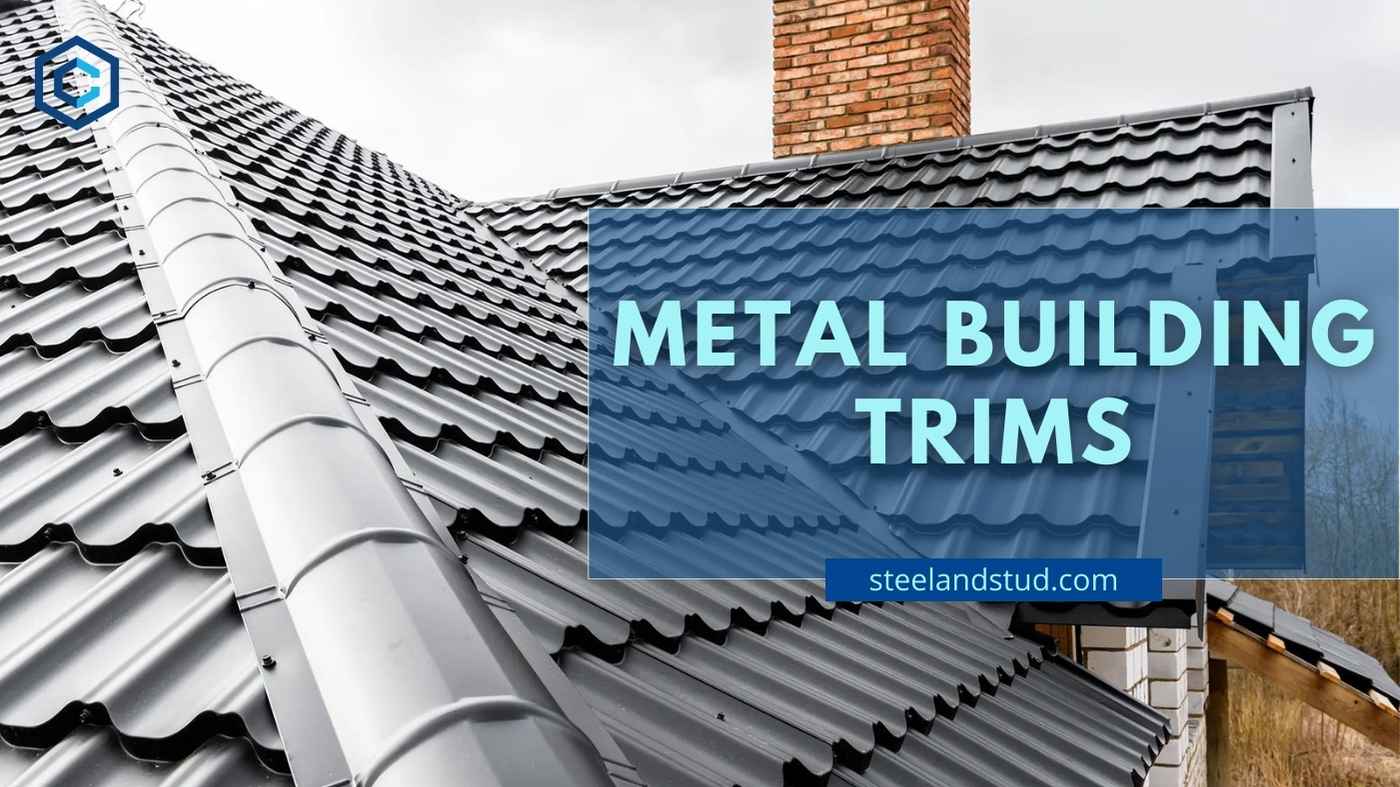
Base Rails & Trim
Base Rails form the building footprint and tie your metal structure together. Good quality base rails are made up of galvanized steel. In addition to base rails, bracing both U-channel and Hat channel is available. This extra bracing provides support and stability if you live in an area with a harsh climate like high winds. Also, trims finish up the structure. They are made available in the same color as the panels so that your carport looks as good as it is strong.
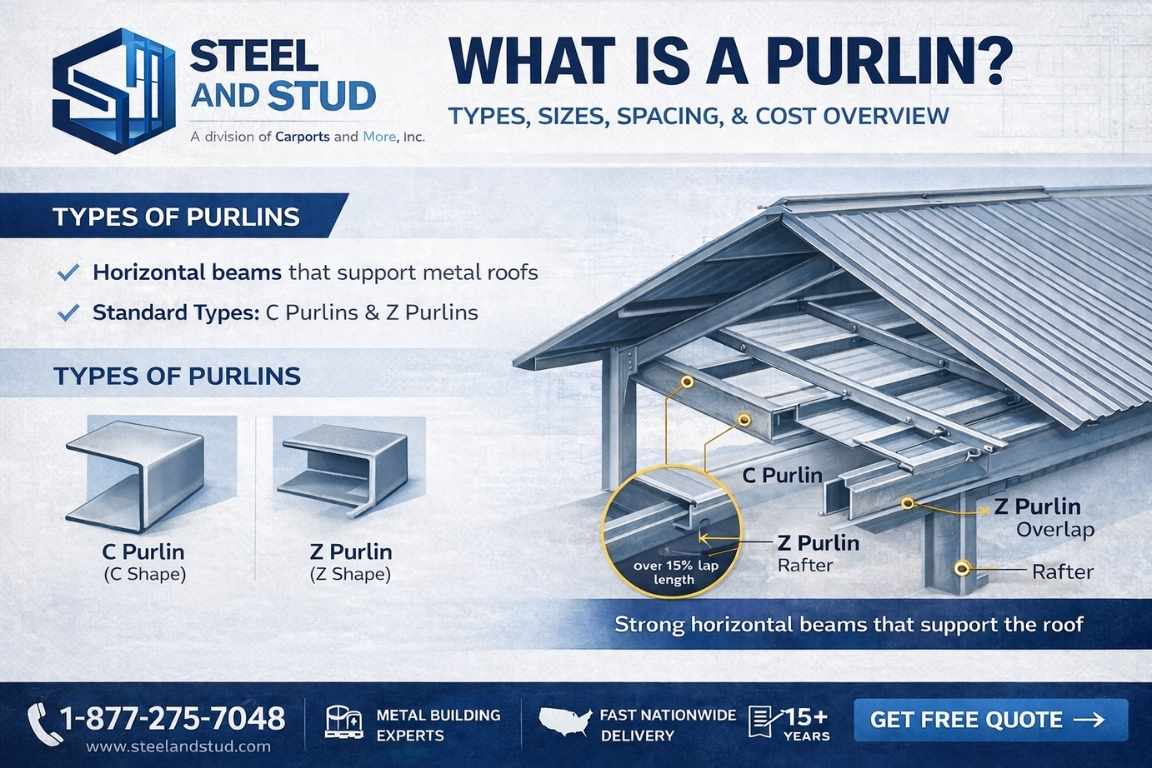
Bows And Trusses
Bows and trusses are basically the skeletons of your metal structure’s roof. Their crucial role is to give strength and stability to your garage.
Depending on the type of roofs available, the different types of bows and trusses come. The standard bow for horizontal roofs and A-frame bow for boxed eave horizontal and vertical roofs.
Doors & Windows
If you plan to cover the sides of your steel carport, doors and windows are a must and are available as an add-on to the carport materials.
Remember to use headers when installing doors and windows to support the stresses of opening and closing doors and windows.
Panels
Panels are metal sheets that cover the structure’s roof and sometimes the sides too.
Tools
Here is a list of tools you would need to set up your DIY metal carport:
- Cordless or Electric Screw Gun
- Safety Goggles or Glasses
- Working Gloves
- Pencil or any Marker
- Tape Measure
- Hammer
- Tin Snips
- Level
- Chalk Line And Mason Line or Nylon String
- 2 Step Ladders
- Adjustable Wrench
- Hammer Drill
- Masonry Drill Bit
- Motor Cycle Or Ratchet Straps
- Wrench- 3/4″ or ½”
- Vise-Grip
Equipment
Depending on the type of footing, you may need the following equipment:
- Gas-powered auger
- Spade
How are Metal Carports Anchored to the Ground?
Before you start anchoring metal carports or even prepping the ground, you need to take care of the below steps. These will ensure a hassle-free metal carport building later on!
- Check with your local city or county planning departments whether you need a permit to build a metal building on your land. Don’t worry. Your very own Steel and Studs experts will assist you in the feat.
- If you need water or electricity at your metal carport, ask a plumber or electrician to inspect the site before laying the foundation. Most contractors and even you would prefer it that way!
- Call 811 to mark underground buried gas, electric, or water pipelines.
1. Level The Site Before Carport Installation
The first step here is to clear any debris or vegetation from the site. And then level the ground properly. Here we provide a complete guide on how to level ground for carport.
Proper leveling will ensure that the carport structure stays balanced even in high winds and other harsh conditions.
Also, the leveling required depends on the types of foundation– dirt, gravel, concrete, and asphalt.
Lastly, the foundation you choose and the anchors used to secure that foundation to the ground will make all the difference when rains pour and hailstorms strike.
2. Carport With Dirt Foundation.
A dirt foundation demands maximum leveling and clearing of the ground and the space around the site.
You can use mobile home anchors to fix the metal structure to the ground.
However, a dirt foundation is less costly; you may have to deal with standing water and muck as the rain eventually erodes the surrounding soil.
3. Carport With Gravel Foundation.
A gravel foundation too requires much leveling and clearing before you dump stone over the site. Gravel is another cost-effective solution and gives you a slightly more stable foundation for your metal building than soil-based.
However, gravel stone moves with time, so you may have to invest in re-leveling with time.
4. Carport With Concrete Foundation:
Concrete slabs are your best bet to keep your storage safe from the elements. However, you need to hire a concrete professional to pour one.
But be vary of poor quality slabs, redoing them is not an easy alternative.
Also, keep the dimensions of the length of the roof and base in mind while constructing the concrete slab.The building footprint on the slab will measure one foot shorter than the roof length.
Finally, ensure no likelihood of seepage of water under the base rails.
5. Carport With Asphalt Foundation.
An asphalt foundation is constructed on similar lines as concrete. Just that asphalt is cheaper than concrete.
Asphalt foundation can last you years but may need sealing as the years pass as it will get deteriorated due to the elements.
How To Prep For Footings For Metal Carport Kits?
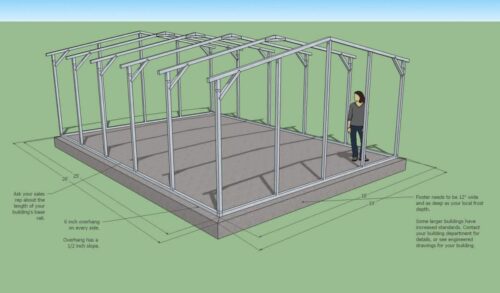
Here is the process of prepping for footings:
- The first task in laying footings is to mark the centers for each footing.
- Next, take care the post you want to lay in a footing should be at a maximum of 4′ from the edges.
- Ensure that your lines are correctly squared. This ensures the footings and posts will go at their exact places.
- Further, secure your footings by laying string lines to help align the installation of the post. The lines should be applied at a distance of 4″ from the posts and not right onto the posts so that the line is still visible for checking even when the posts have been straightened up.
- Lastly, mark your post at the depth you want to install them at. This depends on the type of footing you need to use.
Pro Tip: The choice of footing depends on your state and city laws. Therefore, always check with a local engineer before placing your footings. The width, depth, and type of footings will vary depending on your state’s building codes and your carport type.
How Do You Install A Caisson Footing (With Optional Baseplate) For A Metal Carport Kit?
Here is a step-by-step process:
- Use a gas-powered auger to dig a deep enough hole, at least 30 inches deep and 10 inches wide, depending on your carport type and local regulations.
- If you do not have access to an auger, give it a shot with your hands. However, a simple shovel won’t cut it as the hole goes deep.
- As soon as your holes are dug, start filling them with ACI-specified concrete and keep your post anchors handy.
- Mostly you will need a 10 – 12 ½ inch galvanized steel anchor for your footings. And be ready with a sledgehammer. You might need a whack or two to push it down if the concrete is stiff.
- Once you have placed the anchor bolt down far enough, put your post on the top and finish it with a washer and nut.
- After fixing it is time to adjust it in the right place. To do so, restring the string line and measure it to the center of the anchor.
- After the anchors are done, final adjustments can be made by sliding them into their adjustable mounting plate to get them exactly where you need them to be.
How Do You Install a Spread Footing for a Steel Carport Kit?
Here is a step-by-step process:
- Use a spade to excavate the area. You can dig a 2′ wide and 2′ deep hole or as specified by your local regulations.
- After the excavation, you need to insert a rebar base of size depending on your footings specifications.
- Next, fill the fill with concrete upto 1′, place a 10″ mold over it,and fill it with ACI-specified concrete.
- Now, use a 10 – 12 ½ inch galvanized steel anchor for the footings and push it down the concrete utilizing a sledgehammer.
- Finally, place the post on the top and finish the task with a washer and nut.
- Measure the alignment of footings with the help of the string line.
- You can also use a scrap post of the right length to measure the distance from the string line with ease.
- After the anchors are done, make final adjustments by sliding them into their adjustable mounting plate to bring them in their exact positions.
How to Install A Carport Canopy?

Let’s follow the process step-by-step:
Step 1: Before starting with the assembly, stack the peak tubes on top of each other and line up the ends.
Step 2: Now mark a line 17 1/8″ from one end if your carport is 10′, 12′, 18′, 24′, or 30′ wide. Or mark the same line at 3 5/8″ from one end if your carport is 14′ or 20′ wide.
Step 3: Next, start assembling the roof/wall structure by joining the peak bends to rafters, rafters to side posts, and side posts to height extensions (If needed).
Pro Tip: Driving in two stakes at the bottom and two stakes at the top helps you give accurate dimensions to the structure.(Keep in mind the outer dimensions of the carport)
Step 4: Now that the structure is in place, drill in #12 hex head self-drilling screws at all joints. 4 screws on each side for the peak to rafter joint and side post to rafter joint. And two screws each for the side post and height extension joint.
Note:
Use the first assembly as a template and keep stacking the rest of the roof/wall assemblies on top of the previous ones so that you know they all fall in a line. Also, try to keep all the joints equal.
How To Install Truss Bracing?
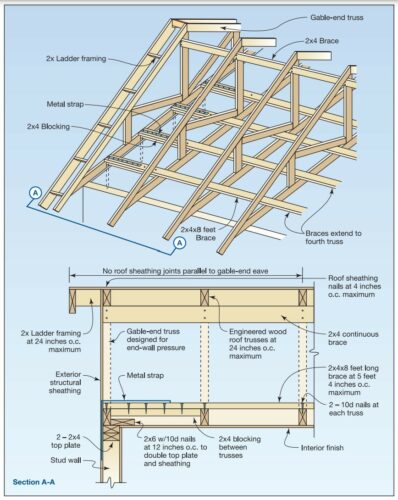
A carport doesn’t always need truss bracing. Truss bracing is done to provide strength and stability to the steel building. Thus, if your county experiences a lot of high winds and snow, brace up because it is time for truss bracing.
However, as a general guideline, 10′, 12′, and 14′ wide carports do not require truss braces. While 6′, 18′, and 20′ carports may need truss braces. But large steel structures like 24′ and 30′ wide carports require bracing.
There are two types of truss bracing:
- Collar Tie With Vertical
- Collar Tie With Web Braces
For the scope of this article, we will discuss only collar ties with vertical.
Note: Bracing is done on all inside frame sections but not on the two end frames.
Here is the step-by-step process of installing a collar tie with vertical:
- Step 1: Collar ties comprise three parts- one center tie and two end ties. Attach the end ties to the center tie with six #12 self-drilling screws.
- Step 2: Install collar tie brackets on both ends of the collar tie vertical.
- Step 3: To install the vertical to the roof/wall frame, take equal measurements from side to side. Mark the ends and place the vertical carefully. Fasten these collar tie brackets to the rafters with six self-drilling screws on each side.
How To Install Roof/Wall Sections To Base Rails?
This part of carport installation requires at least two people. You can also use a ladder to help you give support for raising the sections into the base rails.
Start by placing the first section, the one with no truss bracing. Once the section is placed inside the base rail, fasten it with two #12 self-drilling screws on each side. Repeat the task with the rest of the sections as well.
How To Install A Metal Carport Roof?
Follow the below steps closely to install a carport roof:
Step 1: Installing Panel 1
Take a pencil and mark the overhang on the bottom of the panel. This line will help you place the panels in perfect alignment.
Pro Tip: Install the first panel on the lower side of the carport to ensure proper drainage of rainwater.
Do you remember putting a line at 17 1/8″ or 3 5/8″ from the end while assembling the roof/wall sections?
This is the same line that will guide you to place your first panel.
Once the panel is appropriately placed, clamp the panel before drilling screws.
Next, drill your first #12 x 1″ self-drilling screw with a rubber washer 1″ above the major ribs. Don’t install screws on the edge ribs because the adjacent panels will slide onto them. Similarly, screw the second frame as well.
Do not screw the third section because another panel will slide over this first panel there.
Step 2: Installing Panel 2
Let the second panel overlap the first panel by 2″.
Taking care of the overhang and other measurements, screw in the second panel as well.
Continue paneling until the entire roof has been assembled.
How To Install A Trim On A Metal Carport?
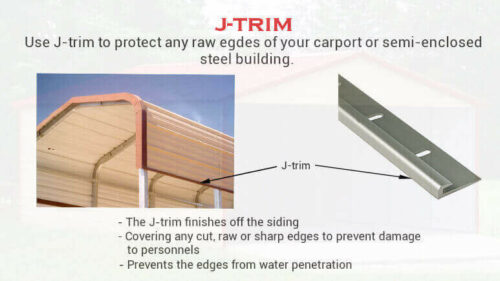
Our structure is ready, but we need to apply a vinyl edge trim to give it a perfect finish.
We need to install the trim on the front, side, and back edges of the metal paneling.
You can start at one of the gable ends, work up your way to the peak, and then down to another gable end. Use your tin snips to cut off the trims at the ends. Repeat the process for both the back and front edges.
Also, apply the trim to the side edges. Lastly, use a small hammer to fit the trim over the major ribs.
With this last effort, your metal carport installation process is complete! Voila!
An Overview Of Extending A Metal Carport
Extending a metal carport to add a length is easy. Since innumerable metal carports are often made up of columns and rafters combined into a single piece (struts), extending a metal carport’s width may require additional work, though it is still viable.
When you extend a metal carport, it’s imperative to consider some factors. Read on to learn how.
Extending your metal carport is as easy as following these steps:
Remove the side panelling and roof
- Set aside the sheeting for later use, as you’ll probably reinstall it once you’re done.
- Taking all the panelling off before you begin will allow you to get to the struts quickly.
Extend the pad
- Make sure the concrete slab on which your carport is erected is moulded and prolonged enough to hold up the auxiliary struts you intend to add to the structure.
- An additional slab may be poured on top of the driveway, or it can be evened out so that the added struts can rest on more stable ground.
Erect the struts
- Adding one strut is probably all you need, but if you want to extend a carport to engulf an RV, you may need two struts.
- Struts should be attached to the base precisely like the original ones.
Replace the sheeting
- There will be a need for new sheeting to wrap the additional length.
How long does it take to put up a metal carport?
- Your choice of model will determine this.
- It takes 2 to 4 hours to install a single carport for one vehicle.
- Depending on the conditions, installing a double or triple carport may take approximately six to eight hours.
- No matter how large your carport is, we suggest setting aside an entire day, so you have time to address any unexpected problems.
Metal Carport Installed Prices and Sizes
| Size | 12 Wide | 18 Wide | 20 Wide | 22 Wide | 24 Wide |
|---|---|---|---|---|---|
|
20 Long |
$1,100 – $1,300 |
$1,299 – $1,400 |
$1,599 – $1,700 |
$1,799 – $1,900 |
$1,800 – $ 2,000 |
|
25 Long |
$1,499 -$1,600 |
$1,600 – $1,700 |
$1,900 – $2,000 |
$2,200 – $2,300 |
$2,400 – $2,500 |
|
30 Long |
$1,699 – $1,800 |
$1,800 – $1,900 |
$2,300 – $2,400 |
$2,500 – $2,700 |
$2,800 – $3,000 |
|
35 Long |
$1,899 – $2,000 |
$2,000 – $2,200 |
$2,600 – $2,800 |
$3,000 – $3,100 |
$3,300 – $3,400 |
|
40 Long |
N/A |
N/A |
N/A |
N/A |
N/A |
4 Tips to Assemble-A-Carport In One Go
The Types of Carport You Need
To determine what type of carport is best for you, you should first decide your needs.
The market offers various types of carport, from singles to doubles to triples.
How many vehicles you intend to protect will determine your carport type. Having one vehicle will suffice for a single carport; however, you may require a double or triple carport if you have more than one vehicle.
Obtain Permits
It is time to obtain the necessary permits after determining what type and size of carport suit your needs.
Building a carport might require a permit in your area.
Contact Public Utility Company
Another critical step in the process is to contact your Public Utility Company.
You must follow this process to prevent accidentally damaging underground lines.
All three utilities, i.e., gas, water, and electricity, might be located in your yard. So it is advisable to mark those spots before post holes are dug.
Go For Professional Support
Professional contractors can quickly assemble carports for those who ain’t confident doing it themselves. As a result, you can ensure the job is completed correctly.
A Steel And Stud professional contractor has the expertise and experience to erect a carport quickly.
Need Help to Prepare for Your Carport Installation? Call Us
Does this feel like too much work or too complicated? But there is no need to feel overwhelmed by the installation process. Steel and Stud’s team of able engineers are always eager to help you with the installation.
Just give us a call, and our customer service representative will instantly get in touch with you. The representative will guide you with every question, from which carport fits your needs to county regulations and when a team of engineers can arrive at your doorstep to install your carport within a day or two.
The best part? We offer professional carport installation services at very competitive rates so that you can enjoy a perfect installation and have the best bang for your buck!
Metal Carport Delivery & Installation Across the USA:
Customer service representatives will contact you ahead of time to schedule your delivery date in your location. We offer metal buildings with living quarters installation services in 48 US states, including:-
| Locations | Locations | Locations | Locations |
|---|---|---|---|

Frequently Asked Questions
Different foundations demand different anchors. You would need mobile home anchors for dirt foundations and concrete anchors for the concrete foundation.
Absolutely not, as it can cause severe structural issues. Your ground should be leveled to accommodate the steel carport design.
You can attach a carport to the ground using mobile home anchors.
To install a carport on your property,
- Level the ground and clear it
- Get the foundation done
- Anchor the carport
- Construct the canopy
- Fix the structure into the base rails
- Place panels
- Install trim and finish the metal carport
Yes, absolutely! Otherwise, it may lead to severe structural issues.
There are majorly three types of anchors:
- Cement Anchor: For cement foundation
- Mobile Home Anchors: For Dirt foundation
- Asphalt Anchor: For asphalt slab foundation
Make enough room to open both your vehicle doors inside the carport. Also, consider the number of vehicles you need to incorporate.
Steel carports are the best as they are the most sturdy and durable.
Yes, you need a building permit to build a carport over your property.
Yes, you can using mobile home anchors!
Yes, you can install the carport on an asphalt slab using asphalt anchors.
You can anchor to a cement foundation using cement anchors
Indeed, we will!